
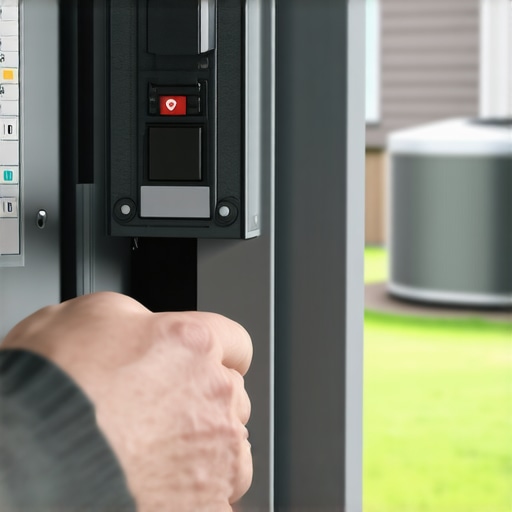
It was 98 degrees in the shade, my shirt was stuck to my back, and the only sound in my living room was the slow, rhythmic ticking of a clock that seemed to be mocking me. My HVAC unit had just quit. Again. I did what every frustrated homeowner does: I marched down to the basement, found the breaker box, and slapped that metal switch back to ‘On.’ It stayed for three seconds before a loud clack echoed through the room. I felt defeated. I didn’t realize then that I was actually making the problem worse by rushing the process. If you’ve ever stood in front of your electrical panel praying for a miracle, I’ve got some news: there’s a specific sequence to this madness that can save your compressor—and your sanity. [image_placeholder]
Stop Flipping That Switch Before You Burn Something Down
Most people think a breaker is like a light switch, but it’s actually a safety gate. When your AC pulls too much juice, the gate slams shut to prevent a fire. My biggest mistake early on? I kept resetting it immediately, trying to force the unit to start while it was still under high pressure. I nearly fried the motor because I didn’t give the refrigerant pressures time to equalize. It’s a classic rookie move that turns a simple reset into a need for an expert guide to appliance repair rather than a DIY win. You need to understand that your HVAC is a complex beast, and sometimes it just needs a five-minute breather to settle down before you try to power it up again. According to data from the National Fire Protection Association, electrical failures or malfunctions are a leading cause of home fires, and forcing a tripped breaker is a major risk factor. Today, I’m going to walk you through the reset method that actually works, ensuring you don’t void your warranty-backed appliance services by accidentally damaging the internal components. We’re going to look at why timing is everything and how to identify if the culprit is actually a failing blower capacitor rather than a massive electrical short.
Does a tripped breaker mean I need a whole new unit?
That’s the fear, isn’t it? That $6,000 bill looming over your head while you sweat through your sheets. In my experience, eight times out of ten, it’s something much simpler—and cheaper—than a full replacement. Maybe your HVAC filter is soaked and heavy, causing the blower to strain and pull too many amps. Or perhaps you just need a bit of same-day appliance repair to swap out a worn-out wire. Have you ever tried to reset your breaker only to have it pop again instantly? If so, tell me about it—I’ve likely made the same mistake you’re making right now. Let’s get into the step-by-step process of doing this safely so you can get the air flowing without calling in the cavalry just yet.
Give the Compressor a Five-Minute Timeout
The first thing you have to do—and this is the hardest part when you are sweating—is absolutely nothing. Imagine you have just run a full-speed sprint and someone immediately asks you to solve a calculus problem. You would collapse. Your HVAC compressor is the same way; it needs to equalize its internal pressures. If you flip the switch while the system is under a high-pressure load, you are essentially asking the motor to pull a massive amount of amperage just to start turning. I once ignored this rule during a heatwave in July. I kept flipping the switch every time it popped, thinking I could ‘catch’ it. Eventually, the smell of burning ozone filled my hallway. I had not just tripped a breaker anymore; I had overheated the windings in the compressor. By waiting at least five to ten minutes, you allow the refrigerant to settle, which makes the next startup significantly easier on your electrical system and reduces the need for expert guide to appliance repair interventions later on.
Look for the Red Flags Before You Restore Power
Before you even touch that panel again, do a quick sweep of the obvious culprits. A common reason for a trip is an overworked motor. Walk over to your furnace or air handler and check the filter. If you see that your HVAC filter is soaked and heavy, or just caked in dust, your system is struggling for air. This lack of airflow causes the unit to run longer and hotter, eventually drawing enough current to trip the breaker. While you are at it, check the outdoor unit. If it is buried under tall grass or covered in cottonwood seeds, it cannot shed heat. Think of it like trying to run a marathon in a parka. Clean the area around the unit to ensure it has at least two feet of clear space for proper ventilation.
The Three-Step Dance at the Electrical Panel
Once the waiting period is over and you have checked the basics, head to the breaker box. Most people try to flip the switch directly to ‘On’ and are confused when it feels spongy or bounces back. First, you must move the breaker to the full ‘Off’ position until you hear a distinct click. This resets the internal spring mechanism. Second, wait another thirty seconds in the off position. Finally, flip it firmly to ‘On.’ If it stays, go back inside and set your thermostat to ‘Cool’ and the fan to ‘Auto.’ If it trips again immediately, stop. At this point, you are dealing with a direct short or a grounded compressor, and continuing could lead to a fire. This is when you should look into same-day appliance repair to diagnose the electrical fault safely.
Keep Your Service Logs Ready for the Warranty Provider
If your unit is relatively new, your biggest asset is your paperwork. Many homeowners lose out on coverage because they cannot prove they have performed basic maintenance. Always keep the one maintenance record that saves your appliance warranty claim in a dedicated folder. If a technician has to come out, make sure they document the exact cause of the trip. If it turns out to be a faulty component from the manufacturer, having the exact photo evidence needed for an hvac warranty claim can be the difference between a free repair and a $1,500 bill. Being diligent with your records ensures that even if a simple reset doesn’t work, your wallet is still protected under your existing protection plan.
Let’s dig deeper into why most homeowners get the ‘same-day’ promise completely wrong. Everyone tells you that speed is the only metric that matters, but in my years of dealing with broken compressors and leaky dishwashers, I’ve found that speed without the right parts is just a faster way to a second visit. People chase companies promising same-day appliance repair thinking they’ll be cooling off by dinner, but they often ignore the nuance of preparedness. A true pro doesn’t just show up; they arrive with a van stocked based on the specific model number you provided during the intake call.
Wait, did you give them the model number? Most people don’t. That’s the first ‘oops’ factor that kills your chances of a quick fix. If you’re scheduling your appliance repair for same-day service in 2025, the quality of the outcome is entirely dependent on the data you provide upfront. Without it, the technician is just an expensive delivery driver for bad news.
Why do some ‘protected’ repairs still cost me out of pocket?
This is where the nuances of fine print come to bite you. There is a massive distinction between the difference between a manufacturer warranty and a service contract. A manufacturer warranty usually covers internal defects for the first year, but a service contract—what many call an ‘extended warranty’—is often a third-party insurance product. I’ve seen homeowners get hit with a hefty diagnostic fee because they didn’t realize their specific plan had a hidden deductible. According to a report by the Association of Home Appliance Manufacturers (AHAM), improper installation and failure to follow the manufacturer’s specific maintenance protocols account for a significant percentage of denied claims.
One of the most expensive traps I see involves the deductible trap in most third-party appliance protection plans. You think you’re safe, but the ‘service fee’ often equals the price of the part anyway, making the ‘protection’ almost moot for smaller repairs.
And while we’re talking about installation, let’s bust the myth that new means perfect. I once saw a brand-new high-end washer literally walk across a laundry room floor because the homeowner thought the shipping bolts were part of the frame. The shipping bolt error that ruins new washing machines is a classic example of why DIY installation is riskier than it looks. If those bolts stay in, you aren’t just looking at a noisy cycle; you’re looking at a cracked outer tub within months, a repair that almost no warranty will cover because it’s considered ‘user error.’
Understanding what to expect from same-day appliance repair experts means knowing they should be checking for these installation ‘ghosts’ before they even touch the electrical panel. Have you ever fallen into this trap—maybe paying for a repair that should have been free under your contract? Let me know in the comments.
If you want to move beyond the ’emergency’ phase and into the ‘proactive’ phase, you need more than just a standard screwdriver. I’m a big advocate for building a ‘save-my-weekend’ kit that lives in the utility closet, not out in the garage where it’s hard to find in the dark. For me, that kit starts with a high-quality non-contact voltage tester and a specific offset wrench. I’ve spent way too much time hunting for a tool that fits into the tight cavity of a garbage disposal, which is why I always keep the specific wrench you need to unjam a disposal in seconds right next to the sink. It’s these small, hyper-specific tools that turn a potential three-hour ordeal into a five-minute win. When you are looking at how to ensure reliable appliance installation in 2025, having these tools on hand is the first step toward long-term success.
How do I keep my high-end appliances from dying early?
The secret isn’t a secret at all: it’s the service log. I know it sounds like homework, but there is a very practical reason why your extended warranty company keeps asking for service logs. They are looking for any excuse to deny a claim, and ‘lack of maintenance’ is the easiest out they have. I set a recurring calendar alert for every six months to do a deep-clean sweep. This includes the one maintenance move that stops your ac from smelling like mildew, which is essentially just clearing the condensate line with a shop vac. According to technical documentation from the Air-Conditioning, Heating, and Refrigeration Institute (AHRI), even a minor restriction in airflow or drainage can reduce system efficiency by up to 15%, forcing the compressor to work harder and shortening its lifespan significantly.
As we move further into the decade, I predict we are going to see a massive shift toward predictive diagnostics. Instead of waiting for a breaker to trip, your fridge will send a notification to your phone saying that the fan motor is drawing 10% more power than it was last month. This ‘smart’ integration is already starting with high-end brands, and it’s going to make scheduling your appliance repair for same-day service in 2025 much easier because the tech will already have the diagnostic report before they even leave their shop. Until then, we have to be the sensors. We have to listen for the clicks and smell for the ozone. If you’re feeling overwhelmed, start small: go check your dishwasher’s drain line right now. Ensuring you have the critical drain hose loop you’re missing in your dishwasher setup is one of those ‘invisible’ fixes that prevents backflow and keeps your dishes from smelling like a swamp.
The Brutal Truths About My Most Expensive Appliance Blunders
The first big lesson I learned is that a reset is a diagnostic tool, not a permanent fix. If you have to flip that breaker more than twice in a season, something is fundamentally wrong. I spent years ignoring a slight humming sound from my outdoor unit, thinking I was saving money by not calling a pro. In reality, I was just waiting for a massive failure that cost three times as much as a simple capacitor swap would have. Another hard truth is that the hidden costs of diy repairs on warranty covered items aren’t just about the parts; it is about the time you lose when a simple fix goes south. Finally, remember that speed isn’t everything. I have learned to value a technician who takes twenty minutes to explain the ‘why’ over one who is out the door in five. [image_placeholder]
The 4-Piece Emergency Kit I Keep Next to the Service Panel
To stay ahead of the curve, I recommend building a small toolkit that stays in your utility room. First, a non-contact voltage tester—it is the only way to be 100% sure a line is dead before you touch it. Second, keep the specific wrench you need to unjam a disposal in seconds taped to the side of the cabinet; it is a lifesaver on Thanksgiving morning. Third, a high-quality shop vacuum for clearing your AC condensate lines, which is the one maintenance move that stops your ac from smelling like mildew and prevents water damage. Lastly, keep a physical folder for your receipts because the one maintenance record that saves your appliance warranty claim is usually the one you cannot find when the technician arrives.
Stop Waiting for the Next Breakdown and Take Control
You do not have to be a master electrician to keep your home running smoothly. By paying attention to the behavior of your machines—the sounds, the smells, and the timing of the cycles—you become your own first responder. Whether you are seeking an expert guide to appliance repair and installation today or just trying to survive a heatwave, knowledge is your best defense against high costs. Don’t be afraid to step up and handle the basics, but always know when to call for same-day appliance repair quick solutions with warranty support to ensure your home stays safe and cool. Have you ever had a breaker trip three times in a row before you realized something was actually wrong? Let me know your rookie mistake story in the comments below!