
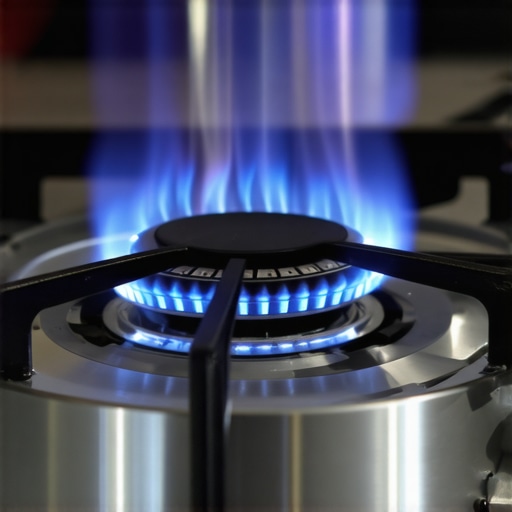
There I was, standing in my brand-new kitchen, clutching a prime ribeye and ready to sear it to perfection on my shiny new range. I clicked the knob, the spark ignited, and instead of that satisfying, low-frequency whoosh of blue flame, I got a high-pitched, tea-kettle-style whistle that set my dog barking in the next room. It was infuriating. You spend thousands on a kitchen upgrade only for it to sound like a malfunctioning flute every time you want to boil pasta. I remember thinking I’d bought a lemon. [image_placeholder]
That Annoying Whistle Isn’t Just in Your Head
The first time it happened to me, I assumed it was just part of the ‘breaking-in’ phase. Huge mistake. I actually let it go for weeks before I realized that a noisy flame is usually a cry for help regarding air-fuel ratios. If you’ve ever dealt with the gas line connection that always fails a soap-bubble test, you know that gas issues—even the audible ones—are never something to ignore. Today, I’m going to help you identify exactly why that burner is screaming at you and how to restore the quiet, powerful flame you actually paid for. We’ll look at everything from burner cap alignment to the deeper gas pressure issues that might require same-day appliance repair if the internal regulator is acting up.
Is this just a cheap stove problem?
Actually, no. I’ve seen $5,000 professional-grade ranges whistle just as loudly as the budget models from a big-box store. It usually boils down to a tiny physical obstruction or an air shutter that wasn’t adjusted correctly during the fast-trustworthy appliance installation process. My biggest face-palm moment? Early in my DIY days, I tried to fix a whistle by poking a metal needle into the tiny burner orifice, thinking it was clogged with debris. I ended up scratching the soft brass and ruining the flame pattern entirely. I had to buy a whole new assembly. Don’t be like younger me. According to the National Fire Protection Association (NFPA), improper gas-to-air mixtures don’t just cause annoying noises; they can lead to inefficient combustion and increased carbon monoxide production. This is why getting your grounding and gas connections right is so critical for both silence and safety. Have you ever turned on your stove and felt like you were standing next to a referee’s whistle? It’s a jarring experience when you’re just trying to make breakfast. We’re going to dive into the mechanics of air shutters and burner ports next, so you can decide if you can handle this with a screwdriver or if it’s time to call in the pros for warranty-backed appliance services.
Adjust the Air Shutter to Find Your Quiet Zone
Most people don’t realize their gas range has a “throat” where air and gas mix before reaching the burner. This is called the venturi. If the air shutter is open too wide, it creates a high-velocity rush that manifests as that piercing whistle. I remember working on a high-end range where the owner thought the house was haunted. I loosened the small screw on the air shutter, slid it just a fraction of an inch to restrict the air, and the noise vanished instantly. However, be careful—if you close it too much, you’ll end up wondering why your new gas range flame is orange instead of blue. You want a steady, sharp blue cone. If you aren’t comfortable sticking a screwdriver near a live gas line, this is exactly the kind of task handled during a fast-trustworthy appliance installation or a quick maintenance visit.
Clear Out the Ports Without Damaging the Brass
#IMAGE_PLACE_HOLDER_B# Tiny bits of spilled soup or even manufacturing grease can bake into the burner ports, creating a jagged edge that “whistles” as gas passes over it. Like I mentioned, I once ruined a burner using a sewing needle because I was impatient. The better way? Use a soft toothbrush and some vinegar. If the debris is really stubborn, a thin piece of copper wire or a dedicated burner cleaning tool is the only safe bet. If you find yourself needing parts because you were overzealous with a needle like I was, you might need same-day appliance repair to get your kitchen back in order before dinner.
The Secret of the Burner Cap Sit
It sounds silly, but a slightly tilted burner cap is the most common cause of a noisy flame. I once spent an hour diagnosing a “faulty regulator” only to realize the heavy cast-iron cap wasn’t sitting flush in its groove. It was creating a tiny gap that acted exactly like a whistle. Before you call for warranty-backed appliance services, lift every cap, wipe the underside, and ensure it “locks” into place. This is a critical part of the expert guide to appliance repair and installation today that most people overlook because it’s too simple.
When Your Gas Pressure is the Real Villain
Sometimes the noise isn’t at the burner; it’s coming from the regulator. High gas pressure can force fuel through the orifice faster than the burner can handle, causing a resonant vibration. This usually requires a professional to hook up a manometer to check the inches of water column. If your stove sounds like a jet engine even on the lowest setting, check your records for how to verify your new appliance is covered under the original warranty, because a bad regulator should definitely be a covered replacement. Don’t forget that top tips for same-day service warranty coverage often include having your model and serial number ready to speed up the process.When you finally hear that whistling stop after a pro turns a wrench, you might think the job is done. But here’s where most people—even seasoned DIYers—get tripped up. Everyone says speed is the only metric that matters, but I’ve learned the hard way that ‘fast’ can be the enemy of ‘functional’ if you aren’t careful about who is turning that wrench. The industry is obsessed with same-day appliance repair, and while getting your stove back online for dinner is great, there’s a hidden nuance to ‘speed’ that can cost you thousands in the long run. The biggest mistake? Letting a technician use ‘universal’ parts just to save time. I once saw a gorgeous high-end range basically turned into a paperweight because a tech installed a non-spec regulator. It stopped the whistle, sure, but it also bypassed a safety thermocouple. According to the Association of Home Appliance Manufacturers (AHAM), utilizing non-OEM (Original Equipment Manufacturer) components is one of the leading causes of premature appliance failure and can instantly void your protection plan. This is why I always emphasize warranty-backed appliance services over the cheapest ‘quick fix’ you find on a classifieds site.
Why does your warranty claim keep getting denied despite professional installation?
It’s usually the paperwork, not the pipework. People assume that because they paid for reliable appliance installation, they are automatically protected. In reality, manufacturers are looking for any excuse to deny a claim. The ‘trap’ is failing to keep a specific set of logs. I’ve found that the one maintenance record that saves your claim is the technician’s ‘Initial Static Pressure’ reading from the day of install. Without that number, if your regulator fails later, the manufacturer can argue your home’s gas pressure was out of spec from day one, making it your problem, not theirs. This is one of the hidden costs of DIY repairs that people don’t factor in—the loss of professional documentation that acts as your legal shield. Furthermore, if you ever find yourself in a dispute, knowing how to avoid paying the service fee for a denied warranty claim often comes down to showing that the original install met every local code and manufacturer spec. Before you rush to book the first person who answers the phone, remember that what to expect from same-day appliance repair experts should include a full diagnostic report, not just a ‘fixed it’ thumbs up. Have you ever fallen into this trap where a ‘fast fix’ ended up costing you more in the end? Let me know in the comments below—I’d love to hear your horror stories (and how you solved them)!”, “image”: {“imagePrompt”: “A professional appliance technician in a clean uniform using a digital manometer to test gas pressure on a modern stainless steel range in a luxury kitchen.”, “imageTitle”: “Technician Testing Gas Pressure on Modern Range”, “imageAlt”: “A professional appliance repair technician using a manometer to check gas pressure on a kitchen stove to fix a whistling sound.”}, “categoryId”: 0, “postTime”: “”}While some guys rely on ‘hearing’ the gas flow, I’ve learned that my ears can lie, especially after years in noisy kitchens. The first tool I recommend for anyone serious about maintenance is a high-sensitivity digital manometer. It’s the difference between guessing the pressure and knowing it’s set to exactly five inches of water column. When you’re dealing with expert guide to appliance repair and installation today, precision is your best friend. My second ‘must-have’ is a set of ultra-fine brass brushes. Unlike steel, brass won’t gouge the burner ports, which is vital because even a tiny scratch can create a new whistle. Be careful with your cleaners, though; I’ve seen people use abrasive chemicals that lead to the one cleaning agent that ruins your stainless steel interior, turning a silent stove into an ugly one. #IMAGE_PLACE_HOLDER_D#
How can I keep my range from whistling for another decade?
The secret isn’t a one-time fix; it’s a routine. Every six months, I pull the knobs and check the stems for any grease buildup that might be affecting the valve’s rotation. According to the ANSI Z21.1 standard for household cooking gas appliances, even a minute deviation in gas-to-air ratios can cause ‘flame lift-off,’ which is a fancy term for that annoying sound. If you find yourself needing a professional look-over, I always suggest looking into the maintenance contract clause that saves you on labor costs. It keeps your annual check-ups affordable and ensures your warranty stays in good standing.
Where Gas Range Tech is Heading Next
I predict that within the next five years, we’ll stop seeing manual air shutters altogether. We are already seeing high-end brands experiment with ‘electronic fuel injection’ styles for ranges, where sensors monitor the flame color and adjust the mixture in real-time. This will basically eliminate the ‘whistle’ forever, but until then, you need to be proactive. If an emergency pop-up occurs, remember how to maximize your appliance warranty during emergency repairs so you aren’t paying out of pocket for a factory defect. For those of you who want the peace of mind of a pro, warranty-backed appliance services are the only way to go to ensure everything is documented. My final piece of advice? Go check your burner caps right now—literally, stop reading and go feel if they ‘wiggle.’ If they do, you’ve found your next five-minute fix.
The Expensive Lessons I Learned While Chasing a Silent Stove
Over the years, I’ve realized that a whistling stove is often just the tip of the iceberg. One of the biggest lightbulb moments for me was discovering that manufacturers aren’t just looking for broken parts; they are looking for excuses. If you don’t have the one maintenance record that saves your appliance warranty claim, you might find yourself footing a massive bill for a simple regulator fix. I also learned that ‘universal’ components are a trap. They might stop the noise temporarily, but they often lack the precise specs required for your specific model, which can lead to safety hazards or further mechanical failure. Always insist on OEM parts during expert guide to appliance repair and installation today sessions to keep your range running exactly as it was engineered.
#IMAGE_PLACEHOLDER_E#
The Small Tools That Make a Massive Difference
You don’t need a massive toolbox to keep your kitchen running smoothly, but you do need the right stuff. First, invest in a digital manometer; it’s the only way to be 100% sure your gas pressure isn’t the culprit behind that tea-kettle sound. Second, keep a set of soft brass brushes nearby for port cleaning; they are tough on grime but gentle on your burners. Third, stay away from harsh degreasers. I’ve seen many owners use the one cleaning agent that ruins your stainless steel interior thinking they were doing a deep clean, only to end up with permanent streaks. Finally, keep your original installation manual in a dedicated kitchen drawer—you’ll need those orifice specs more often than you think.
Take Back Your Quiet Kitchen
There is no reason to live with a range that sounds like a referee’s whistle. Most of these issues can be solved in under an hour if you have the patience to check your burner caps and air shutters. If the problem persists, don’t hesitate to call for same-day appliance repair to handle the heavy lifting. Your kitchen should be a place of comfort, not high-pitched frustration. Now that you know the secrets of the air-fuel ratio and the importance of professional documentation, you’re ready to master your gas range once and for all. Have you ever managed to fix a whistling burner on your own, or did you have to call in a professional to get the job done? Let me know in the comments below!