

I stood in my kitchen last July, staring at a puddle that shouldn’t have been there and a power bill that made my eyes water. I’m usually the guy who keeps things ship-shape, but I completely missed the obvious warning signs. I felt a tiny, persistent chill every time I walked past the refrigerator. At first, I blamed the air conditioning or maybe a drafty window, but then I realized my fridge was essentially trying to cool the entire neighborhood. It’s a classic headache: you think you need affordable same-day appliance fixes with warranty benefits when, in reality, you might just need a crisp five-dollar bill and two minutes of your time. If you’ve ever found your lettuce wilting way too fast or noticed ‘sweat’ on the outside of the door, you’re likely dealing with a compromised gasket. I made the mistake of ignoring it for months, thinking I was just overreacting to a humming sound, and by the time I finally checked, my compressor was practically screaming for mercy. Today, I’m going to show you how to stop that silent energy thief in its tracks before it ruins your unit.
Stop Throwing Money Away Through Your Fridge Door
The gasket—that rubber strip around the edge of your fridge door—is the only thing standing between your fresh groceries and the warm air of your kitchen. When it fails, your fridge works double-time, spinning its wheels to maintain a safe temperature. It’s not just about the annoying noise of a motor that never shuts off; it’s about the massive wear and tear on the internal components. I learned the hard way that a small leak can eventually lead to why your fridge is getting warm but the freezer is fine because the system just can’t keep up with the constant influx of heat. Most people assume they need a brand-new appliance or a complex repair involving warranty-backed appliance services you can rely on, but often it’s just a matter of understanding the door seal secret for a frost-free freezer.
Is a Faulty Seal Really Worth the Worry?
You might be thinking, ‘It’s just a tiny gap, how bad can it really be for my wallet?’ Actually, research from the U.S. Department of Energy indicates that poorly sealed refrigerators can increase energy consumption by up to 25%, making your appliance the most expensive item in your home to run. Beyond the cash, a bad seal lets moisture in, which leads to frost buildup and that gross ‘fridge sweat’ that ruins labels. I once spent a whole afternoon scrubbing mold out of the crevices because I didn’t bother with the simple gasket cleaning that stops fridge door sweating. It’s an easy, proactive fix that prevents a much larger disaster down the road. Have you ever noticed your fridge running constantly even when no one has opened the door for hours? Let me know if you have, because that’s the first big red flag. Before you call for same-day appliance repair quick solutions with warranty support, let’s try a few neighborly tricks I’ve picked up over the years to see exactly where that cold air is escaping.
Grab Your Wallet for the Dollar Bill Test
The most reliable diagnostic tool isn’t a laser thermometer or a specialized sensor; it’s a simple five-dollar bill. I remember the first time I tried this on my old Kenmore. I felt like a low-budget detective. Open the door, place the bill halfway in, and close it. If you can pull the bill out with zero resistance, your seal is essentially a screen door. You need to repeat this every six inches all the way around the frame. I found a massive ‘dead zone’ right near the top hinge where the bill practically fell out on its own. This is usually where the door seal secret for a frost-free freezer comes into play because that tiny gap allows humid air to rush in and turn into ice, creating a cycle of inefficiency that kills your produce.

Clean Away the Grime That Breaks the Seal
Before you assume the rubber is shot, look for ‘fridge gunk.’ Syrup spills, crumbs, and general kitchen grease act like tiny wedges, keeping the magnetic strip from making full contact. I once spent thirty minutes scrubbing what I thought was a permanent deformity, only to realize it was dried grape juice from my toddler’s juice box that had hardened into a literal wall. Use a mixture of warm water and a drop of mild dish soap. Avoid harsh chemicals that can dry out the rubber and cause it to crack prematurely. This is the simple gasket cleaning that stops fridge door sweating that most homeowners skip until it’s too late. Once it’s clean, wipe it dry and see if the suction improves; you’d be surprised how often a little soap saves a lot of money.
Heat It Up to Reshape the Rubber
Gaskets are made of flexible vinyl or rubber that can lose its ‘memory’ over time, especially if the door was left ajar or if the unit was moved recently. If you see a fold, a flat spot, or a section that looks like a crumpled accordion, grab a hairdryer on a medium setting. I did this last winter when my freezer started acting up and my ice cream felt more like soup. I held the dryer about six inches away, moving it constantly so I didn’t melt the vinyl. As the rubber warmed up, I used my fingers to gently pull the gasket outward, ‘massaging’ it back into its original puffed-up shape. It’s like giving your fridge a mini-spa day that results in an airtight seal. If the gap persists, a thin layer of petroleum jelly along the hinge side can help the rubber slide into place without binding or folding back on itself when the door closes.
Know When to Call for Professional Help
Sometimes the rubber is cracked, brittle, or completely torn from the track. In those cases, no amount of cleaning or heating will save it. Replacing a gasket is a foundational part of any expert guide to appliance repair and installation today. If you’re still under coverage, you should look into warranty-backed appliance services you can rely on to ensure the replacement is a genuine OEM part. A generic seal might save you ten bucks now, but if the magnetic strength isn’t exactly right, you’ll be right back to square one. Don’t forget that affordable same-day appliance fixes with warranty benefits often cover these hardware swaps, protecting your compressor from burning out. If you’ve tried the heat trick and the paper test still fails, it’s time to realize that the 20-part that usually fixes a fridge that wont cool might just be a brand-new, airtight seal that restores your kitchen’s peace and quiet.
Stop Viewing Same-Day Service as a Luxury
Most people think calling for scheduling your appliance repair for same-day service in 2025 is just for emergencies like a flooded laundry room. In my experience, waiting even 48 hours for a ‘small’ issue is the most expensive mistake you can make. When a fridge gasket fails, your compressor works at 110% capacity. By the time you get around to a weekend fix, you’ve not only wasted $20 in electricity, but you’ve shaved six months off the lifespan of the motor. I’ve seen homeowners avoid top tips for same-day service warranty coverage because they didn’t want to pay a service fee, only to end up replacing a $1,200 unit three weeks later. Think of immediate repair not as a panic move, but as a preservation tactic for your most expensive assets.
Is Your Warranty Actually a Hidden Maintenance Contract?
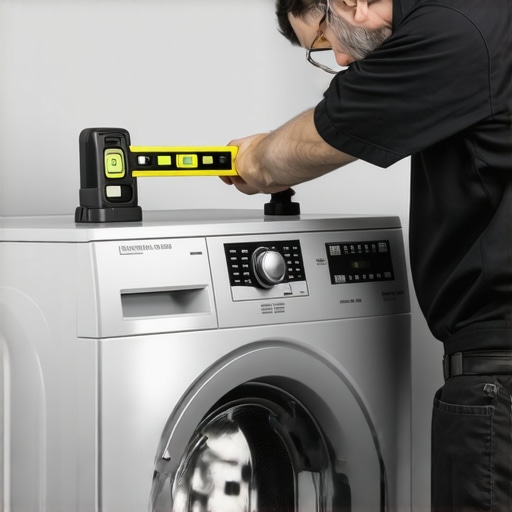
Here is a nuanced truth that manufacturers won’t tell you: your warranty is often conditional on your own behavior. According to data from the Association of Home Appliance Manufacturers (AHAM), a significant percentage of modern appliance failures stem from improper installation rather than factory defects. If you didn’t follow the how to ensure reliable appliance installation in 2025 protocols—like ensuring a perfect level or proper voltage—your claim can be denied faster than you can say ‘lemon law.’ This is the ‘Oops’ factor most people hit. They assume they can DIY the setup, but they miss the fact that the document every technician needs to see for a valid warranty visit often requires proof of professional commissioning. If you can’t prove the unit was installed to spec, you’re often footing the bill for parts and labor yourself.
The Danger of the ‘It Still Works’ Mentality
The most dangerous appliance in your house isn’t the one that’s dead; it’s the one that’s ‘limping.’ We’ve all been there—the dryer that needs an extra twenty minutes, or the dishwasher that leaves a little film. You might think you’re being frugal by ‘getting your money’s worth,’ but you’re actually inviting a disaster. For instance, the real reason your new dryer takes three cycles to dry jeans is often a blocked vent or a failing heating element that is drawing massive amounts of current. This puts immense strain on your home’s electrical system. Instead of waiting for a total blackout, looking into what to expect from same-day appliance repair experts can help you catch these ‘silent’ failures before they turn into house fires or flooded basements.
Master the Paperwork Before the Breakdowns
If you want to survive a major repair without losing your mind, you have to treat your appliance records like a car’s title. I always tell my neighbors to keep a dedicated folder for every major purchase. You need to know how to verify your new appliance is covered under the original warranty before the technician even knocks on your door. Most people fumble through drawers while the ‘pro’ is on the clock, wasting time and money. Furthermore, understanding the difference between a factory warranty and a service contract can save you hundreds on ‘diagnostic fees’ that you shouldn’t actually be paying. Have you ever fallen into this trap of waiting until the smoke starts rising to find your manual? Let me know in the comments, and we can swap horror stories about the ‘easy’ fixes that turned into week-long nightmares.
I don’t just stop at paperwork; I keep a small ’emergency bag’ tucked behind my laundry detergent. Inside isn’t some fancy high-tech gadgetry, but a basic digital multimeter. Most people see a screen flashing an error code and assume the motherboard is fried, but in my experience, it’s usually just a $15 component that’s lost its electrical path. I use my multimeter to check for continuity on things like the thermal fuse location you need to check in your dryer or the heating element in the dishwasher. If the meter doesn’t beep, you’ve found your culprit. This simple tool turns a blind guess into an informed conversation with a technician, or better yet, a quick DIY fix. It is the real secret to accessing affordable same-day appliance fixes with warranty benefits because you aren’t paying for hours of diagnostic labor.
How can I maintain my complex smart appliances over the long haul?
Maintaining a modern appliance isn’t just about wiping down the surfaces. It’s about the hidden filters and ports that the manual barely mentions. For instance, I make it a point to perform the pump guard cleaning that fixes your washer drainage issues every three months. If you’ve ever noticed a weird smell or standing water, that tiny plastic screen is usually the hero or the villain. I also keep a close eye on power quality. I’ve seen the voltage issue that kills your new oven control board happen after a simple summer thunderstorm because the homeowner didn’t have a dedicated surge protector. According to the technical bulletins from Appliantology.org—a premier resource for master technicians—over 40% of control board failures in modern units are caused by voltage spikes rather than manufacturing flaws. Keeping your electrical supply stable is the most underrated maintenance move you can make for expensive gear. 
Ditch the Guesswork with the One Tool That Saves My Weekend
Beyond just checking fuses, I use my tools to verify that my initial setup wasn’t the problem. I’m a stickler for the proper way to ground your new smart stove during installation. If you skip this, you’re not just risking a shock; you’re inviting phantom error codes that will drive you insane. I predict that by 2028, we won’t even need these handheld tools because ‘Self-Healing’ AI diagnostics will be standard. Your fridge will likely email you a link to buy its own replacement part before it even stops cooling, using internal vibration sensors to detect a failing bearing before you hear a single squeak. But until we live in that sci-fi future, you need to be the brain of the operation.
Stop Ignoring the Hidden Intake Screens
One trick I swear by—and I want you to go try this right now—is checking the tiny screen inside your washer hose thats blocking the water. It takes five minutes to unscrew the hose and pull out that little mesh circle with a pair of needle-nose pliers. If you live in an area with hard water, that screen is probably choked with calcium or sediment from the main line. Cleaning it can restore your fill speed and prevent your machine from timing out mid-cycle. It’s these small, granular steps that ensure you’re getting the most out of an expert guide to appliance repair and installation today. If you find your machine is still struggling after cleaning the screens, then you know it’s time for scheduling your appliance repair for same-day service in 2025 before the internal pump burns out from the constant strain of trying to pull water through a wall of gunk.
What the Repair Manuals Hide from Regular Homeowners
I’ve spent years tinkering with various units, and if there is one hard truth I’ve discovered, it’s that a ‘limping’ appliance is your bank account’s worst enemy. We often wait for a total breakdown to act, but the real secret to longevity is noticing the small shifts in performance. For instance, I’ve found that you can maximize your appliance warranty during emergency repairs simply by keeping a digital log of every odd noise or minor leak the moment it starts. It’s also vital to realize that professional standards exist for a reason; skipping a step during setup is why many people eventually have to search for fast trustworthy appliance installation near you to fix a self-inflicted error. Finally, never underestimate a simple level—half of the ‘mechanical failures’ I see are actually just units that aren’t sitting flat on the floor.
The Only Maintenance Toolkit You Actually Need
You don’t need a van full of specialized gear to keep your home running smoothly. Beyond a basic screwdriver and a multimeter, I personally trust and recommend these resources: first, the Association of Home Appliance Manufacturers (AHAM) for understanding energy standards; second, the peer-reviewed technical forums at Appliantology.org for those impossible-to-find wiring diagrams. For specific, high-frequency annoyances, I always keep my guide on the 10-minute fix for a squeaky dryer drum bookmarked. To avoid a flooded laundry room, I suggest every homeowner double-check the drain hose height rule that prevents washer backflow, which is a common mistake that ruins floors and motors alike.
Don’t Let Your Home Manage You
Taking these small, proactive steps turns you from a frustrated consumer into a confident master of your domain. It is about reclaiming your weekends and ensuring your hard-earned money stays in your pocket instead of going toward avoidable utility bills or emergency service fees. By staying ahead of the grime and the loose seals, you won’t just be waiting for affordable same-day appliance fixes with warranty benefits; you’ll be preventing the need for them in the first place. Have you ever tried the dollar bill test on your fridge, or are you still wondering why your groceries are spoiling too fast? Let me know your maintenance wins and woes in the comments below!