
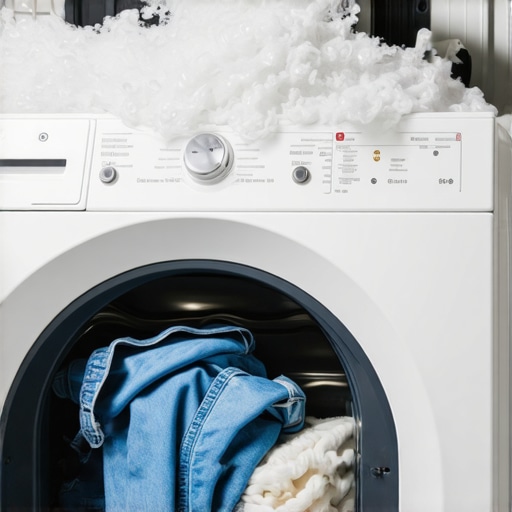
I remember the exact moment I wanted to kick my brand-new, $1,100 smart dryer across the laundry room floor. I had just finished a long week, and all I wanted was my favorite pair of jeans to be ready for a night out. Instead, I opened the door after a full cycle to find a cold, damp pile of denim staring back at me. It felt like a betrayal. We’re told these modern machines are smarter and more efficient, yet my 20-year-old dinosaur of a dryer could have handled those jeans in forty minutes flat. I spent the next hour convinced I had a faulty unit, even looking into same-day appliance repair options before I realized the problem wasn’t a broken part—it was the machine’s brain itself. If you’re currently living in a cycle of dry, check, and repeat, I’m here to tell you that you aren’t crazy, and your dryer probably isn’t broken.
Stop Blaming the Lint Filter for Your Damp Denim
The truth is a bit hard to swallow: your new dryer is actually designed not to get as hot as your old one. In an effort to meet strict energy requirements and protect delicate fabrics, manufacturers have moved away from the scorched-earth approach to drying. I made the classic mistake of trusting the Auto-Dry setting for everything, including heavy work clothes. I even wasted an entire afternoon trying to perform a belt replacement on a machine that was barely a month old because I thought the drum wasn’t spinning fast enough to vent the moisture! It turns out, the moisture sensors are located near the front of the drum, and while they can detect when a t-shirt is dry, they often miss the dampness trapped in the thick seams of your denim. According to research by Consumer Reports, these sensors are calibrated for mixed loads, often leaving heavy-duty items unfinished to prevent over-drying the lighter clothes in the same cycle.
Is This High-Tech Sensor Actually a Lemon?
It’s a fair question to ask. We pay a premium for features that promise to take the guesswork out of chores, but when it comes to jeans, the sensors are easily fooled. They feel the dry surface of the fabric and shut the heat off, while the pockets and waistbands are still soaking wet. This is why you might find yourself needing sensor adjustments or simply a change in how you use the digital interface. I’ve learned the hard way that smart doesn’t always mean capable when it comes to thick fabrics. Have you ever felt like your high-tech appliances are actually making your life harder instead of easier? Share your most frustrating smart appliance fail with me! If your machine is truly acting up beyond just being too smart, you might want to look into expert guides on appliance repair to see if there’s a deeper mechanical issue at play. Today, we’re going to dive into the settings and mechanical quirks that will finally get your laundry dry on the first try.
Stop Mixing Heavy Jeans with Thin T-shirts
The fastest way to confuse your dryer’s moisture sensor is to throw a mixed load of heavy denim and lightweight synthetics together. Think of it like a thermostat in a house with one open window; the machine gets a signal from the dry t-shirts and assumes the whole room is cool, even if the thick denim seams are still sweating. I remember a particularly rainy Tuesday when I threw my work hoodies in with some gym leggings. The leggings were crisp after twenty minutes, but the hoodie pockets were sopping. To avoid this, group your fabrics by weight. It’s an extra five minutes of sorting that saves you three hours of re-running cycles. If you’ve just moved into a new place and your laundry setup feels off, you might need fast trustworthy appliance installation near you to ensure the machine is leveled and vented correctly from the start.
Force the Heat with Timed Dry
When the ‘Smart’ setting fails you, it’s time to take back control. The ‘Timed Dry’ setting is your manual override; it ignores those finicky sensors and keeps the heating element engaged for exactly as long as you tell it to. I use this exclusively for heavy towels and bedding. If your machine still isn’t getting hot during a timed cycle, you aren’t looking at a sensor glitch anymore; you’re looking at a mechanical failure. Before you assume the worst, check if you have warranty-backed appliance services you can rely on to handle the technical heavy lifting without breaking your budget.
Clean the Sensors You Didn’t Know Existed
Most people don’t realize that those two small metallic bars inside the drum—the moisture sensors—can get coated in a thin, invisible film from dryer sheets and fabric softener. This film acts like an insulator, tricking the sensor into thinking the air is dry. I once spent forty dollars on a service call only for the technician to wipe those bars down with a bit of rubbing alcohol. It was embarrassing, but a lesson well learned. You can perform a simple sensor adjustment yourself by cleaning them once a month. 
Fix the Airflow to Save Your Sanity
If the moist air can’t leave the drum, the clothes will never get dry, regardless of how hot the element gets. Think of your dryer like a straw; if there’s a blockage at one end, you can’t blow air through it. I once discovered a bird’s nest in my exterior vent that was causing my high-end dryer to shut down every ten minutes. Beyond the external vent, there is often dangerous lint build-up your dryer filter always misses deep inside the internal cabinet. If clearing the visible lint doesn’t help, it might be time to call for same-day appliance repair to have the internal ducts professionally vacuumed. Keeping the airflow clear isn’t just about dry clothes; it’s the number one way to prevent a house fire. If you’re unsure how to handle the internals, refer to an expert guide to appliance repair and installation today to see the proper breakdown of your specific model.If clearing the lint and wiping those sensors didn’t solve your dampness dilemma, you’re likely staring at your phone, ready to call in the professionals. But here is where we need to dig into the high-level nuances of the industry. Most homeowners assume that booking same-day appliance repair means their machine will be spinning and heat-blasting again by dinner time. In reality, ‘same-day’ often refers to the diagnostic visit rather than the final resolution. With over 40,000 different appliance parts currently circulating in the market, it is physically impossible for a technician to carry every belt, sensor, and heating element on a single truck. According to data from the United Appliance Servicers Association, first-call completion rates typically hover around 70%. This means there is a significant 30% chance your repair will require a second visit once a specific part is sourced. Challenging the ‘instant fix’ myth is essential for your sanity; it is far better to receive an accurate diagnosis from same-day appliance repair experts than a rushed, temporary patch that fails a week later.
Why Your Same-Day Tech Might Leave Without Fixing a Thing
One massive trap I see homeowners fall into—and yes, I’ve been guilty of this myself—is the documentation failure. You call for same-day appliance repair with warranty support, the technician arrives, but because you cannot locate the original purchase receipt or the installation date, they are forced to charge you a standard service fee. To prevent this, you need to know exactly the document every technician needs to see before they even unzip their tool bag. Furthermore, if you are dealing with a modern smart dryer, any minor oversight during the reliable appliance installation phase can completely void your coverage. For example, using a plastic vent hose instead of a UL-rated metal one is a classic reason for a denied insurance or warranty claim. 
Will Your Warranty Actually Pay for That Visit?
Most people believe a warranty is a ‘get out of jail free’ card for any mechanical failure. However, there is a nuance most people skip: the ‘No Fault Found’ clause. If a technician comes out for affordable same-day appliance fixes and discovers the problem was simply a tripped breaker, a clogged house vent, or a film of fabric softener on the sensors, the warranty company will not cover the labor. You will be stuck paying for the visit out of pocket. To protect your wallet, always learn how to avoid paying the service fee for a denied warranty claim before you pick up the phone. I always recommend reviewing top tips for same-day service warranty coverage to ensure you have performed the basic maintenance required by the manufacturer. If the machine isn’t properly grounded—something often missed during a DIY setup—you might also run into issues with the control board. Even if you aren’t a pro, following a guide on the proper way to ground your appliances during installation can save you from a ‘glitched’ motherboard that a warranty won’t touch. Have you ever fallen into this documentation trap or been charged for a simple fix you could have done yourself? Let me know in the comments! If you’re still stuck, checking an expert guide to appliance repair and installation today can give you the final checklist needed to ensure your next service call is successful and fully covered.To really stay ahead of the game, I’ve stopped relying on ‘vibes’ and started relying on a $20 digital multimeter. If you’re serious about DIY, this tool is non-negotiable. I use mine to test for continuity on heating elements and thermal fuses before I even think about ordering parts. It’s the difference between a calculated fix and throwing money at a problem. If you aren’t ready to poke around with probes yet, you can still do a lot of high-level diagnostics; for instance, you can check your hvac blower capacitor without a multimeter just by observing the start-up behavior of the motor. I also swear by a specific offset wrench—it is the specific wrench you need to unjam a disposal in seconds without risking your fingers.
How do I keep my laundry room from becoming a constant repair zone?
Maintenance isn’t just about cleaning the lint trap. For my front-loader, I’ve found that the secret to deep cleaning a front load washer gasket is actually using a dedicated high-efficiency cleaner every thirty cycles to prevent biofilm buildup. According to technical bulletins from the Association of Home Appliance Manufacturers (AHAM), neglecting these internal residues can increase motor strain by up to 15%, leading to premature bearing failure. I’ve personally integrated the maintenance step that extends the life of your high efficiency washer into my monthly calendar to avoid emergency calls. 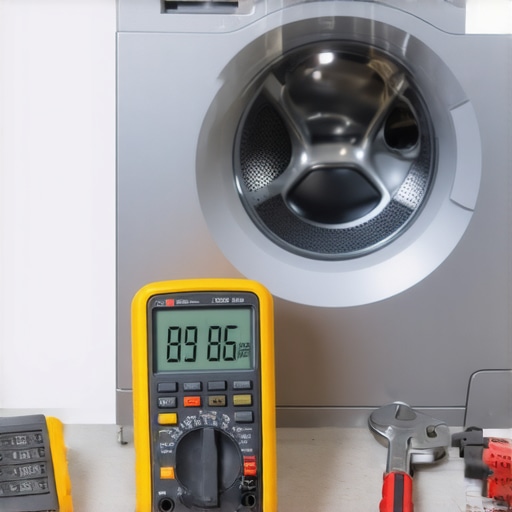
Your Dryer Will Soon Be Smarter Than Your Repairman
Looking ahead, the trend is moving toward ‘Predictive Maintenance.’ We are already seeing high-end models equipped with vibration sensors that can detect a failing bearing in your front load washer months before it actually snaps. In the next few years, expect your dryer to send a push notification to scheduling your appliance repair for same-day service in 2025 automatically because it sensed a microscopic drop in airflow or a voltage spike. This tech exists, but until it’s standard, you need to be the brain of the operation. If you suspect your machine is struggling, I challenge you to try a ‘Hard Reset’ sequence tonight. Many modern control boards simply need to be drained of residual power—unplug the unit for a full ten minutes, then hold the power button for 30 seconds before plugging it back in. It’s a simple trick that often clears ‘ghost’ error codes. If that doesn’t work, ensure your warranty-backed appliance services are on standby. Don’t wait until the smoke alarm goes off; grab a microfiber cloth and some rubbing alcohol and go wipe those moisture sensors right now.
The Hard Truth About My Five-Year Tech Battle
Looking back at that $1,100 dryer, I’ve realized that high-tech convenience often comes with a steep learning curve. First, expensive doesn’t mean invincible. My old dinosaur dryer worked because it was simple; my new one works because I’ve learned to speak its language. Second, your appliance is only as good as its environment. If you don’t ensure reliable appliance installation, even the smartest sensor will fail under the pressure of poor venting. Lastly, maintenance is actually cheaper than stress. Five minutes of sensor cleaning saves five hours of frustration every single time. It took me a year to stop fighting the machine and start working with it, but the peace of mind is worth every bit of effort.
My Secret Arsenal for DIY Success
I don’t expect you to become a full-time technician, but having a few specific things on hand can save you from a crisis. I highly recommend a long-reach vent brush to pull out that hidden lint that escapes the trap; it’s the simplest way to prevent a service call. I also suggest bookmarking affordable same-day appliance fixes with warranty benefits so you aren’t scrambling for a phone number when a real mechanical failure happens. For those who want to go deeper, checking out an expert guide to appliance repair and installation today is the best way to understand the anatomy of your machines before you start unscrewing panels. These resources turn a potential disaster into a manageable Saturday project.
Mastering Your Home One Machine at a Time
You shouldn’t have to be a slave to your laundry room or feel betrayed by the very technology designed to help you. By understanding how your sensors think and keeping your vents clear, you’re taking back control of your schedule and your home. Remember, if a simple reset or cleaning doesn’t do the trick, don’t hesitate to reach out for professional same-day appliance repair to protect your investment and your sanity. You’ve got the tools and the knowledge now—go show that dryer who’s boss!
What’s the one appliance in your house that always seems to have a mind of its own? Let me know in the comments below!