
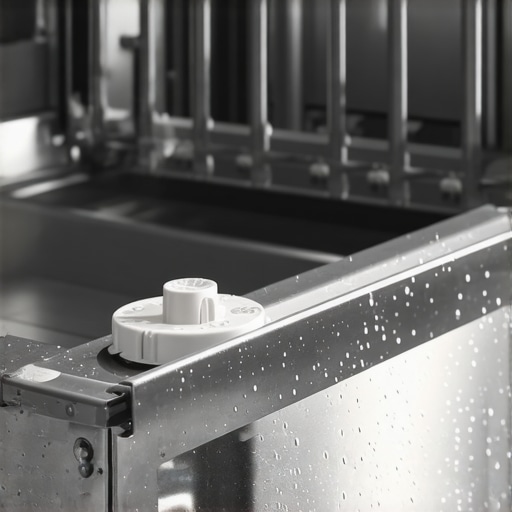
There I was, standing in two inches of lukewarm, soapy water at 11:30 PM on a Tuesday. The hum of my dishwasher, usually a comforting sound of productivity, had turned into a taunt. My first instinct? Panic. My second? Grab every towel in the house. I had made the classic rookie mistake of assuming the machine knew when to stop, but gravity and a stuck sensor had other plans. If I had known about the tiny mechanical hero hiding under the bottom rack, I could have saved my hardwood floors from a week of warping. We are going to dive into that ‘secret’ component today because, frankly, you should not have to learn the hard way like I did.
Stop the Flood Before It Ruins Your Floor
Dealing with a messy overflow is a rite of passage for many homeowners, but it is one I would gladly skip. Early in my DIY journey, I thought I could solve every drainage issue by just poking at the drain with a screwdriver—a move that nearly cost me my warranty coverage. I did not realize that the real culprit was often a simple, stuck plastic piece known as the float switch. This little component acts as the brain for your water levels. When it fails to rise, the water just keeps coming. If you are currently seeing standing water at the bottom after a cycle, you might be closer to a flood than you think. Learning how to identify and maintain this switch is the difference between a quick five-minute fix and calling for same-day appliance repair after your kitchen turns into a pond.
Can a Tiny Plastic Float Really Prevent a Whole Flooded Kitchen?
It sounds almost too simple to be true, right? You would think a high-tech machine would have lasers or digital sensors for this, but many of the most reliable units rely on basic physics. According to the International Association of Certified Home Inspectors (InterNACHI), a malfunctioning float switch is one of the primary mechanical failures that leads to significant interior water damage. Skeptics often assume the problem is a complex electronic glitch, but more often than not, it is just a bit of debris or a stray bean wedged under that plastic dome. Before you assume you need a brand-new appliance installation, you need to check this failsafe. I am going to show you how to locate it and keep it moving freely so you never have to experience that ‘cold sock’ moment I had. Have you ever walked into your kitchen and felt that dreaded cold puddle under your toes? I would love to hear your appliance horror stories—or your lucky saves—in the comments below. Let us get into the grit of how to handle this yourself before it becomes an insurance claim.
Getting Your Hands Dirty Without Making a Mess
To solve a flooding issue, you first have to understand that the float switch is the gatekeeper of your kitchen floor’s safety. Think of it like the ball in your toilet tank; when the water reaches a certain level, the float rises and tells the machine to cut the supply. If it gets stuck in the ‘down’ position because of a stray piece of silverware or a build-up of grease, the machine assumes it is empty and keeps pumping in water. I once spent forty minutes mopping up a mess because a single, fossilized green pea had wedged itself under the rim of the float. It was a humbling lesson in how the smallest obstacles can cause the biggest headaches. If you find yourself in a similar spot, checking this should be your first move before looking into the right way to fix a noisy dishwasher pump without replacing it.
Find the Plastic Mushroom Near the Front
Open your dishwasher and pull out the bottom rack. Look toward the front corner—usually the left or right side—for a small, plastic cylinder or dome. This is your float. It should move up and down freely with a light touch. If it feels gritty or stuck, you have found your culprit. While you are down there, check for any residue; occasionally, why your dishwasher suds up even when you dont use soap can be traced back to detergent buildup that literally glues this switch in place. 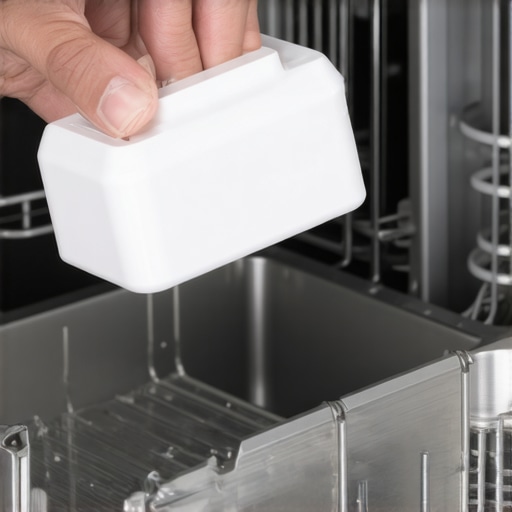
The Three-Second Jiggle Test
Lift the float up and let it drop. You should hear a distinct ‘click’ coming from the microswitch underneath. That click is the sound of your machine’s brain acknowledging that the water is full. If there is no click, or if the float won’t move, you likely have debris trapped in the housing. I usually take a small toothbrush and some warm vinegar to clear away any mineral deposits. This simple cleaning is a core part of an expert guide to appliance repair and installation today because it prevents unnecessary part replacements. I remember helping a neighbor who was convinced she needed a new unit; we found a toothpick jammed in the float, and her ‘broken’ machine worked perfectly five minutes later.
Protect Your Coverage with Proper Documentation
If you clean the float and the dishwasher still won’t stop filling, you might have a truly failing switch. This is where you need to be careful with your DIY enthusiasm. Before you start unscrewing wires, check your paperwork. Understanding the hidden costs of diy repairs on warranty covered items is vital; if you break a plastic clip while forcing the housing open, you might void your protection. Always keep the one maintenance record that saves your appliance warranty claim by noting when you cleaned the sensors. This shows the manufacturer you have done your part as a homeowner. If the float clicks but the water keeps flowing, you are likely looking at a faulty inlet valve, a task that often qualifies for professional help to how to avoid paying the service fee for a denied warranty claim by proving the failure wasn’t due to neglect.
Why Same-Day Service Does Not Always Mean a Fixed Machine
Most homeowners think that calling for same-day appliance repair is a guarantee that their kitchen will be back to normal by dinner time. In my experience, that is a dangerous misconception. While same-day appliance repair quick solutions with warranty support are vital for diagnostics, the reality is that the most reliable technicians prioritize accuracy over speed. A technician who promises a thirty-minute fix without checking the electrical draw of your inlet valve is likely just slapping a bandage on a bullet wound. I have seen countless neighbors fall into the trap of demanding speed, only to have the same flood recur forty-eight hours later because the root cause—perhaps a failing control board—was ignored in the rush. If you are booking a visit, look for top tips for same-day service warranty coverage to ensure the ‘fix’ is actually documented and protected.
Can You Really Lose Your Coverage Over a Non-Certified Part?
This is the advanced nuance that trips up even the most seasoned DIY enthusiasts. We often assume that as long as the machine works, the warranty remains intact. However, many manufacturer contracts contain a ‘like-for-like’ clause. According to data from the National Association of Home Builders (NAHB), improper installation and the use of unapproved aftermarket components account for nearly 25% of denied warranty claims. If you swap a faulty float switch for a generic one found on a bargain site, you might save twenty dollars today but lose the $500 coverage on your motor tomorrow. This is why I always emphasize warranty-backed appliance services you can rely on. Using an authorized tech ensures that the paper trail remains ‘clean’ in the eyes of the manufacturer. 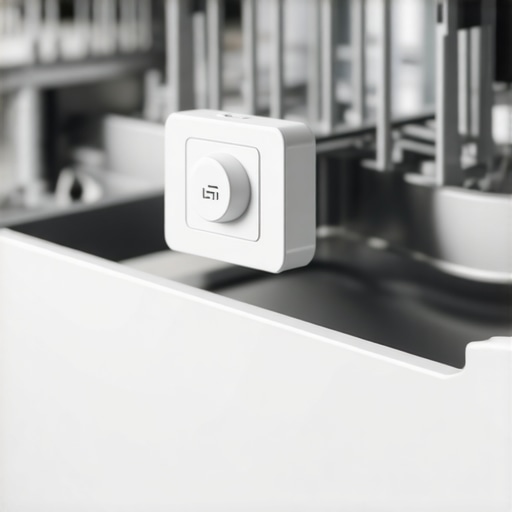
The Hidden Danger of the Missing Drain Loop
Everyone talks about the float switch, but almost no one discusses the ‘High Loop’ or the air gap. If your installer was in a hurry, they might have skipped the critical drain hose loop you are missing in your dishwasher setup. Without this simple physical curve in the hose, dirty water from your sink can actually siphoned back into your dishwasher. You think you have a broken machine, but you actually have a physics problem. It is a classic ‘Oops’ factor: you pay for a repair you do not need because the initial fast trustworthy appliance installation near you was not actually done to code. This mistake is especially common in newer builds where speed is prioritized over standard plumbing practices.
Protect Your Investment with Better Records
Before you even pick up a wrench, locate the proof of purchase rule for transferring appliance warranties. If you bought your home with the appliances already there, do not assume you are covered. Often, you need a specific transfer of the protection plan to avoid paying full price for a professional visit. I have learned the hard way that knowing the hidden costs of diy repairs on warranty covered items is the only way to stay ahead of the game. Have you ever attempted a ‘quick fix’ only to realize you accidentally voided your protection plan? I would love to hear your stories in the comments—let’s help each other avoid these expensive traps. If you are stuck and need professional advice that keeps your paperwork valid, you can always contact us for a consultation before you start unscrewing the baseplate.
Does Your Service Contract Cover Labor or Just Parts?
This is the question that separates the pros from the amateurs. Most people see ‘5-Year Warranty’ and relax. But many of those plans only cover the cost of the metal and plastic, leaving you with a $200 labor bill. Always check the difference between a manufacturer warranty and a service contract before you agree to a repair. It is these tiny details that turn a minor leak into a major financial headache. Stay informed, keep your receipts, and never assume the loudest promise of ‘speed’ is the best path for your kitchen.It is one thing to fix a leak once, but it is another to build a maintenance routine that keeps your kitchen from becoming a construction zone every few years. If you want to move beyond basic troubleshooting, you need a dedicated kit. I do not mean a $500 rolling chest, but you absolutely need the specific wrench you need to unjam a disposal in seconds. Since your dishwasher and disposal often share the same drainage path, a clog in one is a flood in the other. I also swear by a simple non-contact voltage tester; it is the only way to be 100% sure you will not get a nasty surprise when you are reaching behind a wet machine to check the power cord or the motor terminals.
How can I maintain my kitchen ecosystem over the long haul?
Longevity is about the small, unglamorous tasks that prevent systemic failure. For instance, I set a calendar alert every six months to check the drain line slope rule for a silent dishwasher operation. Hoses move, clamps loosen, and that perfect ‘high loop’ you installed can sag over time, leading to backflow issues that smell like a swamp. If you have a central unit, I recommend performing the one maintenance move that stops your ac from smelling like mildew at the same time. Consolidating these chores into a ‘Seasonal Appliance Walkthrough’ saves you from the stress of hunting for affordable same-day appliance fixes with warranty benefits during a holiday weekend when everyone else is calling for help. 
Smart Sensors and the Death of the Guesswork Repair
Looking ahead, the era of poking at float switches with toothbrushes is coming to a close. We are seeing a massive shift toward ‘Predictive Maintenance’ driven by internal AI and better sensors. According to the Association of Home Appliance Manufacturers (AHAM) in their recent technical sustainability briefing, the next generation of appliances will utilize ultrasonic sensors and amperage-draw monitoring to detect micro-leaks or motor strain before a single drop of water hits your floor. This means an expert guide to appliance repair and installation today will soon focus more on software updates and sensor calibration than on traditional physical valves. However, this high-tech future comes with a catch: more complex service contracts. You will want to watch out for the deductible trap in most third-party appliance protection plans as these digital components can be incredibly expensive to replace out-of-pocket. My advice is to start a digital folder on your phone now. Take a photo of your model number, your receipt, and your specific warranty terms. It sounds tedious, but having that data ready is the ultimate tool for navigating the modern repair landscape. I challenge you today to go look under your sink and check that drain hose—is it still looped high, or has it slipped? Checking that one physical detail could save you a $300 service call next month.
What I Wish Someone Told Me Before My First Kitchen Flood
Reflecting on my own water-soaked Tuesday nights, I’ve realized that most appliance disasters are entirely avoidable if you know where the “cracks” are. Here are a few things that changed my perspective on home maintenance:
- Speed is often the enemy of a quality repair. I’ve learned that a tech who takes an extra twenty minutes to verify the drain line is worth twice as much as a “thirty-minute miracle” worker who skips the testing phase.
- Your warranty is a legal contract, not a suggestion. Small mistakes, like missing a single maintenance log, can be the loophole that costs you a thousand dollars. When you maximize your appliance warranty during emergency repairs, you are actually just being a diligent record-keeper.
- The physical setup matters as much as the internal parts. If you did not how to ensure reliable appliance installation in 2025 during the initial setup, you are fighting a losing battle against physics every time you press start.
The Three Items I Keep in My Under-Sink Emergency Kit
You do not need a garage full of gear to prevent a flood, but you do need a few specific items to stay ahead of the game. First, I always keep the specific wrench you need to unjam a disposal in seconds attached to the side of the cabinet. Since the dishwasher and disposal share a drainage path, a jam in one is a flood in the other. Second, a simple soft-bristled toothbrush and white vinegar are my go-to tools for keeping the float switch housing free of calcification. Finally, I trust a non-contact voltage tester more than my own intuition; it’s the only way to be safe when reaching into a wet machine.
Stop Fearing Your Dishwasher and Start Owning It
It is easy to feel overwhelmed by the hums and clicks of a modern machine, but remember that most issues are just physical obstacles waiting for a human touch. By taking five minutes once a month to check your float switch and your drain hose, you are doing more than just cleaning—you are investing in your home’s longevity. This expert guide to appliance repair and installation today is designed to give you the confidence to act before the water hits the floor. Have you ever caught a potential flood just in time by a simple jiggle of the float? Let me know your close calls or your most stubborn appliance puzzles in the comments below!