
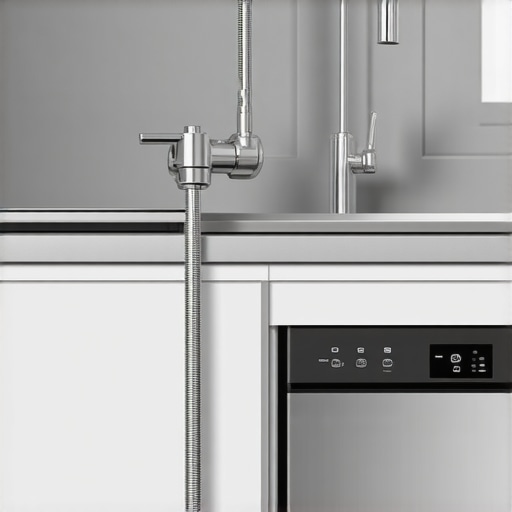
I was standing in my kitchen, finally enjoying a quiet moment after dinner, when my sink suddenly decided to join the conversation. It wasn’t a polite bubble; it was a deep, guttural glug-glug-glug that sounded like a drain-dwelling creature was choking on its dinner. I’ve been there—staring at the drain, wondering if I’d have to spend my Saturday morning waiting for a professional appliance installation team to fix a mounting disaster. For years, I just assumed my plumbing was old and cranky. I even tried those expensive liquid drain cleaners, which did absolutely nothing but waste my money and probably eat away at my pipes. It wasn’t until I actually crawled under the cabinet with a flashlight and a sense of desperation that I realized I had been making a classic rookie mistake. Today, I’m going to show you the one simple drainage trick that will silence your sink for good and keep your dishwasher running exactly as it should.
Put an End to That Annoying Sink Soundtrack
The first thing you need to know is that your sink isn’t actually broken; it’s just suffocating. When your dishwasher pumps out wastewater, it does so with a surprising amount of force. If that water doesn’t have a clear, air-supported path, it creates a vacuum. That noise you’re hearing? That’s air being violently sucked through your sink’s P-trap because your dishwasher hose is fighting for breath. I remember the embarrassment of having guests over for a nice dinner, only to have the kitchen start “growling” at them the moment I started the cleaning cycle. I actually thought I had a major blockage and almost spent a fortune scheduling your appliance repair for same-day service before I checked the hose.
Can a simple piece of plastic really be the problem?
You might be skeptical that a fix this easy could actually work. Most homeowners think they need to replace the disposal or snake the entire main line when they hear these noises. However, the reality is often much simpler. According to the International Association of Plumbing and Mechanical Officials (IAPMO), improper drainage slopes or missing air gaps are leading causes of “siphonage” in residential kitchens, which forces air through the water seal of your traps. This doesn’t just cause noise; it can actually pull dirty sink water back into your “clean” dishwasher. In my early days of DIY-ing, I completely ignored the critical drain hose loop you’re missing in my own setup. I just draped the hose along the floor of the cabinet and called it a day. That was a huge mistake. Not only did my sink gurgle like a drain-monster, but I eventually realized that the P-trap mistake I made was letting sewage smells creep into the kitchen. [image placeholder] Have you ever had to turn up the TV just to drown out the sound of your kitchen sink? It’s a frustrating cycle, but once you understand the secret drain loop every plumber knows, you’ll wonder why you didn’t fix it months ago. Let’s get into the nitty-gritty of how you can fix it with nothing more than a single plastic zip tie and five minutes of your time.
Pull That Hose Up Toward the Countertop
First, clear everything out from under your sink. You need enough space to move without hitting your head on the P-trap. Find the corrugated plastic hose that comes from your dishwasher. In many homes, especially where a fast trustworthy appliance installation was rushed, this hose simply drapes across the cabinet floor. That’s your problem. Grab a heavy-duty zip tie or a stainless steel pipe strap. You want to pull the middle of that hose up as high as it can go—ideally, it should be pinned right against the underside of your countertop. I remember a particularly messy Saturday where I skipped the zip tie and tried to use a command hook; the weight of the water eventually ripped the hook off, and I ended up with a face full of gray water. Don’t be me. Use a permanent fastener to ensure the critical drain hose loop you’re missing stays put. When the hose is elevated this way, gravity becomes your best friend. It prevents the ‘siphon effect’ where water from your sink or disposal drains back into your dishwasher, which is exactly why you might notice why your dishwasher still has water at the bottom after a cycle.
The Right Way to Connect to Your Disposal
Once you’ve secured your high loop, look at where the hose actually connects to the garbage disposal or the sink tailpiece. This connection needs to be higher than the bottom of the loop but lower than the peak you just created. Think of it like a mountain pass; the water needs to climb the peak (the high loop) and then slide down into the disposal. If the hose sags before it hits the disposal, you create a secondary ‘trap’ where nasty food particles sit and rot. This leads to that funky smell many people mistake for a broken sewer line. I once consulted an expert guide to appliance repair and installation today and realized that a simple one-inch difference in the slope was all it took to stop the smell and the noise.
Check the Slope for Silent Operation
If you’ve done the loop and you still hear a faint glug, check the angle. The hose shouldn’t have any sharp kinks or ‘U’ shapes in it. It should be a smooth, continuous slope from the high point down to the drain. Many homeowners forget to check the knockout plug inside the disposal itself. If you just replaced your disposal and the dishwasher isn’t draining at all, you likely forgot to hammer out that plastic plug. This is a common hurdle during a how to ensure reliable appliance installation in 2025 project. While you’re down there, make sure you aren’t accidentally hitting the safety switch that shuts down your garbage disposal with your cleaning supplies, as a non-functioning disposal will quickly back up into the dishwasher line. Following the drain line slope rule for a silent dishwasher operation ensures that air can move freely through the pipes, effectively killing that guttural noise for good. When air moves smoothly, the water flows without resistance, meaning your dishwasher pump doesn’t have to work twice as hard to clear the tub.Now, I know what you’re thinking—if a zip tie can fix a gurgling sink, why wouldn’t I just DIY every single problem that crops up? It’s a tempting thought, especially when you’re staring at a broken fridge and a ticking clock. But let’s dig deeper into where the line between a ‘clever hack’ and a ‘costly mistake’ actually sits. Most people assume that scheduling your appliance repair for same-day service in 2025 is a magic bullet that guarantees a fully functioning kitchen by dinner time. In my experience, the ‘oops’ factor usually happens because homeowners confuse a fast arrival with a fast resolution. If you dive in with a screwdriver before the pro arrives, you might be walking straight into the hidden costs of diy repairs on warranty covered items. I’ve seen people lose hundreds of dollars in coverage just because they tried to ‘tighten’ a valve that was actually a sealed component.
The Dangerous Myth of the Instant Fix
Everyone says you should demand a repair within hours, but here is a contrarian view: speed can sometimes be the enemy of quality. A technician who is rushed to meet a ‘same-day’ quota might miss the underlying cause of a failure, like a fluctuating voltage issue, and only treat the symptom. I once rushed a repair on my own oven, only to realize later that I had ignored the real culprit. This is why looking for affordable same-day appliance fixes with warranty benefits is so critical. You want someone who has the parts on the truck but the patience to diagnose the root cause. According to a report by the Association of Home Appliance Manufacturers (AHAM), nearly 25% of modern appliance failures are linked to improper installation or previous uncertified ‘tweak’ attempts that ignored manufacturer protocols.
Does same-day service actually mean a same-day fix?
This is the question that separates the amateurs from the experts. A truly expert guide to appliance repair and installation today will tell you that ‘same-day service’ often refers to the diagnostic visit. If your high-end smart fridge needs a specific control board, it might take a day to source it. The trap many fall into is refusing to pay a diagnostic fee when a same-day fix isn’t possible. However, how to avoid paying the service fee for a denied warranty claim often comes down to how well you documented the issue before the pro even knocked on your door.
Keep your receipts or pay the price later
The biggest nuance that even seasoned DIY-ers miss is the importance of a paper trail. Most extended warranties are voided not by the repair itself, but by a lack of maintenance records. If you can’t prove you cleaned the coils or cleared the filters, the provider can argue ‘user neglect.’ That is why the one maintenance record that saves your appliance warranty claim is the most valuable tool in your kitchen drawer. Before you call for an emergency, make sure you know how to maximize your appliance warranty during emergency repairs by having your model number and purchase date ready. It’s also worth checking the maintenance contract clause that saves you on labor costs to see if your ‘same-day’ hero is actually covered under your existing plan. Have you ever fallen into this trap where a ‘quick fix’ ended up costing you your warranty? Let me know in the comments, and let’s make sure your next warranty-backed appliance services you can rely on actually keep your wallet full.
Grab This Specific Wrench Before Your Disposal Jams
When I first started managing my own home repairs, I used to reach for a pair of standard pliers for everything. That was a mistake that usually ended in stripped bolts and bleeding knuckles. If you want to handle a jammed disposal like a pro, you need to stop guessing and get the specific wrench you need to unjam a disposal in seconds. It’s a simple hex-key tool, but the offset handle is designed specifically to fit into the bottom of the flywheel. I keep mine taped to the side of the disposal unit itself. That way, when the sink stops spinning because a cherry pit got lodged in there, I’m not digging through a messy junk drawer while the motor hums and overheats. Having the right physical tool is half the battle, but the other half is making sure the invisible stuff—like electricity—is behaving. According to the InterNational Electrical Testing Association (NETA), microprocessors in modern ranges are incredibly sensitive to ‘stray voltage.’ If your home’s grounding isn’t perfect, you might notice the grounding error that makes your smart stove controls glitch or reset randomly. I learned this the hard way after a lightning storm fried a control board that wasn’t properly grounded during the initial setup.
How can I keep these appliances running smoothly for years?
Maintenance isn’t just about fixing things when they break; it’s about preventing the friction that causes the break in the first place. For instance, if you have a Golden Retriever like mine, your refrigerator is basically a giant vacuum cleaner for dog hair. I’ve started using the condenser coil cleaning hack for pet owners with hairy dogs every six months. It involves a flexible vacuum attachment that reaches into the narrow gaps where heat is supposed to escape. When those coils are clogged, your compressor runs 30% harder, which leads to those expensive ‘same-day’ emergency calls we all want to avoid. Beyond cleaning, you need to become a librarian of your own kitchen. I keep a digital folder on my phone with photos of every model number and serial tag. This is exactly why your extended warranty company keeps asking for service logs—they want to see that you’ve done your part before they pay out for a major part. #IMAGE_PLACE_HOLDER_D#
Your Fridge Is About to Get a Lot Smarter
Looking ahead, the ‘future’ of appliance repair isn’t just about better wrenches; it’s about data. We are moving toward a world where your dishwasher will send an alert to your phone—and your repairman—before the pump actually fails. This predictive maintenance is already showing up in high-end models, and it’s going to change how we think about how to ensure reliable appliance installation in 2025. You won’t just be plugging in a machine; you’ll be syncing a node to your home network. To stay ahead of the curve, I suggest you start by mastering the basics of documentation. Check your current coverage today and look for top-tips for same-day service warranty coverage so you aren’t caught off guard. My advanced tip for you this week: go buy a $10 outlet tester and check the ground on your stove. It takes ten seconds and could save you a $400 control board repair down the line. If you’re ever unsure, always refer back to an expert guide to appliance repair and installation today before you start pulling wires.
The Truth About the Same-Day Fix Myth
After years of tinkering and calling in pros, I’ve realized that the biggest hurdle isn’t the broken part; it’s our expectation of time. While scheduling your appliance repair for same-day service in 2025 is a fantastic safety net, I’ve learned that a ‘fix’ is a process, not just an appointment. I once spent a whole afternoon frustrated because a technician couldn’t find a rare sensor on his truck, only to realize later that my own lack of documentation made his job twice as hard. The smartest thing you can do is accept that complex machines sometimes need a 48-hour window for specialized parts. Also, never underestimate the power of a clean drain; a simple high loop can save you more money than the best discount coupon ever could. Finally, I’ve learned to stop touching sealed components. If you have to break a manufacturer seal to see the problem, you are likely about to maximize your appliance warranty during emergency repairs by doing absolutely nothing and letting the licensed pro handle it instead.
My Go-To Kit for Kitchen Sanity
I don’t believe in owning every tool in the hardware store, but I do swear by a few specific items that have saved my skin. First is a basic digital multimeter; even if you aren’t an electrician, knowing if an outlet has power can save you a $100 service call. Second, I highly recommend keeping a dedicated ‘Appliance Bible’—a simple accordion folder where you put every single receipt and manual the day you buy the machine. This is the one maintenance record that saves your appliance warranty claim when a provider tries to claim you haven’t maintained the unit. Lastly, keep that specific offset hex wrench taped to your disposal. It’s a tiny investment that turns a 3:00 AM kitchen flood into a five-second fix.
Take Control of Your Kitchen Again
It’s easy to feel like our homes are running us instead of the other way around. But when you master that high loop or finally understand how your warranty works, you stop being a victim of your appliances. You don’t need to be a master plumber to have a quiet sink; you just need the confidence to look under the cabinet and the patience to do it right. Whether you are tackling a DIY fix or looking for an expert guide to appliance repair and installation today, remember that every small step you take protects your investment and your peace of mind. Your kitchen should be a place of creation, not a source of constant ‘glug-glug’ noises and repair bills. Have you ever tried the high-loop trick and found it silenced your sink instantly, or did you find another secret to a quiet kitchen? Let me know in the comments below!