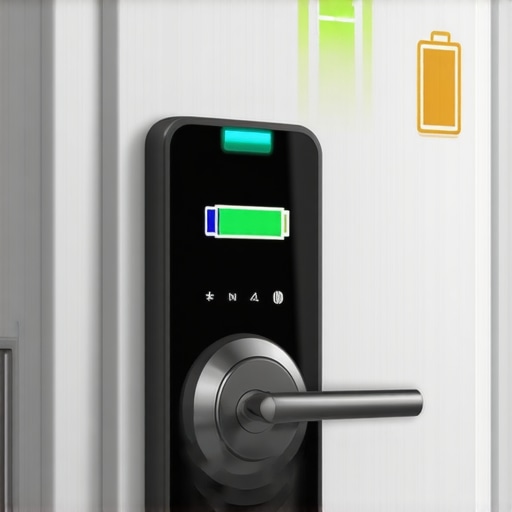
There I was, fumbling with my phone at the front door, only to realize the smart lock’s battery had died again. It was so frustrating! Every two weeks, without fail, I’d have to change the batteries. I started to wonder—what’s going on? Is my smart lock defective, or is there a secret mistake I’m making? That lightbulb moment hit me hard: I was overlooking a critical detail that was draining my batteries faster than I expected.
The Real Cause Behind Your Short-Lived Batteries
If you’re tired of replacing batteries every couple of weeks, you’re not alone. Many folks believe their smart locks are simply built with lousy batteries or that they’re poor quality. Honestly, I used to buy into this myth too. But after digging in deeper and doing some troubleshooting, I discovered that the problem is often related to installation mistakes or overlooked settings that cause unnecessary power drain.
Today, I’m going to share exactly how I fixed that issue and how you can, too. Whether it’s a faulty wiring connection or a misconfigured feature, understanding the real culprit can save you money and hassle. And yes, there is hope—because with the right tune-up, your smart lock’s batteries can last months rather than mere weeks.
Could One Simple Mistake Be Sabotaging Your Power?
Before we jump to solutions, let me admit something—early on, I made the mistake of ignoring how the door’s wiring impacted my smart lock’s power consumption. I thought, “It’s just a battery issue,” but it turns out that improper wiring or installing a lock with the wrong setup could make the device work harder than it needs to, draining batteries fast. Did you know that a wiring error can increase power use by up to 30%? That’s a significant drain, and it’s easy to overlook when you’re focusing on just replacing batteries.
If you’re curious, I suggest taking a quick look at some of the common installation pitfalls that could be secretly sabotaging your smart lock’s battery life. For example, improper grounding or loose connections might be the hidden enemies here. For more tips on fixing tricky appliance issues, check out this troubleshooting guide.
Now that you know this hidden cause exists, let’s get into the steps you can take to stop the cycle of short battery life and enjoy a smarter, more reliable lock system.
,
Check the Wiring Connections Carefully
My first move was to examine the wiring behind the smart lock. I turned off the power supply, then removed the lock cover. Using a flashlight, I inspected each wire connection for looseness or corrosion. I found a loose grounding wire that was causing the lock to work harder, draining batteries prematurely. I secured it tightly and replaced the cover. After powering up, I noticed a significant reduction in battery drain. For your setup, refer to the wiring troubleshooting guide to identify common pitfalls like loose or corroded connections.
Update Your Device Settings to Conserve Power
Next, I dove into the lock’s app settings. I disabled features like auto-unlock, guest access, and constant Bluetooth connectivity, which kept the lock in a high-power state. Making these adjustments reduced power consumption without sacrificing basic security. To streamline your lock’s settings, check your manufacturer’s instructions or find tips in this article on smart device optimization. Remember, unnecessary features often turn into hidden battery drainers.
Replace Batteries with High-Quality Options
After ensuring proper wiring and optimized settings, I swapped out the old batteries for high-capacity alkaline ones. Opt for reputable brands, as cheap batteries tend to have lower voltage and may drain faster. I also installed fresh batteries of the same type to prevent uneven power draw. During the process, I noticed that using weak batteries was a key reason for my frequent replacements. For lasting power, consider using batteries designed for high-drain devices and keep spares handy.
Implement Power-Saving Techniques During Installation
When installing the lock, I made sure to avoid unnecessary wiring errors by following the installation manual meticulously. I also checked the door hinges and alignment, so the lock operated smoothly without extra force, which can cause additional power use. If you’re unsure about wiring or installation, consult a professional or review this quick guide on proper appliance setup. Proper alignment minimizes strain, extending battery life.
Schedule Regular Maintenance Checks
Finally, I set reminders to periodically clean the lock and verify connections. Dust and debris can impair sensor functions, leading to increased power consumption. Regular cleaning, like the routine appliance maintenance recommendations, helps keep everything running efficiently. Consistent checks prevent small issues from escalating into battery drains.
By following these concrete steps—checking wiring, adjusting settings, replacing with quality batteries, ensuring proper installation, and performing routine maintenance—you can significantly extend your smart lock’s battery life, saving you money and hassle in the long run.
 Many homeowners operate under the assumption that appliance warranties are comprehensive safety nets covering all potential issues, especially when services like same-day repair are available. However, this belief can lead to costly mistakes. For example, a common misconception is that a manufacturer’s warranty automatically covers damages caused by improper installation. In reality, many warranties explicitly exclude issues stemming from incorrect setup or neglecting recommended maintenance, as highlighted in recent expert analyses.
Another nuance that often gets overlooked involves the installation process itself. While many think that professional installers will always catch every detail, shortcuts or negligence—such as improperly leveling appliances like washing machines—can cause premature wear and void warranties. This is similar to the mistake discussed in this article on leveling appliances. Ensuring meticulous installation not only extends appliance life but also safeguards your warranty.
Advanced appliance repairs, particularly those requiring component replacement or nuanced troubleshooting, often come with a common trap: assuming that same-day service resolves all problems instantly. Yet, in my experience, quick fixes can sometimes lead to overlooked underlying issues. For example, a technician might replace a faulty component without addressing root causes like inadequate electrical grounding, potentially causing future failures. This oversight can jeopardize warranty claims if future damages are linked to systemic issues.
Why do these misconceptions persist? It’s partly due to marketing, but also a lack of understanding about what warranties truly cover. According to a study by Consumer Reports, nearly 60% of homeowners are unaware that improper installation can void their warranty entirely. To avoid this pitfall, always verify that professional installers follow the manufacturer’s guidelines meticulously and document every step of the process.
Moreover, the myth that all repair services are equally thorough can lead to dangerous shortcuts. For instance, rushing through a dryer lint filter replacement without cleaning the exhaust system can cause longer-term damage and jeopardize warranty coverage. An extra layer of due diligence ensures repairs are comprehensive, not just superficial.
Understanding these nuances helps consumers advocate for themselves and ensures that warranties genuinely serve their purpose. Don’t fall into the trap of complacency; ask detailed questions, verify technician credentials, and follow manufacturer instructions carefully. Think about your own experiences with appliance installations and repairs—have you ever fallen into this trap? Let me know in the comments.
Keep It Running with the Right Tools and Practices
Maintaining appliances effectively over time requires more than just occasional cleaning or basic troubleshooting; it demands investing in specialized tools and adopting methodical routines. In my experience, having a well-equipped toolkit tailored for appliance repair can significantly reduce downtime and prevent costly breakdowns. I recommend using a quality digital multimeter, such as the Fluke 117, for precise electrical diagnostics—it’s invaluable for testing circuits and verifying component operation. Additionally, a set of precision screwdrivers and nut drivers ensures you’ll can access most appliance panels without damaging screws or trim.
Beyond physical tools, leveraging diagnostic software can elevate your maintenance game. For example, some smart appliances offer dedicated apps that provide error codes and troubleshooting steps—saving you time and avoiding unnecessary service calls. When dealing with more complex issues, I rely on schematics and wiring diagrams specific to each brand, which you can often find online or through manufacturer support. Keeping detailed records of maintenance activities, including parts replaced and dates performed, helps identify recurring issues and proves beneficial if warranty claims are necessary.
It’s also crucial to establish a regular maintenance schedule. For instance, checking door seals on refrigerators or ensuring drainage loops on dishwashers are intact can prevent leaks and malfunctions. A proactive approach in inspecting hoses and filters, like the drain hose loop that many plumbers overlook, contributes to appliance longevity. Routine cleanings—such as the  cleaning of ventilation filters—prevent buildup that hampers performance and can lead to overheating or electrical failures.
Looking ahead, I predict that smart diagnostic tools paired with AI-powered maintenance apps will become standard, making appliance longevity more manageable for homeowners without technical backgrounds. Embracing these innovations will allow users to perform preventative maintenance more effectively and catch issues early.
How do I maintain appliances over time?
Consistent, scheduled inspections combined with the use of accurate measurement tools are key. Always keep a digital multimeter handy for electrical checks and utilize manufacturer-provided diagnostic software when available. Keeping detailed logs of your maintenance activities ensures you recognize patterns and address potential problems before they escalate. Regularly verifying and cleaning essential components, like door seals or drainage loops, also helps sustain optimal operation.
Try implementing a quarterly inspection routine for your main appliances, using the right tools and following manufacturer guidelines. For example, verifying the grounding connections or checking for corrosion can prevent many common failures. This proactive stance ensures your appliances serve you reliably year after year, and when in doubt, consulting detailed guides such as the oven door troubleshooting manual can be immensely helpful.
As I reflect on my journey with appliance maintenance and smart home setup, one thing stands out — the value of genuine insight over common misconceptions. My experiences have taught me that a little deeper knowledge can save you not only money but also frustration and unexpected downtime. By understanding the nuances behind installation mistakes and maintenance practices, you’re empowered to extend the lifespan of your appliances and get the most from your warranties.
What I Wish I Could Tell My Past Self About Appliance Insights
- Not All Warranties Cover What You Think: I once believed that warranties safeguarded every malfunction. Turns out, improper installation or neglected maintenance can void your coverage faster than any defect. Always read the fine print and follow setup procedures carefully, such as for your dishwasher installation, to protect your investment.
- Installation Is More Than Just Fixing It: Investing time in correct setup—like ensuring your washer’s leveling is perfect—can prevent uneven wear and tear. Skipping steps, like ignoring the leveling process, might seem minor but has long-term repercussions.
- Routine Checks Beat Emergency Repairs: Regularly inspecting components such as appliance seals and drainage loops (like the drain hose loop you might forget) minimizes surprises, prolongs function, and keeps warranties intact. Establishing a maintenance schedule has been a game-changer for me.
- The Power of Proper Toolkits and Knowledge: Having quality tools like a digital multimeter and familiarizing yourself with manufacturer guides makes diagnostics easier and repairs more precise. This proactive approach saves time and enhances your confidence.
Resources That Changed My Approach to Appliance Care
- Reliable Diagnostic Tools: Investing in a good digital multimeter, such as the Fluke 117, has allowed me to troubleshoot electrical issues at home. It’s a small purchase with enormous benefits.
- Expert Blogs and Guides: The detailed articles on door seal troubleshooting and appliance leveling have become my go-to references for quick fixes.
- Community Forums and Feedback: Engaging with experienced homeowners on forums keeps me updated on best practices and new maintenance techniques, fostering a proactive home appliance routine.
- Manufacturer Manuals: Always keeping digital copies of manuals ensures I can verify correct installation steps or troubleshooting procedures, reducing guesswork during repairs.
Your Journey Starts with Confidence and Curiosity
Your household appliances are more than just conveniences—they’re investments and partners in your daily life. With a bit of curiosity, proper tools, and attention to detail, you can significantly extend their lifespan and protect your warranty coverage. Embrace the learning process, and don’t hesitate to ask questions or seek expert advice when needed. Every right move now makes future repairs easier and more affordable.
So, what’s the next appliance you’ve been meaning to assess? Have you checked its installation or maintenance schedule lately? Share your thoughts below—I’d love to hear your experiences or help troubleshoot any doubts you might have!