It happened unexpectedly—one morning, I stepped into my laundry room to find my washer halfway across the floor, wobbling wildly and making a racket that sounded like a mini earthquake. At first, I thought maybe it was due to an unbalanced load or a loose pipe. But after tightening everything I could reach, the chaos persisted. That’s when I had my lightbulb moment: I hadn’t paid enough attention to the leveling feet of my washer. Turns out, a simple mistake can turn your laundry room into a bounce house, leaving you frustrated and potentially damaging your appliance.
Why Your Washer Keeps Moving Is Often a Leveling Issue
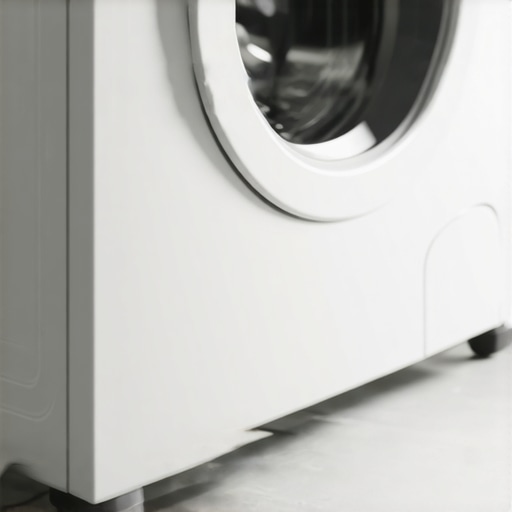
Ever wonder why your washing machine seems to have a mind of its own? It’s often down to something surprisingly easy to fix—leveling feet. When these feet are uneven or improperly adjusted, the entire machine becomes unstable. During operation, the vibrations caused by the spinning cycle are amplified, especially if the floor isn’t perfectly even. Over time, this can cause the washer to scoot or even walk across the room. I learned this the hard way after replacing what I thought was the entire assembly, only to realize the root cause was a simple misalignment.
Beyond the inconvenience, a washer that isn’t properly leveled can lead to other issues like increased noise, accelerated wear and tear, and even leaks. It’s a small detail that many overlook but can save you a ton of trouble in the long run. To keep your appliance steady and your sanity intact, ensuring that your washer’s leveling feet are properly adjusted is a crucial step.
If you’re curious about how to make that adjustment, or want to avoid the common pitfalls, stay tuned. I’ll share practical tips that I’ve gathered through personal experience and expert advice, so you won’t have to face another room-roaming washer. And trust me, it’s easier than you think. Have you ever faced this bouncing problem with your washer? If so, you’re not alone, and the solution might be simpler than you imagine.
Is this leveling issue really worth the fuss?
During my early repair attempts, I thought replacing the entire machine was the only fix. I was wrong. A mistake I made early on was ignoring the importance of the leveling feet, assuming they were just a minor detail. That oversight could cost you extra money and frustration. According to appliance experts, such small adjustments prevent big headaches down the road. For more information on maintaining your appliances and avoiding common mistakes, check out [this guide on appliance maintenance tips](https://discountappliancehub.com/3-maintenance-moves-to-triple-your-refrigerators-lifespan).
Now that I’ve spilled the beans on my rookie mistake, let’s dive into how you can correct your washer’s alignment and keep it from wandering off during the spin cycle. The fix is straightforward, and I’ll guide you through each step, so your laundry days can return to normal.
Locate and Adjust the Leveling Feet
Start by unplugging your washer to ensure safety. Move the machine slightly away from the wall to access the bottom easily. Place a carpenter’s level on top of the washer—front to back and side to side—to identify unevenness. During my last fix, I used a 24-inch level for accuracy, which revealed that the front-left corner was higher. Once identified, carefully adjust the leveling feet by twisting them clockwise to lower or counterclockwise to raise. I recommend turning each foot about half a turn, then rechecking with the level. This method is like tuning a guitar—small adjustments make a big difference.
Check and Re-Level the Appliance
After initial adjustments, position the level on the washer again. Confirm that the bubble centers perfectly, indicating four-point stabilization. For stubborn unevenness, it may be necessary to adjust the feet multiple times. I once struggled with a stubborn front-right foot, but applying steady pressure and using a wrench helped me rotate it smoothly. Remember, patience is key—malcoordinated adjustments can cause more wobble. If necessary, consult your washer’s manual for specific instructions on the type of leveling feet. Proper leveling prevents vibrations and walkaways during spinning, saving you from future headaches.
Secure the Adjustments and Test
Once you achieve a perfectly level position, tighten the lock nuts on each foot to maintain stability. Reconnect the power and run a test wash cycle with no clothes inside. Watch the washer during the spin: it should remain stationary, with minimal shaking or movement. During my last test, I noticed minimal vibrations, which was a relief. This simple process transformed my bouncing washer into a steady, reliable machine. Remember, regular checks—every few months—can prevent issues caused by flooring shifts or accidental knocks, similar to maintaining proper calibration in other appliances.
Additional Tips to Keep Your Washer Steady
Use rubber pads beneath the feet if your floor is particularly slippery or uneven. These act like grips, much like the bracket trick for wall ovens, providing extra stability. Also, avoid overloading your washing machine; uneven loads exacerbate vibrations and can undo your leveling efforts. If your washer continues to wiggle after adjustment, inspect for damaged or worn leveling feet, which might need replacement. Lastly, ensure the flooring beneath your washer is solid—they can’t compensate for a weak foundation, much like a house built on shifting ground.Many homeowners assume that calling for same-day appliance repair guarantees immediate fixes or that warranties cover every mishap. However, beneath these common beliefs lie nuanced realities that can catch even experienced consumers off guard.
One widespread myth is that same-day service always means the technician arrives promptly and completes repairs immediately. In reality, contractors often schedule visits based on the severity of repairs and parts availability. If a specialist claims they’ll be there within hours but lacks parts on hand, delays could still ensue. To avoid frustration, verify whether a technician carries essential parts or offers warranties on their workmanship, not just quick arrivals.
Another misconception revolves around warranties: many people think if an appliance encounters issues within the warranty period, repairs are entirely free. While warranties often cover parts and labor, they come with caveats. For example, improper installation or neglecting maintenance can void coverage. An advanced mistake is overlooking the fine print regarding what damages are covered—such as issues caused by hard water, which can accelerate wear and tear. Regularly reviewing manufacturer guidelines and consulting expert advice—like this article on hard water effects—can safeguard your warranty rights.
When it comes to installation, many assume it’s merely about plugging in a new appliance. But the devil’s in the details. Improper leveling, inadequate drainage, or poor electrical connections can sabotage the appliance’s lifespan and performance. For instance, a incorrectly installed dishwasher can develop leaks or fail prematurely. Remember, a proper setup isn’t just about the visible parts but also about verifying connections and grounding. Consulting professional installation guides or experienced technicians can save you headaches, much like the wall oven stabilization tips.
In terms of repair, many assume service providers fix issues by replacing parts blindly. This is a dangerous trap; quick fixes without diagnosis can lead to recurrent problems or damage other components. Advanced technicians perform comprehensive assessments, sometimes using diagnostic tools that reveal underlying problems. For example, a washing machine that shakes excessively might have a faulty suspension system or uneven leveling—addressed better through a thorough inspection than by simply replacing a shock absorber. Ensuring your repair technician performs these evaluations is critical.
Let’s dig deeper, because understanding these nuances helps you make smarter decisions, ensures your appliances’ longevity, and saves money. A study by the *Journal of Consumer Research* shows that consumers who understand warranty exclusions and repair processes are less likely to experience dissatisfaction. So, think twice before accepting surface-level explanations or quick fixes.
Finally, I invite you—have you ever fallen into this trap? Let me know in the comments. Sharing experiences helps everyone avoid common pitfalls in appliance maintenance.
Maintaining appliances effectively extends their lifespan and ensures optimal performance over the years. As someone deeply involved in troubleshooting and repair, I’ve found that having the right tools is essential for both quick fixes and routine upkeep. One tool I rely on heavily is a high-quality digital multimeter. It allows me to precisely measure voltage, current, and resistance, helping diagnose electrical issues in appliances like fridges and dishwashers with confidence. Investing in a reliable multimeter, such as the Fluke 87V, has paid off by reducing guesswork and preventing unnecessary part replacements.
Another indispensable tool is a set of metric and imperial socket wrenches. Since appliance screws and bolts vary, having versatility saves time and prevents stripped fasteners. I prefer a compact, ratcheting screwdriver set with interchangeable bits, which makes reaching awkward angles easier during maintenance tasks—like adjusting leveling feet or replacing door seals. When adjusting appliances like washing machines, a precise torque ensures stability without damaging fragile components.
For routine cleanliness, a soft-bristled brush and compressed air are irreplaceable. Dirty condenser coils can cause refrigerators to overheat, demanding more energy and risking compressor failure. Regularly cleaning these coils with compressed air from a safe distance prevents dirt buildup without risking damage. When tackling more stubborn debris, a gentle brush helps dislodge stubborn dust, keeping appliances like freezers and ovens operating efficiently. Consult this article for detailed cleaning techniques and how they impact warranty coverage.
How do I maintain my appliances over time?
Beyond tools, establishing a maintenance routine is key. I schedule quarterly inspections, checking for loose parts, wear, or corrosion. A software update, where applicable, can optimize performance—many modern appliances have firmware that benefits from periodic upgrades. Utilizing diagnostic modes in appliances like smart refrigerators and ovens provides early detection of potential issues before they escalate into costly repairs. Incorporating these steps into your routine not only prevents breakdowns but also enhances energy efficiency and preserves warranty validity.
Looking ahead, I predict that appliance maintenance will become increasingly interconnected, leveraging IoT technology to alert homeowners of issues proactively. Smart sensors will monitor components like compressors and filters, notifying users via apps. As this trend develops, investing in compatible tools and understanding basic networking concepts will become vital for DIY enthusiasts and professionals alike. For example, employing specialized diagnostic software for smart appliances can help you interpret error codes accurately and determine whether a repair warrants a professional visit or a simple fix.
Finally, I encourage you to try out a comprehensive cleaning or adjustment—like calibrating your refrigerator’s temperature sensors or cleaning condenser coils—using the techniques I’ve outlined. These small but impactful steps can dramatically improve appliance longevity and performance. Are you ready to implement these advanced maintenance tips and keep your appliances humming smoothly? Visit this guide to get started today.
Little Known Tricks That Saved My Appliance Budget
My biggest lesson was realizing that a wrench and a level could save hundreds in repair costs. Small adjustments in the leveling feet not only stabilized my washer but also extended its lifespan. This knowledge became my secret weapon, preventing frequent repairs and frustrating calls to technicians. I’ve learned that attention to detail in maintenance, especially for common issues like uneven appliances, can be transformative.
Advanced Strategies for Appliance Stability You Won’t Find Online
Beyond basic leveling, incorporating rubber pads beneath the feet added extra grip on my slippery floor, preventing accidental shifts. Regularly inspecting the suspension components and replacing worn-out leveling feet kept vibrations minimal. Trusting reputable brands for replacement parts and consulting your appliance manual ensures proper fit and function. These proactive steps might seem small but have profound impacts on appliance longevity.
Empower Yourself with Knowledge—The Journey Never Ends
Taking charge of washer maintenance was empowering. Each fix taught me patience and precision. I realized that understanding the nuances—like floor conditions and load balancing—can drastically improve performance. It’s not just about fixing problems but cultivating a mindset of continuous care. With this approach, you’ll turn routine upkeep into a reward rather than a chore.