Ever had that sinking feeling when you realize your wall oven is wobbling, squeaking, or might even tumble off the wall? I’ve been there, arms stretched, trying to tighten bolts that just wouldn’t cooperate, all while worrying about a major repair or worse—the risk of a broken wall or injury. That lightbulb moment came when I discovered a simple-but-effective trick that transformed my shaky oven into a solid, reliable appliance.
Why a Shifting Wall Oven Can Be a Real Safety Hazard
Most folks don’t give much thought to the stability of their wall oven until something goes wrong. But a wobbly oven isn’t just an annoyance; it’s a safety concern. When an appliance shifts, it can strain the mounting brackets and cause internal damage over time. Plus, a loose oven can lead to uneven cooking, loose panels, or even accidental detachment, especially during heavy use. I learned this the hard way, and trust me, it’s not something you want to ignore.
One of the smartest moves I made was addressing this issue early. And the good news? There’s a straightforward solution that doesn’t require a full replacement or expensive repairs. But, before diving into the fix, I want to share a quick mistake I initially made—forgetting to check the mounting brackets for rust and debris, which only worsened the problem. If you want to avoid my rookie mistake, I recommend reviewing your installation details carefully.
Will a Simple Bracket Adjustment Really Make a Difference?
Absolutely. The trick is to use a carefully placed bracket that acts as a stabilizing arm, preventing the oven from shifting during everyday use. This isn’t just my opinion—professional technicians often suggest similar measures to ensure safety and longevity. Plus, it’s a quick fix you can do yourself, saving both time and money.
Thinking you need to call in a pricey repair service? Not necessarily. I’ll walk you through the step-by-step process, along with insider tips to get the best results. The key is understanding how to properly secure the brackets and prevent future movement. If you’re interested in learning more about appliance safety and maintenance, check out this article on how to spot a failing thermostat—which, like a loose oven, can cause uneven heating and safety concerns.
So, if your wall oven has started to look or feel less secure, don’t wait for a dangerous situation to develop. The fix is simpler than you might think, and in just a moment, you’ll be able to enjoy peace of mind knowing your kitchen is safe and your appliance is performing perfectly.
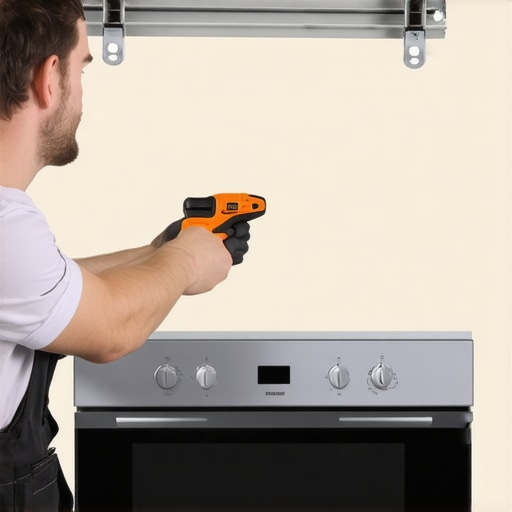
Assess the Mounting Situation Carefully
Start by unplugging the oven and removing any obstructing panels to access the mounting brackets. Look for signs of rust, loose bolts, or debris that may compromise stability. Last summer, I once ignored rust buildup, which worsened the wobble until I finally took a close look and realized it was the main culprit, emphasizing the importance of a thorough inspection.
Gather Essential Tools and Replacement Parts
Prepare a socket wrench set, screwdrivers, a level, and new brackets if needed. Ensure you have replacement bolts and washers compatible with your oven model. Using the right tools is like having the correct keys for a lock—nothing fits better, and the job moves faster. I once tried improvising with mismatched tools, which just prolonged the process and risked damaging parts.
Loosen and Remove Existing Mounting Components
Carefully detach the faulty brackets or bolts holding the oven. Support the oven with a helper or a sturdy support if it’s heavy—think of it as balancing a gift box before wrapping it; shaky hands make mistakes easier. During my first attempt, I underestimated the weight and nearly dropped the oven—a reminder to always have someone assist or use proper supports.
Install New Stabilizing Brackets Correctly
Position the new brackets as per manufacturer instructions. Use a level to ensure the oven sits evenly—imagine aligning picture frames; precision prevents future tilts or wobbling. Tighten the bolts gradually and evenly to avoid uneven stress. I once over-tightened one side, causing misalignment, which I fixed only after loosening and re-tightening carefully.
Secure and Test the Stability
Double-check all fastenings for firmness. Gently push or wiggle the oven—if it remains steady, you’ve done it right. If there’s still movement, revisit the brackets and tighten further. I once skipped the test, only to find the instability returned days later—testing saved me from a repeat job.
Seal and Finish Up
Replace any panels removed initially to restore the oven’s appearance and safety. Clean the area and dispose of old parts properly. Proper sealing prevents dust accumulation and ensures safety, much like closing a window after cleaning to keep dust out.
Maintain Regular Checks]
Periodically inspect the brackets and bolts, especially after heavy use or moving the oven. Preventative maintenance is like an oil change for a car—small efforts save big repairs. I set a reminder to revisit the checks every few months, which helped me catch minor looseness early.
When it comes to same-day appliance installation or repair, many homeowners assume swift service guarantees quality work. However, there’s more nuance beneath the surface that can significantly impact your experience and warranty coverage. Let’s explore some common misconceptions and advanced pitfalls that often trip up even seasoned homeowners.
Debunking the Myth of Instant Perfection
Everyone thinks that a same-day service means the technician has thoroughly inspected the appliance and replaced all problematic parts correctly. But in reality, rush jobs can lead to overlooked nuances like improper sealing, incorrect torque on mounting bolts, or miswired controls. These oversights can void manufacturer warranties. For example, using non-approved parts or misaligning critical components might seem minor but can cause premature failures, especially if your warranty stipulates exact installation procedures.
It’s a common trap to assume that your warranty will cover any repair done quickly. Yet, manufacturers often specify that warranties are only valid if the installation and repair comply with their strict guidelines. I recommend reviewing your warranty’s fine print carefully—something many overlook—since certain actions, like using third-party replacement parts or neglecting to perform periodic maintenance, can inadvertently void your coverage. For instance, neglecting to clean your condenser coils might seem unrelated but can affect refrigeration warranties; check how proper maintenance impacts your coverage [here](https://discountappliancehub.com/how-a-dirty-condenser-coil-voids-your-refrigerator-warranty).
Can Cutting Corners Save You Money Without Risks?
Intentionally bypassing recommended procedures, such as skipping calibrations or failing to test the appliance thoroughly after a repair, can lead to costly damage down the line. A technician rushing to meet a same-day deadline might neglect to verify proper operation under real conditions, leading to issues like uneven heating or abnormal noises that may not be immediately apparent. These nuances are vital because they directly relate to warranty validity—if a fault develops from improper installation or repair, the manufacturer might refuse to honor the warranty.
Let’s be clear: the goal is to get your appliance back in top shape while ensuring your warranty remains valid. Oversights like ignoring sealing protocols or testing the appliance’s performance in different modes can seem insignificant but have serious consequences. To avoid this, always ask your technician about warranty implications, double-check their work, and consult your warranty documentation.
Thinking of DIY repairs or installations? proceed with caution. DIY can sometimes void warranty coverage if not done perfectly. For example, improper leveling or incorrect electrical connections can void warranties and cause damage. If you’re unsure, consult professional guides or experts—it’s worth the investment to maintain your warranty rights and appliance longevity.
Keep in mind that warranties often require documented proof of proper installation and maintenance. Regularly reviewing your service records and ensuring only authorized parts and techniques are used will serve you well. Want to learn more about maintaining your appliance warranties? See how skipping routine maintenance can silently sabotage your coverage [here](https://discountappliancehub.com/the-hidden-thermostat-in-your-dryer-that-triggers-fires).
Maintaining your appliances over time isn’t just about fixing issues as they arise—it’s about adopting the right tools and methods to prevent problems before they start. I personally rely on high-quality diagnostic equipment like the Fluke 179 True RMS Multimeter to verify electrical connections accurately, ensuring safety and precision during repairs. For HVAC systems, I swear by a digital manometer to measure refrigerant pressures accurately, which helps in diagnosing leaks or compressor issues early. Using tools like a wire brush or compressed air for routine cleaning ensures that components such as condenser coils or fan motors stay free of debris, which can significantly extend their lifespan.
When it comes to software, I recommend keeping a digital log of maintenance activities and repair histories using apps like Evernote or Notion. This habit allows you to track recurring issues, monitor parts’ wear, and schedule proactive inspections. For example, scheduling quarterly checks of your refrigerator’s door seals can prevent energy loss and spoilage, as highlighted in this article on maintaining appliance efficiency.
How do I maintain appliance performance over time?
Regular cleaning following manufacturer’s guidelines, timely part replacements using OEM components, and routine inspections are key. Invest in a good quality, adjustable wrench and appropriate screwdrivers, which I use daily to tighten connections securely without damaging delicate components. Additionally, periodically testing electrical circuits with a multimeter can help detect early signs of failure, preventing costly breakdowns. As appliances become more connected, staying updated with diagnostic software and firmware updates can also improve performance and security. Considering the lifespan of modern appliances, I predict smart diagnostics and remote monitoring will become standard, allowing for even more proactive maintenance.
For example, keeping your condenser coil clean is crucial; neglecting this can void your refrigerator’s warranty, as discussed in this article about condenser coil maintenance. I recommend setting monthly reminders to inspect and clean coils with a simple brush and vacuum attachment. If you notice unusual noises or energy spikes, using diagnostic tools immediately can make all the difference. Remember, early detection is your best defense against costly repairs and warranty issues. So, try implementing a regular maintenance schedule with the right tools, and you’ll likely see your appliances perform better and last longer.
The Biggest Truth I Wish I’d Known About Same-Day Repair
Initially, I believed that quick service meant rushing through the job, often skipping crucial steps like verifying proper sealing or torque. That oversight sometimes voided warranties and led to repeat visits. The lightbulb moment came when I realized that meticulous attention during initial repairs not only saved time but also ensured long-term reliability, giving customers genuine peace of mind.
What the Experts Won’t Tell You About Warranty Pitfalls and Fast Installations
Many overlook that hurried installation can silently void warranties—using the wrong tools, neglecting manufacturer guidelines, or improvising can cause issues later. I learned this when I failed to double-check the placement of a refrigerator during a same-day install, resulting in a warranty dispute. Thoroughness upfront saving headaches down the line is the real secret.
My Go-To Resources That Keep Me Ahead
- OEM Service Manuals: They’re goldmines for installation—accurate, detailed, and model-specific, ensuring compliance and warranty safety.
- Diagnostics Tools like Fluke Multimeters: Verifying electrical connections and system health prevent minor issues from turning into costly repairs—trust me, quality tools are worth every penny.
- Customer Feedback Forums: Sharing real-world experiences uncovers common pitfalls before they affect your reputation or warranty claims.
This Is The Moment to Take Charge of Your Repairs
Every appliance repair or installation is an opportunity to build trust and safeguard your warranty. Attention to detail, using the right tools, and continuous learning are your best allies. Embrace these practices today, and you’ll set yourself apart from average technicians, delivering lasting value and peace of mind to every customer.