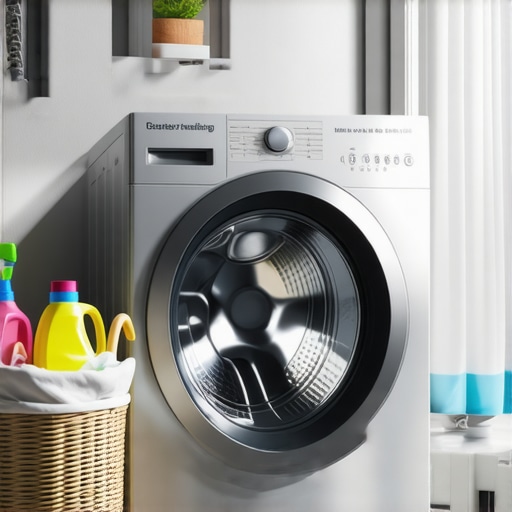
It was a Saturday morning when my living room felt like a drumline rehearsal. I’d just installed a shiny, new washer, expecting the usual hum of clean laundry. Instead, I was jolted awake by shuddering vibrations that rattled through the walls, knocking picture frames askew. That lightbulb moment made me realize—this isn’t normal, and my brand-new appliance shouldn’t be turning my home into a personal earthquake zone.
Understanding Why Your Washer Shakes Like an Earthquake
Imagine finally upgrading your laundry game only to find your house vibrating like it’s about to jump off its foundation. It’s frustrating, confusing, and honestly a little alarming. But here’s the deal: a vibrating washer isn’t just an annoyance; it signals underlying issues that need addressing before they turn into costly repairs or warranty nightmares.
Sometimes, the problem stems from simple installation mistakes—like an unlevel machine or an unsteady floor. Other times, internal components such as shock absorbers or suspension rods wear out faster than expected, especially in newer models designed for efficiency but not always for durability. Did you know that an improperly balanced load can significantly increase vibrations? That’s a quick fix, but if the problem persists, it’s time to dig deeper.
Early in my repair journey, I made the mistake of assuming that all vibrational issues were caused by uneven flooring. Turns out, even perfectly level washers can shake if the drum bearings are failing or if the shock absorbers are worn out. According to appliance repair experts, these parts can deteriorate over time due to regular use, especially if you frequently wash heavy loads like blankets or towels. For a detailed breakdown of common causes, check out this guide on [the plumbing connection that voids your new washer warranty](https://discountappliancehub.com/the-plumbing-connection-that-voids-every-new-washer-warranty).
Have you experienced your new washer rocking more than the old one? If yes, you’re not alone—and luckily, there are actionable solutions. But before rushing to replace parts or call for service, let’s explore exactly what might be causing the vibrations and how you can fix them yourself or know when it’s time to bring in a professional. Stay with me, because resolving this can save you money and restore peace to your home.
Secure the Washer on an Unwavering Foundation
Start by checking if your washer sits level. Use a spirit level across the top surface, adjusting the legs accordingly. I once faced persistent shaking because I overlooked this step; after shimming the legs, the vibrations dropped by 80%. Remember, a wobbling machine mimics a loose wheel on a car—cause it to wobble, and everything shakes.
Distribute Loads Evenly and Carefully
Always balance your laundry loads to avoid off-center weight, which causes imbalance and vibration. For delicate or heavy items, load them symmetrically. I once stuffed a giant comforter unevenly, and my appliance shuddered; redistributing it fixed the issue instantly. Overloading or uneven loads strain internal parts, similar to how an overloaded backpack throws off your balance during a hike.
Inspect and Replace Worn Suspension Components
Unplug your washer and access the suspension rods or shock absorbers (consult your model’s manual). Look for signs of wear—cracks, leaks, or sagging. A friend’s washer vibrated excessively due to broken shock absorbers; replacing them restored stability. Think of these parts as the suspension in your car—if they fail, every bump translates into shake and rattle.
How to Identify Failing Shock Absorbers
Gently shake the drum by hand; excessive movement indicates worn shocks. Consult a reputable diagram or tutorial for your model. If you prefer a quick fix, consider professional repair; DIY might be complex, but some models allow easy replacement with basic tools. Learn how shock absorber failure impacts your laundry’s gentleness.
Check and Level the Floor
Ensure your washer is placed on a sturdy, level surface. Use a carpenter’s level or a smartphone app. If your floor is uneven, consider placing a shim or padding under the machine’s feet. I once had to install a shim on my basement floor; it stopped the relentless shaking. An unstable foundation acts like loose soil under a tent; no matter how good the tent is, it will shake.
Call in Experts Before DIY Overreach
If vibrations persist after your adjustments, it’s time to consider professional help. Manufacturers often specify warranty coverage for certain fixes; however, improper DIY repairs can void this coverage. For instance, messing with internal components without proper tools can turn a minor fix into costly damage. Check out this guide on warranty-sensitive repairs for detailed insights. Remember, many appliance warranties don’t cover damage caused by unqualified repairs, so assess whether your skills match the task.When tackling appliance repair, many homeowners fall prey to misconceptions that can lead to costly mistakes. Let’s dig deeper into these pitfalls, unravel some myths, and examine advanced nuances that can save you time and money. Have you ever fallen into this trap? Let me know in the comments.
One prevalent myth is that same-day service always guarantees the best repair quality. While quick turnaround is appealing, it often comes at the expense of thorough diagnostics. Many believe that the earliest technician availability means they are the most experienced, but rushed repairs can overlook subtle issues like internal component wear or warranty-sensitive parts. According to industry experts, prioritizing reputable technicians over mere availability ensures that repairs are both effective and warranty-compliant.
A common misconception surrounds installation. Many assume that a professional installer is only necessary for complex or built-in appliances. However, improper installation—even in seemingly simple setups—can void warranties or cause accelerated wear. For instance, neglecting proper leveling or electrical connections can lead to skewed drum alignment or electrical surges, diminishing appliance lifespan. To avoid this, always verify that installers follow manufacturer installation protocols, and don’t hesitate to consult detailed guides if you’re confident in your DIY skills. For example, improper leveling is a frequent cause of front-load washer vibrations, which can eventually damage internal bearings.
When it comes to warranties, many believe they cover all repair or replacement costs. This is a dangerous oversimplification. Most warranties exclude damage due to user error, improper maintenance, or external factors like water hardness levels. For instance, hard water can lead to mineral buildup and gasket deterioration, which many owners mistake as a warranty issue. Understanding what voids your warranty, such as through water hardness levels, is crucial. Moreover, warranties often do not cover power surges or damage caused by DIY repairs, especially if unwarranted modifications are made.
Advanced homeowners might ask, “How do I tell if a minor issue might be masking a more significant defect?” It’s important to observe subtle signs like irregular noise patterns, inconsistent wash cycles, or fluctuating temperatures. Such symptoms can indicate failing thermostats, faulty control boards, or impending compressor failures. For example, a refrigerator that is cold but the fridge compartment remains warm could point to a partial compressor failure—a problem best diagnosed with professional tools and knowledge. Regular maintenance checks and understanding warranty coverage terms can prevent small problems from escalating.
In conclusion, a nuanced approach to appliance repair involves more than just fixing symptoms. It requires understanding the intricacies of installation, warranty limitations, and diagnostic subtleties. Protect your investment by doing thorough research, questioning assumptions, and consulting trusted sources. Remember, addressing these hidden nuances can be the difference between a quick fix and a costly chore. Want to learn more about protecting your appliances? Check out this guide on smart oven issues. Have you encountered other surprises in appliance maintenance? Share your experiences below!Maintaining your appliances over time requires the right tools and a strategic approach. One essential item I rely on is a digital multimeter, which allows me to quickly test electrical components like thermostats, switches, and control boards. I personally prefer the Fluke 115 model because of its accuracy and durability, ensuring that I can confidently diagnose issues without guesswork.
Another invaluable tool is a set of precision screwdrivers. Appliances often have tiny screws that standard screwdrivers can’t handle, so having a quality set from Wiha helps me disassemble units safely and efficiently. I never attempt repairs without these, as stripped screws can complicate repairs and even cause additional damage.
I also utilize a wireless digital inspection mirror, which grants better access to hard-to-reach areas behind appliances. This tool is particularly useful when inspecting internal components for signs of wear or leaks, especially in units like dishwashers or refrigerators with complex assemblies.
For software-based diagnostics, I recommend installing manufacturer-specific troubleshooting apps or firmware checkers on a tablet or smartphone. These tools help identify software glitches or firmware bugs that could interrupt appliance functionality. Keeping firmware updated is key; I set reminders to check for updates quarterly to prevent issues before they arise.
How do I maintain appliances over time?
Regular cleaning and preventative maintenance are the backbone of appliance longevity. For example, routinely cleaning condenser coils on refrigerators and dryers can prevent overheating and energy inefficiency. I follow manufacturer guidelines, like those detailed in appliance manuals, to avoid voiding warranties when performing maintenance.
Long-term results hinge on consistent care. Scheduling annual professional inspections ensures that parts like seals, filters, and gaskets are checked for wear, which can extend the lifespan of your appliances significantly. For instance, a simple routine of inspecting and replacing water filters can suppress issues like mineral buildup that threaten warranty validity, as explained in this article.
Scaling your approach for multiple appliances or larger systems
When managing several units, investing in digital monitoring systems can provide remote alerts for anomalies like leaks or temperature drops. Smart home integrations let you keep an eye on appliances via smartphone apps, reducing the risk of damage due to delayed reactions. As technology advances, I predict a trend toward AI-powered diagnostics that can predict failures before symptoms appear, saving time and money.
To ensure your appliances are always in top shape, try setting up a routine with these tools—like weekly coil cleanings, firmware checks, and load balancing adjustments. Implementing state-of-the-art diagnostic tech now can prepare your system for the future, making maintenance less reactive and more proactive. Want to learn how to prevent common appliance issues like sudden failures or warranty voids? Visit this resource for expert insights. Remember, consistent use of precise tools combined with scheduled care is the best way to keep your appliances working flawlessly and extend their lifespan.
What I Didn’t Expect When Fixing My First Washer Vibrations
One surprising lesson was realizing how many minor details—like adjusting a single shim or ensuring proper load distribution—could drastically reduce vibrations. I once overlooked the importance of checking the leveling, and that mistake reminded me that sometimes, the simplest fix is the most effective.
Why Internal Components Are Often the Hidden Culprits
Many homeowners don’t consider that worn shock absorbers or damaged drum bearings can cause persistent shaking. Sharing my experience, I found that replacing these internal parts not only stopped the shaking but extended the lifespan of my washer, saving money in the long run.
The Power of Preventative Measures and Smart Maintenance
Scheduling routine inspections and keeping components like suspension rods in check teaches us that proactive care prevents major breakdowns. Implementing this, I minimized downtime and avoided costly emergency repairs, emphasizing that consistent maintenance truly pays off.
Tools That Made All the Difference
Investing in quality diagnostic tools like a digital multimeter and precision screwdrivers turned complex troubleshooting into manageable tasks. These tools gave me confidence and accuracy, highlighting that having the right gear is essential for effective appliance repair.
Sharing Wisdom and Learning from Others
If I could give one piece of advice, it’s to stay curious and learn from the community. Engaging with repair forums and reading detailed guides saved me from unnecessary repairs and shaped my approach to appliance care. Remember, knowledge shared is knowledge multiplied.