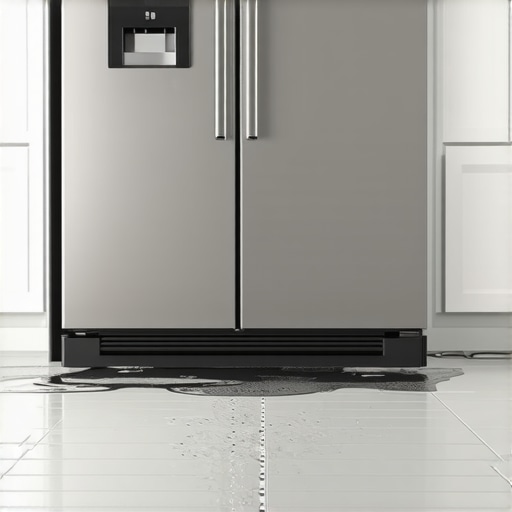
It was a typical Saturday morning when I stepped into my kitchen and noticed a small puddle forming by my refrigerator. At first, I thought maybe I spilled water while cleaning, but then I realized — this wasn’t just a spill. The water kept growing, pooling on my floor, threatening my brand-new hardwood. Frustration and a dash of panic set in. I’d seen this before and knew that ignoring it could lead to costly repairs or worse, damage to my flooring.
Understanding Why Water Leaks Are More Common Than You Think
For many homeowners, a leaking refrigerator is one of those sneaky problems that can catch you off guard. Often, it’s not just a random mishap but a sign that something’s off inside your fridge. The good news? Most causes are simple to identify and fix—if you know what to look for.
Are You Overlooking the Obvious?
Early on, I made the mistake of assuming the leak was due to a major component. Turns out, many times, the culprit is something as straightforward as a clogged defrost drain or a faulty door seal. These issues are surprisingly common, and addressing them promptly can save you from more significant repairs down the road. I learned this the hard way when I missed a tiny crack in my door gasket, which allowed warm air to cause condensation and leaks. To avoid my mistake, I recommend checking your door seals regularly. Need help with this? See how to test your fridge door seal.
Beyond the gasket, other common reasons include a blocked defrost drain that causes water to back up into the fridge, or a broken water inlet valve that leaks onto the floor. According to the Department of Energy, addressing small leaks early can improve your fridge’s efficiency and prevent water damage. So, understanding the root cause matters a lot more than you might think.
Let’s Get to the Bottom of this — and Keep That Water Where It Belongs
Today, I’ll guide you through easy steps to identify and fix the typical causes of refrigerator leaks. By the end, you’ll know whether it’s a quick fix like replacing a gasket or something more involved that might need professional help. Are you ready to turn your frustrating leak into a simple DIY repair? Or perhaps you’ve faced this problem already? Share your experience below—I’d love to hear your story! Next, let’s explore what to do immediately when you spot water on your kitchen floor and how to prevent future leaks from disrupting your day.
Identify the Leak Source Fast
Start by unplugging the refrigerator to prevent electrical hazards. Carefully move the appliance out from the wall to inspect its back and underside. Look for wet spots, ice buildup, or pooled water; these clues indicate where the leak originates. Once located, check common culprits like the door gasket, defrost drain, or water inlet valve. I once traced a leak I ignored for days to a clogged defrost drain; clearing it resolved the problem instantly. Use a flashlight for better visibility and note any cracks, tears, or dark residues.
Test and Replace the Door Seal
Close the door on a dollar bill, then try to pull it out. If the bill slips easily with minimal resistance, your gasket might be faulty. For a more precise check, use a dollar bill or a piece of paper all around the door edge. If you detect gaps, replace the gasket promptly. To do this, loosen screws or clips holding the old seal and install the new one, ensuring a snug fit. An effective gasket prevents warm air from entering and causing condensation that leads to leaks. I once replaced mine following a quick video tutorial, saving me hundreds in repairs.
Clean and Clear the Defrost Drain
The defrost drain channels water from defrost cycles into the drainage pan. If clogged, water can back up and leak. Remove the appliance’s panel or use a turkey baster to flush warm water through the drain opening. Use a pipe cleaner or flexible wire to dislodge stubborn debris. During my own repair, I used a mixture of warm water and vinegar to clear a stubborn clog. Be cautious to avoid damaging the drain or piping. Periodic cleaning prevents future blockages and is a simple maintenance step you shouldn’t skip.
Inspect and Repair the Water Inlet Valve
This valve controls water supply to the ice maker or water dispenser. A faulty or cracked inlet valve can leak water onto the floor. First, turn off the water supply at the valve, then disconnect the water line from the inlet valve. Check for cracks, mineral deposits, or corrosion. Replacing the inlet valve involves disconnecting electrical connectors and removing mounting screws. Be sure to turn off the water supply before starting; I once neglected this and created a small flood—lesson learned! To ensure a proper fix, verify if the new valve fits your model and secure all connections tightly.
Fix or Replace Faulty Components Quickly
If you find a damaged gasket, clogged drain, or broken water inlet, replacing the part promptly restores your fridge’s function. When replacing parts, always consult your appliance’s manual or a professional if unsure. For instance, replacing a broken water filter housing can be straightforward; follow detailed guides like this step-by-step tutorial. Upgrading worn-out components reduces the chance of future leaks and prolongs your appliance’s lifespan. Remember, tackling leaks early minimizes water damage and can prevent costly repairs.
Secure, Test, and Finalize Repair
After repairs, reconnect the appliance, turn on the water supply, and slide it back into position. Check all repaired areas for leaks by pouring a small amount of water if necessary. Run a short cycle to confirm that the leak has stopped. I once fished a small leak by meticulously inspecting every connection and component. Mark any weak points for future maintenance. If everything looks dry and operation is normal, you’ve successfully stopped the leak—or at least narrowed down the cause for professional help if needed.
Want to troubleshoot your fridge more effectively? For smart models that won’t connect to Wi-Fi, see how to resolve connectivity issues quickly. Proper diagnosis and timely repairs ensure your fridge runs smoothly, saves energy, and keeps your food cold.
When it comes to appliance repair, many homeowners assume that same-day service and warranties guarantee a flawless experience. But let’s dig deeper and uncover some common misconceptions. Contrary to popular belief, not all repair services are created equal, and understanding the nuances can save you time and money. For instance, some companies advertise quick turnaround times, but they may prioritize volume over quality, leading to rushed repairs that eventually fail. Moreover, the fine print of warranties often contains exclusions—like limited coverage or conditions that void your guarantee if ignored. According to consumer reports, a significant number of warranty claims are denied due to overlooked clauses, highlighting the importance of reading the fine print thoroughly.
Another trap homeowners fall into is assuming that installation is a simple process covered by the same warranty. However, improper installation can void your warranty entirely or cause damage that isn’t covered, emphasizing the need for professional, certified technicians. For example, incorrectly installed water lines for refrigerators can lead to leaks that damage your flooring, despite the appliance being under warranty.
Many believe that same-day service means an immediate fix, but in reality, it often entails quick diagnostics rather than a full repair, especially during busy seasons. This can lead to repeat visits and extended downtime if the root cause isn’t fully addressed from the start.
To truly benefit from your appliance warranties and repair services, ask detailed questions about coverage limits, the technician’s certifications, and the company’s reputation. Doing so helps avoid the pitfalls of false promises and ensures you’re protected in the long run. For example, if your smart fridge isn’t connecting to Wi-Fi, a comprehensive troubleshooting guide can help you diagnose issues like sensor faults, which are sometimes overlooked by technicians unfamiliar with smart technology.
Remember, being an informed consumer means not just trusting the sales pitch but understanding the underlying conditions that govern warranties and service promises. So, the next time you schedule a repair or installation, make sure to read the fine print and ask about what is truly covered. Have you ever fallen into this trap? Let me know in the comments.
Tools That Make Maintenance Easier and More Effective
Keeping your appliances in top shape requires the right equipment and a systematic approach. Personally, I swear by a few specific tools that streamline the maintenance process. A quality digital multimeter is invaluable for diagnosing electrical issues—it’s like having a medical kit for your appliances, allowing you to test circuits, resistance, and voltage with pinpoint accuracy. I use the Fluke 117 for its reliability and user-friendly interface, which makes troubleshooting less daunting.
Another essential is a flexible drain cleaning brush, which I use regularly to clear defrost drains safely. This simple tool helps prevent leaks caused by clogged channels, saving me costly repairs down the line. For more stubborn clogs, a small hand-held plumber’s snake does wonders, especially when combined with a natural cleaning solution like vinegar and baking soda, which is gentle yet effective.
High-Impact Software and Diagnostic Aids
Beyond physical tools, modern diagnostics software greatly enhance troubleshooting. Many smart appliances come with built-in diagnostic modes; I use a specialized app that interfaces with Wi-Fi-enabled appliances to run comprehensive checks. For instance, when my smart washer stops mid-cycle, I run the sensor fault diagnostic via the app, which pointed me to a thermal sensor issue that was easy to replace. These apps often provide step-by-step guides, making DIY repairs accessible even for less experienced homeowners.
If you’re working with smart appliances, I recommend using the manufacturer’s diagnostic tools and keeping firmware updated to prevent software glitches from mimicking hardware failure. Sometimes, a simple reset—like clearing the cache or performing a hard reboot—can resolve persistent glitches, which I discuss in detail at this guide.
How Will Future Trends Shape Your Maintenance Routine?
Looking ahead, I predict an increased integration of IoT (Internet of Things) devices that will allow remote diagnostics and even predictive maintenance. When connected properly, these tools can alert you before a minor issue causes major damage, saving time and money. Expect to see more AI-driven diagnostics, which will do much of the heavy lifting in identifying problems accurately—potentially even ordering parts automatically. To stay ahead, I plan to invest in compatible apps and firmware updates, turning my smartphone into a full-service maintenance hub.
Ever Wonder How to Keep Your Appliance Troubleshooting Skills Sharp?
One method I recommend is regularly practicing test procedures on your appliances—simulating common faults and seeing if your diagnostic tools detect them correctly. It builds confidence and ensures readiness when real issues occur. For example, try manually simulating a sensor fault on your washer following this tutorial. Mastering this process minimizes downtime and keeps your appliances running smoothly longer.
Remember, combining the right tools with consistent maintenance routines is key to long-term appliance health. Regularly inspecting, cleaning, and testing your appliances ensures their longevity and optimal performance. Don’t wait for a leak or breakdown—stay proactive and keep your systems humming. Want to give your maintenance routine a boost? Try calibrating your multimeter today and see how precise troubleshooting can make a difference!
What The Hardest Lesson Taught Me About Appliance Fixes
One profound realization was that most appliance issues are simpler than they appear—it’s often the overlooked details that cause the biggest headaches. For instance, a tiny crack in a refrigerator gasket can lead to major leaks, but catching these early saves time and money. Another lesson? Never underestimate the importance of regular maintenance; small checks like testing door seals or cleaning filters can prevent costly repairs. My mistake of ignoring a slowly worsening leak taught me that proactive care is your best defense. Remember, understanding the root cause rather than just addressing symptoms is key to long-term success.
Crafting a Toolbox That Empowers DIY Fixes
Over time, I’ve curated a set of tools that make troubleshooting both effective and enjoyable. A reliable digital multimeter has been a game-changer—detecting electrical faults quickly and accurately. Coupled with a flexible drain cleaning brush and a small plumbing snake, I can handle most common issues without calling in a professional. The trust I have in these tools stems from their versatility and durability. For those serious about appliance longevity, investing in quality gear is worth every penny; it saves stress and keeps your appliances humming smoothly.
Feeling Ready to Make a Real Difference
Repairing appliances doesn’t have to be intimidating. With the right attitude, tools, and knowledge, you can tackle issues confidently—even within your busy schedule. Imagine gaining the skills to identify and resolve leaks, faulty seals, or clogged drains—saving you time, money, and frustration. The future of appliance maintenance is moving toward smart diagnostics and remote troubleshooting, but your proactive approach remains invaluable. You’re already ahead by reading up and preparing for minor repairs—the best way to ensure your appliances serve you well for years to come. So, why wait for the next leak to surprise you? Start today, and keep your home running smoothly.