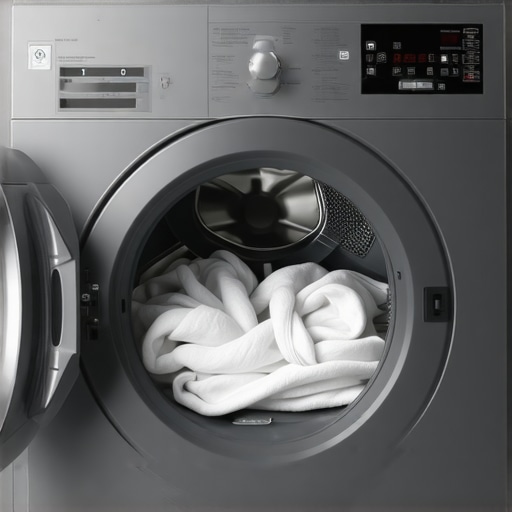
It was a frustrating Saturday morning when my gas dryer decided to spin but refused to produce any heat. I stood there, watching the drum turn relentlessly without so much as a hint of warmth, feeling a mix of annoyance and helplessness. Have you ever faced that moment of helplessness with a household appliance? That dreadful realization that your essential household helper, the dryer, has suddenly turned against you? Well, I’ve been there, and I want to share how I navigated through this issue.
Understanding Why Your Gas Dryer Spins but Doesn’t Heat
One thing I learned early on was that this problem isn’t as mysterious as it seems. The dryer may spin perfectly because the motor and belt are working well; however, the heating element or related components might be malfunctioning. For example, a blown thermal fuse or faulty thermostat can cut off the heat supply while leaving the motor unaffected. Did you know that according to appliance repair experts, a common cause of this specific problem is a failed igniter or a tripped gas valve? It’s worth noting that safety protocols in gas appliances can cause issues to arise unexpectedly, especially if maintenance or inspections are neglected.
If you’re skeptical about tackling this yourself, you’re not alone. I used to think only professionals could handle gas appliance repairs, but I soon realized that many issues are manageable with a little DIY know-how. Just like I once made the mistake of ignoring small irregularities in my appliances, I learned that early diagnosis can save you both money and stress. To avoid common pitfalls, I recommend reading through [this guide on identifying bad thermostats](https://discountappliancehub.com/how-to-identify-a-bad-thermostat-in-your-refrigerator), which, while about refrigerators, shares valuable troubleshooting principles applicable to dryers too.
So, what’s next? Now that I’ve set the stage with what might be wrong, let’s dig into the practical steps you can take to diagnose and fix your gas dryer’s heating issue. But first, I want to ask—have you ever faced this exact problem with your dryer? If so, keep reading; the solutions I found might just save your day.
Check the Gas Supply First
Ensure that the gas valve to your dryer is fully open. Sometimes, the simplest fix is overlooked—like a closed valve preventing the gas from reaching the burner assembly. I once found my gas valve inadvertently closed after a plumbing upgrade; opening it restored heat within minutes.
Test the Igniter and Flame Sensor
Access the dryer’s front panel and locate the igniter. Use a multimeter to check for continuity—if it reads ‘open,’ replace the igniter. A faulty igniter won’t produce the necessary spark to ignite the gas. Similarly, inspect the flame sensor; a dirty or malfunctioning sensor will prevent the gas from staying lit, leaving your dryer spinning but not heating. Replacing these parts is straightforward if you follow manufacturer instructions, saving you a service call.
Inspect the Gas Valve Solenoids
The gas valve has multiple solenoids that open and close to regulate gas flow. Use a multimeter to test these coils for proper resistance. If a coil is burned out, it won’t open the gas valve, and you’ll need to replace it. Remember, working with gas components can be hazardous; always disconnect power and gas before starting repairs.
Examine the Thermal Fuse and Thermostat
Blown thermal fuses or defective thermostats can interrupt the heating cycle. Disconnect power, open the dryer panel, and locate these safety devices. Use a multimeter to test for continuity. If the fuse is blown, it’s an indicator of underlying issues like overheating, so investigate and address the root cause before replacing. For detailed guidance, check out this troubleshooting article.
Clean the Ventilation System
A clogged vent restricts airflow, causing the dryer to overheat and trip thermal safety features. Disconnect the dryer, detach the vent hose, and clear out lint buildup using a brush or vacuum. Regular cleaning of vents not only fixes heating issues but also enhances dryer efficiency and safety.
Verify the Wiring and Electrical Connections
Loose or damaged wires can prevent components from functioning correctly. Carefully inspect connections to the igniter, gas valve, and sensors. Secure any loose wires and replace damaged wiring. If you’re unsure, consult a professional, especially when dealing with gas connections.
Test the Control Board
The electronic control board manages the sequence of operations. If all other components test fine, but the dryer still doesn’t heat, the control board may be faulty. Visual inspection for burn marks or corrosion can provide clues. Replacing an electronic board requires careful handling but follows a straightforward process according to your model’s manual.
 Many homeowners assume that installation, repair, and warranty processes are straightforward, but in reality, there are hidden nuances that can cause unexpected issues. One common myth is that following basic online tutorials guarantees a perfect fix; however, these guides often overlook subtle differences between models or brands that can lead to costly mistakes. For example, incorrect grounding or misinterpreting wiring diagrams may not cause immediate failures but can result in long-term damage or safety hazards, as highlighted by experts emphasizing proper electrical practices.
Another overlooked aspect is the importance of understanding warranty fine print. Many believe that a repair or part replacement automatically preserves their warranty, but manufacturers frequently require that repairs be performed by certified technicians or that specific procedures are followed. Failing to do so may void the warranty entirely, leaving you unprotected when genuine issues arise. Always read the warranty documentation carefully and keep records of any maintenance or repairs to avoid disputes.
What’s the Impact of Skipping Professional Inspection After DIY Fixes?
One of the most critical mistakes is neglecting to have a professional inspect your work, especially after significant repairs. DIY fixes might seem successful initially, but subtle faults like loose connections or improper sealing can develop into larger problems like refrigerant leaks or electrical shorts. According to appliance specialists, a comprehensive inspection can catch these issues early, saving you from costly repairs later. Moreover, some manufacturers require verification by licensed technicians to validate warranty claims, making professional oversight essential. Have you ever fallen into this trap? Let me know in the comments.
When it comes to same-day service, a common misconception is that it always guarantees a complete and long-lasting fix. While quick turnaround is convenient, rushing repairs without thorough diagnostics might only provide temporary relief, with problems recurring soon after. It’s crucial to ask your service provider about their diagnostic process and ensure they use genuine parts and follow industry standards, which significantly impacts the longevity of repairs. Remember, well-informed maintenance is key to avoiding recurrent issues and ensuring your appliances perform optimally over their lifespan.
Being aware of these hidden nuances can save you money, time, and safety headaches down the line. Don’t let misconceptions trap you into ineffective solutions—approach repairs with a combination of DIY knowledge and professional guidance. Want to master more appliance repair secrets? Check out this detailed guide on freezer issues or explore preventative maintenance tips for dishwashers. Have you ever fallen into this trap? Let me know in the comments.
Maintaining your household appliances isn’t just about fixing issues as they arise; it’s about proactively investing in the right tools and adopting strategic practices that prolong their lifespan and enhance efficiency. Over the years, I’ve refined a toolkit that combines both basic and advanced equipment, ensuring I can handle most repairs without needing to call in a professional. This not only saves money but also provides peace of mind, knowing you’re prepared for common hiccups.
Personal Toolkit for Long-Term Appliance Care
My go-to tool is a high-quality multimeter, which I use to diagnose electrical issues precisely. I’ve learned that cheap multimeters can give false readings, leading to unnecessary replacements. For example, testing the thermal fuse in my dryer with a reliable multimeter helped me identify a faulty component that was causing intermittent heating problems—an issue I previously attributed to wiring or control boards. Investing in a multimeter with at least 600V AC/DC and ohmmeter functions ensures versatility and accuracy.
Another essential is a digital infrared thermometer. This device allows me to monitor temperature gradients across appliances like fridges and ovens, helping identify abnormal heat patterns that might indicate inefficiencies or impending failures. For instance, checking the temperature differences in my refrigerator’s compressor coils helped me recognize when they were starting to clog, prompting timely cleaning and preventing overheating.
Software and Diagnostic Apps Making Life Easier
On the tech side, I recommend using appliance-specific diagnostic apps or manufacturer software if available. Many modern appliances come equipped with self-diagnostic features accessible via control panels or companion apps. These tools can pinpoint error codes or malfunctions, saving hours of guessing work. For older models, referencing detailed manuals or online forums dedicated to specific brands has been invaluable. For instance, troubleshooting a complex control board issue became straightforward after consulting expert forums, where members shared pinout diagrams and reset procedures.
Future Trends: Smarter, Connected Maintenance
Looking ahead, I predict an increasing integration of IoT technology into household appliances. Future appliances might come with built-in sensors that alert you when parts are nearing failure or require maintenance. Upgrading to such appliances will mean fewer surprises and longer intervals between repairs, making it essential to stay informed about software updates and sensor calibrations.
What’s the Best Way to Maintain Your Appliances Over Time?
One method I swear by is establishing a regular maintenance schedule using checklists tailored to each appliance. For instance, cleaning refrigerator coils biannually or inspecting door seals monthly can prevent common problems. Remember, prevention is often more cost-effective than repairs. Check out this article for detailed maintenance routines that ensure your dishwasher remains trouble-free.
If you’re ready to elevate your maintenance game, I highly recommend trying a digital infrared thermometer combined with a multimeter for comprehensive health checks. These tools empower you to catch issues early, saving you from costly repairs or replacements down the line. With the right equipment and regular upkeep, your appliances can serve you reliably for years to come, no matter the brand or complexity.
The Hardest Lesson I Learned About installation,appliance repair,warranty,same-day service
One of my biggest surprises was realizing that rushing into repairs without full diagnostics often led me to overlook small yet critical details. I once replaced a thermostat in my fridge only to find the problem persisted because I didn’t check the wiring continuity thoroughly, a mistake that cost me both time and money.
3 Myths About installation,appliance repair,warranty,same-day service That Held Me Back
I believed that DIY repairs voided warranties, but in truth, following proper procedures and keeping records can actually support your warranty claims. Similarly, I thought all repairs needed professional tools, but with the right basics, I managed several fixes myself confidently.
What Experts Won’t Tell You About installation,appliance repair,warranty,same-day service
Sometimes, service technicians provide quick fixes that only temporarily solve the problem, leaving underlying issues unaddressed. Asking about the root cause and understanding the full repair process has helped me avoid recurring problems and expensive service calls.
My Essential Toolkit for appliance repair mastery
Investing in quality tools like a reliable multimeter and infrared thermometer transformed my troubleshooting confidence. These tools turn guesswork into precise diagnostics, helping me identify issues early and save on unnecessary replacements.
Where to Go from Here
If you’re looking to improve your appliance maintenance skills, start building your toolkit with essential items and learn from trusted resources. Remember, consistent proactive care and a few handy tools can extend your appliances’ lifespan significantly. Ready to take control of your household repairs? Share your experience below and let’s learn together!