
I was standing in my laundry room at half-past midnight, staring at a dryer that sounded like it was trying to digest a bucket of gravel. Every rotation of the drum sent a shudder through the floorboards, and I was already mentally calculating how much a new unit would set me back. I’ve seen this a thousand times in my years of tinkering—the panic that sets in when a major appliance starts acting like it’s possessed. You start wondering if you need an expert guide to appliance repair and installation today or if you should just throw in the towel. But before you reach for your wallet, let me tell you about the $0.50 solution I found after almost tearing my hair out.
Stop the Chaos Before You Order a Replacement
It’s easy to assume the worst when your dryer starts rattling. My first big mistake—years ago, back when I didn’t know any better—was assuming the motor was shot. I spent hours disassembling the whole machine, only to realize I’d overlooked the simplest possible fix. I actually ended up causing more damage because I didn’t understand the shipping bolt error that ruins new machines, even though this was an older unit. The real culprit? A single, loosened drum support screw that had backed out just enough to let the drum wobble against the glide. Today, I’m going to show you exactly where that screw lives and how to tighten it so your laundry day goes back to being boring and quiet. Have you ever been convinced your appliance was dead, only to find out it was something tiny?
Does a single screw really have that much power over your peace and quiet?
Absolutely. Dryers are essentially big, hot, spinning boxes of vibration. If one fastener loses its grip, the physics of the whole machine shifts. While you might worry about why your dryer drum belt snapped, a rattle is often just a loose connection crying for help. According to the experts at RepairClinic, a significant portion of appliance noise complaints stem from simple mechanical looseness rather than terminal motor failure. If you catch it early, you avoid the heavy lifting of a full same-day appliance repair. We’re going to dive into the housing, find that specific screw, and talk about why a little thread-locker might be your new best friend. It’s about being realistic: you don’t always need a pro, but you do need the right ten minutes of focus.
Turn Off the Power and Open the Hood
Before you even touch a screwdriver, you have to cut the juice. I’ve seen enough sparks in my time to know that a dryer’s 240-volt connection isn’t something to gamble with. Pull the plug from the wall, or if you can’t reach it, flip the breaker. Once the machine is cold and dead, you’re ready to play detective. For most modern dryers, the easiest way into the ‘belly of the beast’ is through the back panel. You’ll see a perimeter of hex-head or Phillips-head screws. Don’t just unscrew them randomly; organize them on a magnetic tray or a piece of tape. Losing one screw is how you end up needing an expert guide to appliance repair and installation today simply because the casing won’t stay shut. I remember the first time I did this; I was so confident I didn’t need to organize anything, and I spent twenty minutes on my hands and knees looking for a screw that had rolled into the floor drain. Use a nut driver—it’s much less likely to strip the heads than a standard drill.
Locate the Culprit Behind the Casing
Once the panel is off, you’re looking for the drum support. This is usually a metal bracket held in place by two or three heavy-duty fasteners. Give the drum a gentle shove with your hand. If you hear a ‘clack’ or see a gap opening up between the bracket and the machine’s frame, you’ve found your ghost. This is similar to how the washer agitator bolt that always loosens over time causes that rhythmic thumping in laundry rooms. If the screw is loose but not missing, don’t just tighten it and call it a day. The vibration that loosened it once will do it again in six months. 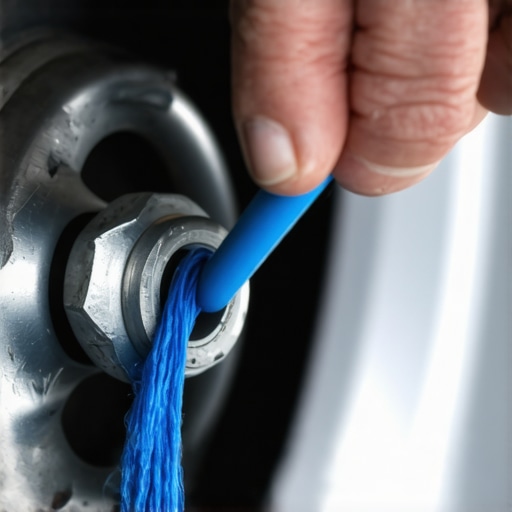
Use This Trick to Keep Screws from Vibrating Loose
This is where the $0.50 solution comes in: blue thread-locker. It’s a liquid you apply to the threads of a bolt that hardens into a plastic-like bond. It’s strong enough to resist vibration but weak enough that you can still break it loose with a wrench if you ever need to do a full same-day appliance repair later on. Back the screw out almost all the way, dab a tiny drop of the blue liquid onto the threads, and then drive it home. I learned this the hard way after ‘fixing’ my own dryer three times in one month. I finally got fed up, used the thread-locker, and haven’t heard a peep from that machine in four years.
When a Simple Screw Isn’t Enough
Sometimes you’ll open the back and find the screw is tight, but the noise persists. This usually means the part itself has worn down. If you see black shavings or metal dust near the drum rollers, you’re looking at a bearing failure. I once helped a neighbor who swore her machine was exploding, only to find that it wasn’t a motor issue at all, but a simple wear-and-tear situation that required the $15 part that fixes a shaking washing machine logic applied to a dryer. If you’re dealing with a new unit and these issues start, it’s often a sign that you need to re-evaluate how to ensure reliable appliance installation in 2025 to prevent frame torque. Realize that every mechanical connection is a point of potential failure, and your job is simply to ensure those connections remain as solid as the day they left the factory. Use a flashlight to inspect the belt for fraying while you have the back off; if it looks like a piece of chewed-up licorice, replace it now while the machine is already open.
Don’t Let Your Warranty Give You a False Sense of Security
Most homeowners sleep better at night thinking their new dryer or fridge is fully protected by a manufacturer’s promise. But here is the contrarian truth: that piece of paper is often a bottleneck, not a safety net. I have seen countless neighbors wait three weeks for a ‘certified’ technician to arrive, only to find out that the specific failure isn’t covered due to a technicality. You need to understand the difference between a manufacturer warranty and a service contract before the smoke starts pouring out of your machine. Manufacturers are in the business of selling units, not providing lightning-fast service. Often, the bureaucracy of filing a claim takes longer than the actual repair, leaving you with piles of damp laundry or spoiled food while you wait for a corporate approval code.
The One Hidden Clause That Turns a $0 Fix Into a $300 Bill
The ‘Oops’ factor in appliance repair is almost always related to the fine print. Did you know that simply removing the wrong access panel can technically void your entire protection plan? This is the ‘trap’ I warn everyone about. While I’m a huge advocate for fixing things yourself, you have to be surgical. If you break a factory seal while investigating a noise, you’re looking at the hidden costs of DIY repairs on warranty-covered items that can dwarf the price of a professional visit. Another common pitfall is the deductible. Many people are shocked to find a $100 service fee attached to their ‘free’ repair. I call this the deductible trap in most third-party appliance protection plans, and it is designed to discourage you from making small claims. 
Is it actually cheaper to skip the warranty claim for small repairs?
Sometimes, the answer is a resounding yes. If your dryer needs a $10 belt and you have a $125 warranty deductible, you are literally paying $115 for the privilege of waiting for a technician. According to a multi-year study by Consumer Reports, the cost of an extended warranty is rarely recouped by the average consumer, as the price of the plan often exceeds the statistical likelihood and cost of a major repair within the coverage window. This is why I advocate for a hybrid approach: learn to maximize your appliance warranty during emergency repairs for big-ticket items like compressors or motors, but handle the small stuff—like that loose drum screw we discussed—on your own.
Keep This Paper or Lose Your Coverage Forever
If you do decide to go the professional route, your documentation must be flawless. I cannot tell you how many times a claim was denied because the homeowner couldn’t prove they had performed basic maintenance. Whether it is cleaning a condenser or clearing a lint trap, you need a trail. There is the one maintenance record that saves your appliance warranty claim that most people toss in the trash with the packaging. Without it, the technician can claim ‘consumer neglect,’ and you are left holding the bill. If you’re feeling overwhelmed by the technicalities, look for affordable same-day appliance fixes with warranty benefits that offer clear pricing and labor guarantees without the corporate runaround. It’s about taking control of your home rather than being a victim of a schedule you didn’t create. Have you ever fallen into this trap? Let me know in the comments.
If you want to move from being a victim of your appliances to being their master, you need to stop thinking about repairs as one-off emergencies and start thinking about your toolkit as an investment. After years of fixing everything from ancient dishwashers to high-end smart fridges, I’ve realized that 90% of my success comes down to having the right physical leverage. I always keep a dedicated kit for these jobs because hunting for a tool while water is spraying across the floor is a recipe for disaster. One of the most overlooked items is the specific wrench you need to unjam a disposal in seconds; it’s a tiny, inexpensive piece of metal that makes the difference between a five-second fix and a $200 plumbing bill.
Build an Unbeatable Maintenance Kit
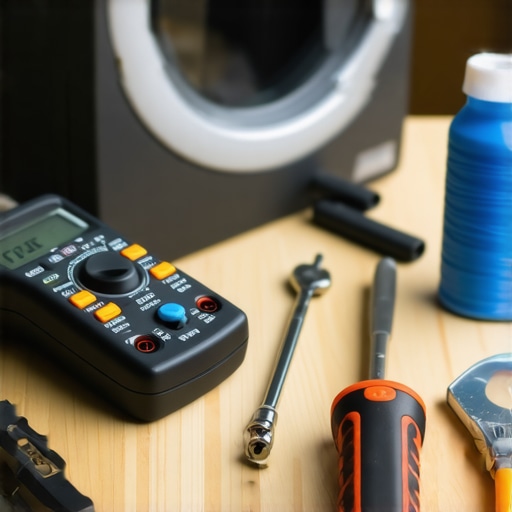
Beyond the basics, I swear by a high-quality multimeter and a telescoping inspection mirror. The mirror allows you to see behind the unit without throwing your back out, which is vital when checking for the hidden vent clog that makes your dryer run all day. For the technical side, the Association of Home Appliance Manufacturers (AHAM) specifically notes in their consumer guidelines that periodic inspection of electrical connections and airflow paths can extend the life of a heating element by up to 40%. This isn’t just theory; it’s about heat management. When lint or dust builds up, the machine works harder, the metal fatigues, and eventually, things snap. I make it a habit to perform a ‘deep sweep’ every six months. If you’re a dog owner like me, you absolutely need to use the condenser coil cleaning hack for pet owners with hairy dogs to keep your fridge from overworking its compressor.
How do I maintain my major appliances over time?
The secret to long-term reliability is scheduled ‘stress tests’ rather than waiting for a failure. Once a quarter, I run my dishwasher on its hottest cycle with a descaler to prevent calcium buildup, which often leads to the drain line slope rule for an odor-free dishwasher being ignored by homeowners who think the smell is just ‘old age.’ Similarly, I check the leveling of my washer. If it’s even slightly off, the centrifugal force during a spin cycle will eventually eat the bearings. If you’re installing a new unit today, make sure you look into fast trustworthy appliance installation near you to ensure it’s balanced from day one, as a poor start usually leads to a premature end. I’ve seen brand-new machines destroyed in six months because they weren’t leveled on a concrete floor correctly.
Predicting the Future of Home Repairs
I predict that by 2027, the ‘dumb’ appliance will be completely extinct. We are moving toward a world where your dryer will send a push notification to your phone saying, ‘My belt is slipping, order a replacement now.’ While this sounds convenient, it also makes scheduling your appliance repair for same-day service in 2025 more about data management than just mechanical skill. You’ll need to be as comfortable with a firmware update as you are with a pipe wrench. However, no matter how ‘smart’ these machines get, the physical components—the bolts, the belts, and the pumps—will still be subject to the laws of physics. My advice? Don’t get distracted by the touchscreens; keep your eyes on the moving parts. Go grab a bottle of blue thread-locker tonight and apply it to those drum support screws we talked about earlier. It’s the single most proactive thing you can do to silence your laundry room for good.
Three Hard Truths About Modern Reliability
After years of wrestling with vibrating metal and confusing paperwork, I’ve realized that the most expensive repair is the one you ignore. First, never assume a noise is just ‘old age’; it’s usually a loose fastener telegraphing a future failure. Second, I learned that a warranty is only as good as your filing cabinet. If you do not have the one maintenance record that saves your appliance warranty claim, the manufacturer has an easy out. Lastly, I stopped fearing the back panel. Most machines are surprisingly simple once you get past the fear of breaking something. You can often handle the basics and save the top tips for same-day service warranty coverage for when the high-voltage components actually fail.
#IMAGE_PLACEHOLDER_E#
The Home Mechanic’s Survival Kit
You don’t need a rolling tool chest, but you do need three specific things. A good set of nut drivers prevents the rounded-off screws that turn a ten-minute job into a two-hour nightmare. I also swear by blue thread-locker for any part that spins or shakes. For those moments when the kitchen sink rebels, I always keep the specific wrench you need to unjam a disposal in seconds right under the cabinet. I trust these tools because they’ve saved me from calling for same-day appliance repair on a holiday weekend when the rates are triple.
Stop Being a Victim of Your Own Appliances
You are more capable than the instruction manual wants you to believe. By taking ten minutes to tighten a screw or clean a coil, you’re not just saving money; you’re buying yourself peace of mind. Whether you are following an expert guide to appliance repair and installation today or just experimenting with a screwdriver, the goal is the same: a home that works for you, rather than the other way around. Don’t let a small rattle turn into a replacement bill. Have you ever found a tiny $1 fix that saved you from buying a brand-new appliance? Let me know your biggest ‘win’ in the comments below!