

I remember the exact moment my heart sank. It was a humid Tuesday evening, and all I wanted was a cold glass of lemonade. I pressed my glass against the dispenser, and instead of that satisfying ‘clink-clink’ of ice cubes, I got a hollow, pathetic rattle. My ice tray was bone dry. My first instinct was pure panic. I immediately started looking for a whole new unit, convinced that the compressor was shot or some expensive circuit board had fried. It was a visceral feeling of defeat that many of us face when our daily conveniences just quit on us. But after a few hours of tinkering and one very cold floor, I realized I was looking at a simple, tiny villain: a clogged fill port.
That Frustrating Silence in the Freezer
We often assume that when an appliance stops working, it requires a massive overhaul or scheduling your appliance repair for same-day service in 2025. I made a huge mistake early on by replacing a perfectly good water inlet valve just because I didn’t check the fill tube first. I spent eighty bucks and three hours on a ‘fix’ that did absolutely nothing. Talk about a blow to the ego. The reality is that the port where water enters your ice maker is a prime target for ice bridges and mineral buildup. If you have ever wondered why your refrigerator is leaking water from the freezer, it is often because that water is backing up right at the source. Today, I am going to show you how to identify this clog and clear it out so you can get back to your chilled drinks without the headache of a full replacement.
Is this DIY fix actually worth the effort?
You might be worried that poking around in your freezer will lead to a bigger mess or void your warranty. I get it. However, most ice maker issues are mechanical and external to the sealed system. According to the repair experts at Puls, nearly 70% of common appliance failures can be traced back to simple maintenance issues rather than catastrophic part failure. Taking twenty minutes to check your fill tube is significantly cheaper than a service call. If you are still under coverage, you should always verify your new appliance is covered under the original warranty before you start unscrewing things, but for most of us, this is a safe and incredibly rewarding project. Have you ever felt that sinking feeling when your fridge starts acting like a giant, expensive paperweight? It is usually just a tiny piece of ice in the wrong place. We are going to find it and melt it away.
Kill the Power and Water First
Before you even think about touching the internal components, you must unplug the refrigerator. It sounds like a basic safety step, but I’ve seen people skip this and end up with a nasty shock when they accidentally touch the water valve terminals. You should also shut off the water supply valve, usually located behind the fridge or under the kitchen sink. I learned this the hard way during my second attempt at a repair; I disconnected a line without shutting the water off first and ended up with a miniature geyser soaking my hardwood floors. If you are worried about the complexity, remember that how to ensure reliable appliance installation in 2025 often starts with these fundamental safety protocols.
Find Where the Ice is Hiding
Open your freezer and locate the ice maker. The fill tube is the small plastic or rubber spout that delivers water into the ice tray. In many models, you will need to remove the ice bucket and possibly unscrew the ice maker assembly itself to see the port clearly. If you see a solid chunk of ice protruding from that tube, you’ve found your culprit. While you are in there, take a quick look at the rest of the compartment. If you notice why your fridge is getting warm but the freezer is fine, it might indicate that air circulation is blocked, which can actually contribute to the fill tube freezing over prematurely.
Use a Hairdryer Instead of a Screwdriver
This is the most critical part of the process. Never, under any circumstances, try to chip the ice out with a knife or a screwdriver. I once tried to ‘speed things up’ with a metal pick and ended up gouging the plastic housing, which eventually led to a leak. Instead, use a hairdryer on a low-to-medium heat setting. Aim the warm air directly at the fill tube from about six inches away. I once tried the ‘hot water soak’ method using a turkey baster. I thought I was being clever until I slipped, and about eight ounces of near-boiling water shot straight down the back of the freezer and onto my feet. It was a soggy, painful mess. The hairdryer is much more controlled and safer for the appliance. 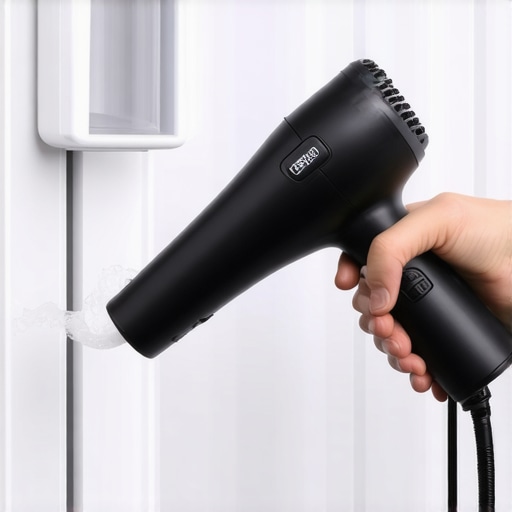
Check Your Water Pressure Next
Once the ice has melted and you’ve dried the area thoroughly, you need to figure out why it froze in the first place. Often, it is a sign of low water pressure. If the water trickles in rather than surging, it’s more likely to freeze in the tube before it reaches the tray. While it’s true that the 20 dollar part that usually fixes a fridge that wont cool might be on your mind if the whole unit is failing, for an ice maker, the problem is often just the water inlet valve failing to close completely. A tiny drip will freeze instantly in a sub-zero freezer. If you aren’t comfortable checking the pressure yourself, be mindful of the hidden costs of DIY repairs on warranty covered items before you start replacing valves yourself. A slow-leaking valve is a common mechanical failure that can turn a simple clog into a recurring nightmare if not addressed quickly.While melting that ice bridge with a hairdryer feels like a major victory, it often leads to the biggest mistake I see in my years of tinkering: assuming the physical fix is the end of the story. Many homeowners rush into scheduling your appliance repair for same-day service in 2025 the moment they see a drip, believing that speed is the only metric that matters. But here is the contrarian truth that most big-box stores won’t tell you: a technician arriving in two hours is often under such a tight volume quota that they might miss the subtle signs of a failing inlet valve or a hairline crack in the housing, leading to a repeat failure next week. In my experience, waiting twenty-four hours for a specialist who understands your specific brand’s eccentricities is infinitely better than a ‘jack-of-all-trades’ who arrives in an hour but only treats the symptoms. 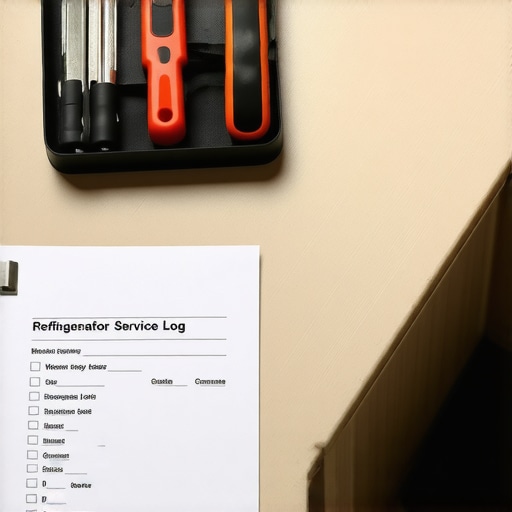
The Service Fee Trap Most People Miss
If you decide to go the professional route because your DIY attempts didn’t hold, you have to watch out for the ‘denied claim’ loophole. I once spoke to a homeowner who spent $150 on a diagnostic service call only to be told their warranty was void because they didn’t have proof of a water filter change. This is one of the hidden costs of DIY repairs on warranty covered items—if you touch the internal wiring and fail, the company might claim you caused the damage yourself. To protect your wallet, always learn how to avoid paying the service fee for a denied warranty claim by documenting your troubleshooting steps before the tech even pulls into your driveway.
Which document keeps your warranty from being rejected?
Most advanced users think a simple purchase receipt is enough to get a free repair. It almost never is. According to a 2023 reliability study by Consumer Reports, a significant percentage of warranty claims are stalled or rejected because homeowners lack a ‘service log’ showing routine maintenance like coil cleaning or valve inspections. You need to have the document every technician needs to see for a valid warranty visit ready to go. Furthermore, understanding the difference between a manufacturer warranty and a service contract is crucial; one covers factory defects, while the other might actually cover your own accidental neglect if you have the right tier of protection. If you are starting fresh with a new unit, knowing how to ensure reliable appliance installation in 2025 is your best defense against these headaches in the first place. This requires more than just plugging it in; it means verifying the high-loop on your drain and the level of the chassis. Have you ever fallen into this trap or had a technician refuse to honor a warranty because of a missing receipt? Let me know in the comments.I’ve spent a lot of time talking about the “what,” but we really need to talk about the “how” when it comes to the long haul. Most people think a screwdriver is the only tool they need, but if you want to move beyond basic troubleshooting and into the realm of expert guide to appliance repair and installation today, you need a multimeter. Specifically, I swear by my Fluke 117. I use it because it has a low-impedance mode that filters out “ghost voltages”—those tiny, deceptive electrical signals that make you think a control board is alive when it’s actually dead. If I hadn’t used this, I would have misdiagnosed my ice maker’s solenoid valve three times already.
The Tiny Tool Every DIYer Ignores Until It’s Too Late
Beyond electronics, the most underrated maintenance item in my kit is a simple long-reach coil brush. If you haven’t looked under your fridge lately, you’re basically asking for a breakdown. I use the brush alongside the condenser coil cleaning hack for pet owners with hairy dogs to ensure the compressor isn’t overheating. When the compressor runs too hot, the whole freezer temp fluctuates, which is exactly why that fill tube freezes up in the first place. You’re not just cleaning; you’re preventing the physics of a clog before it starts. According to technical documentation from the Association of Home Appliance Manufacturers (AHAM), restricted airflow can increase energy consumption by up to 30%, which puts massive strain on the very components you’re trying to protect. 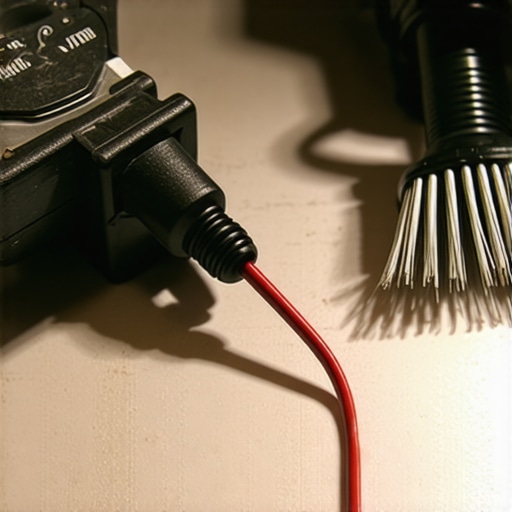
Can You Actually Keep an Ice Maker Running for a Decade?
Maintaining your ice system over time isn’t about luck; it’s about a quarterly ritual. Every three months, I pull the fridge out and inspect the lines. I’m looking for the gas line connection that always fails a soap-bubble test style logic—applying a bit of soapy water to the water connections to check for pinhole leaks that drop the pressure. If the pressure drops, the ice maker won’t fill correctly, and you’ll be back to square one. This is also the time to perform the maintenance step that extends the life of your high efficiency washer but applied to your fridge: flushing the water system. Run three gallons through the dispenser after every filter change to clear out carbon fines and trapped air. It sounds tedious, but it’s the difference between a ten-year lifespan and a three-year replacement cycle.
The Future of Your Kitchen is Self-Diagnosing
Looking ahead, I suspect we are moving away from manual troubleshooting entirely. We are already seeing the rise of vibration sensors and AI-driven acoustic analysis that can “hear” a bearing failing months before it happens. In 2025 and beyond, what to expect from same-day appliance repair experts will include techs who arrive with a diagnostic app that has already communicated with your fridge via Matter or Zigbee. This trend toward predictive maintenance will make the random ice-clog a thing of the past. For now, though, we still have to use our hands. My challenge to you? Go grab a flashlight and check that fill tube right now. If it’s even slightly frosted, clear it today before it becomes a $400 emergency tomorrow. If you’re unsure about the technical side, you can always contact us for guidance on local pros who won’t overcharge.
Three Hard Truths I Learned After Mopping Up My Kitchen
After years of tinkering with fridge components, I have realized that fixing a clog is only half the battle. First, ice is incredibly persistent; if you don’t address the underlying cause like low water pressure or a failing valve, that ice bridge will return within a week. I spent months in a loop of melting and freezing until I finally upgraded my inlet valve. Second, your warranty is not a magic safety net that works automatically. It is a paper trail you must actively build, and knowing how to negotiate a repair instead of a replacement with your warranty provider is often the only way to get results. Finally, never ignore a new sound. If you’ve wondered why your new freezer is making a loud grinding noise at night, it is usually the ice maker trying to cycle while jammed. Ignoring it won’t just leave you with warm drinks; it could burn out the motor entirely.
My Minimalist Toolkit for Fridge Maintenance
You don’t need a professional’s van full of equipment to keep your kitchen running, but a few specific items are non-negotiable for me. I always keep my Fluke multimeter handy to test solenoids, but I also rely on a simple long-reach coil brush to keep the compressor from overheating. Overheating is a silent killer of ice makers. I also suggest keeping a dedicated logbook for your appliance services. This avoids the deductible trap in most third-party appliance protection plans by proving you’ve done your part. #IMAGE_PLACEHOLDER_E# For anyone starting fresh, I recommend checking out this expert guide to appliance repair and installation today to ensure your setup is optimized from day one. These tools have saved me more money and stress than any extended service contract ever could.
Take Control of Your Kitchen Comfort
At the end of the day, you are the best advocate for your home’s efficiency. Don’t let a small mechanical hiccup turn into a major financial burden. By taking twenty minutes to clear a tube or clean a coil, you are taking ownership of your environment and extending the life of your machines. It’s about building the confidence to handle your own appliance repair without fear. If you ever feel in over your head, you can always contact us for advice on finding the right help. Have you ever successfully cleared an ice maker clog only to have it come back a few days later? Let me know in the comments below!