
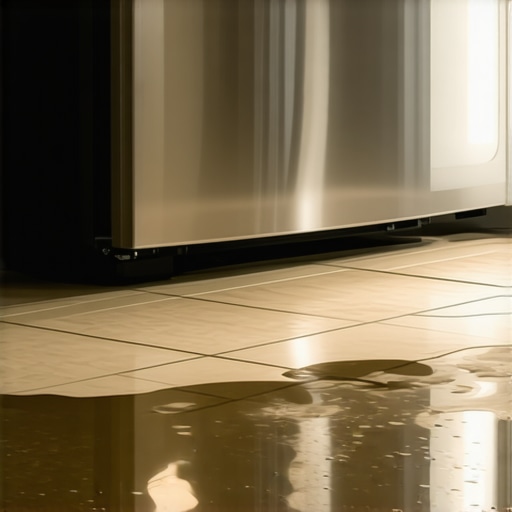
It was 6:15 AM on a Tuesday, and I was shuffling toward the coffee pot in my favorite wool socks. Squelch. My foot hit a cold, unidentifiable puddle right in front of the fridge. At first, I thought the dog had an accident, but a quick glance at the steady drip trailing down the freezer door told a different story. I felt that immediate pit in my stomach—the one where you start calculating how much a new appliance costs before you’ve even had your caffeine. If you are standing in a puddle right now, don’t panic. I have been there, and I have made every mistake in the book so you don’t have to. Today, we are going to stop that leak and save your flooring from a watery grave. [image-placeholder]
Stop Mopping and Start Troubleshooting
I used to think a leak was a sign of a total mechanical collapse. My biggest mistake early on was ignoring a tiny drip for a month, assuming it was just ‘humidity.’ By the time I bothered to look behind the back panel, my freezer had turned into a solid block of ice that eventually burned out the evaporator fan. I learned the hard way that a leaking freezer is almost always a cry for help from a clogged defrost drain or a failing door seal. According to the Association of Home Appliance Manufacturers (AHAM), even a small amount of internal ice buildup from a faulty seal can cause your unit to work 20% harder, spiking your energy bills and shortening the compressor’s life. The good news? Most of the time, the fix is simpler than you think. Often, it’s just the 20 dollar part that usually fixes a fridge that wont cool rather than a total system failure. Have you noticed your fridge making a weird sound along with the leak, or is it just the water that’s giving you grief?
Is this something you can actually fix without calling a pro?
I get the skepticism. When water is pooling on your hardwood, it feels like an emergency that requires a specialized technician and a heavy-duty van. But before you go searching for what to expect from same-day appliance repair experts, you should know that a simple piece of flexible tubing or a hair dryer can often solve the problem in twenty minutes. We’re going to walk through how to clear that stubborn drain line and how to check your gaskets with a simple dollar bill. If the problem ends up being a more complex installation issue, you can always refer to an expert guide to appliance repair and installation today to see where your setup might have gone wrong. Let’s get our hands dirty and dry that floor for good.
Attack the Most Likely Culprits First
First, grab a dollar bill. No, it’s not for a vending machine; it’s your most advanced diagnostic tool right now. If your freezer is leaking, 90% of the time it is because water is escaping a path it was never meant to leave, or the environment inside is fighting the outside air. We are going to isolate the physical failure points before we even think about calling a technician.
Test Your Door Seal with a Dollar Bill
Your fridge is like a submarine; if the seal isn’t airtight, the ‘outside’ gets in. Open your freezer door, place a dollar bill across the gasket, and close the door. Now, try to pull the bill out. If it slides out with zero resistance, your gasket is shot. This allows warm, humid air to rush in, which condenses into ice and eventually melts into that puddle on your floor. A faulty seal is often the silent reason why your fridge is getting warm but the freezer is fine. If the gasket is just dirty, scrub it with warm soapy water and a toothbrush. If it’s brittle or cracked, it’s time to order a replacement.
Flush Out the Clogged Defrost Drain
This is the most common cause of internal puddles. Every freezer has a defrost cycle that melts frost into a small drain hole. If that hole gets clogged with a stray pea or a piece of plastic wrap, the water has nowhere to go but out the front door. I remember the first time I tackled this. I didn’t have a turkey baster, so I thought I could just blow into the tube with a flexible straw. It was a massive mistake. One vigorous exhale later, a back-pressure wave of gray, slimy ‘fridge gunk’ ended up right on my cheek. Avoid my mistake and use a turkey baster filled with hot water and a teaspoon of bleach. Squirt it into the drain hole (usually located at the back of the freezer) until you hear water running freely into the drain pan below. Often, this is the 20 dollar part that usually fixes a fridge that wont cool and stops the leak simultaneously. 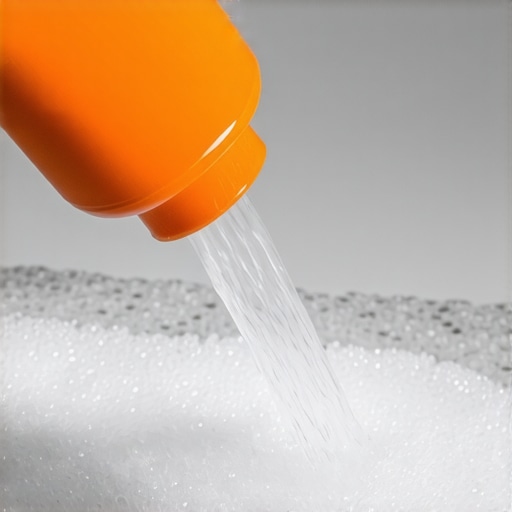
Fix the Tilt to Keep Water Moving
If your fridge is leaning forward, water from the defrost cycle won’t flow into the drain—it will spill over the internal gutter. Your appliance should actually have a very slight backward tilt. You can adjust the leveling legs at the bottom front of the unit using a wrench. This simple adjustment ensures that gravity is working for you, not against you. Beyond stopping leaks, this is also the leveling trick for a fridge that rattles your kitchen floor all night. A level fridge is a quiet, dry fridge.
Know When Your Warranty Should Take Over
If you have cleared the drain and checked the seals but the water keeps coming, you might be looking at a cracked drain pan or a failing internal water valve. Before you start dismantling the compressor, check your paperwork. If your unit is less than a year old, or if you have a protection plan, you need to know how to avoid paying the service fee for a denied warranty claim. Don’t start a DIY project that involves cutting wires or pipes, as this can void your coverage. Instead, look into how to maximize your appliance warranty during emergency repairs to ensure the pro who comes to your house is covered by the manufacturer.
The hidden risk of rushing your repair
When you see water pooling, your first instinct is to Google the fastest help available. We’ve all been conditioned to think that ‘fast’ equals ‘safe.’ But here is the nuance most homeowners miss: rushing into what to expect from same-day appliance repair experts without a strategy can actually be a 500-dollar mistake. While you’re mopping, you should be digging through your junk drawer for that original sales receipt. Why? Because if you hire a non-certified technician to stop a leak on a unit that is still under its 12-month manufacturer’s window, you are essentially tearing up your insurance policy. I once knew a guy who replaced a simple 40-dollar valve himself, only to have the compressor die two months later. The manufacturer denied his 800-dollar claim because they found ‘evidence of unauthorized tampering.’ He fell right into the hidden costs of diy repairs on warranty-covered items, and it’s a trap that is surprisingly easy to trigger.
Don’t let the ’emergency’ cloud your judgment
Everyone says you should fix a leak immediately to save your floors. In my experience, unless it’s a literal geyser, taking two hours to learn how to avoid paying the service fee for a denied warranty claim is better than a hasty fix. A report by Consumer Reports highlights that nearly 20% of repair attempts fail because the root cause wasn’t covered by standard service contracts, leading to massive out-of-pocket expenses for the unwary. You need to verify if your problem is a ‘wear and tear’ issue or a ‘manufacturing defect’ before the tech rings the doorbell. If you aren’t sure, it’s worth learning how to maximize your appliance warranty during emergency repairs so you don’t get stuck with a bill for something that was never your fault. #IMAGE_PLACE_HOLDER_C#
How do you spot a failing internal component before the flood starts?
Advanced troubleshooting goes beyond just looking at the floor. If your fridge is leaking and making a low-frequency growl or a rhythmic thumping, you might be looking at a much larger issue than a clogged drain. For instance, knowing how to spot a failing bearing in your front-load washer before it breaks can help you identify similar mechanical fatigue in your fridge’s evaporator motor. These are the nuances that separate a weekend DIYer from someone who truly understands the lifecycle of their machines. Don’t just treat the symptom; treat the system. Have you ever fallen into this warranty trap or paid for a repair that should have been free? Let me know in the comments below.
The boring chores that save your kitchen floor
I’ve spent a decade fixing my own appliances, and if there’s one thing I’ve learned, it’s that a Friday night flood is almost always the result of a Saturday morning chore I skipped six months ago. Maintenance isn’t just about avoiding a mess; it’s about preserving the efficiency of your machine. For instance, if you live with a Golden Retriever like I do, your fridge’s condenser coils are essentially a high-powered vacuum for dog hair. When those coils get caked in fur, the compressor runs hot, the defrost cycle stays on longer, and suddenly you have water on the floor because the system can’t keep up with the heat. This is why I swear by the condenser coil cleaning hack for pet owners with hairy dogs. It’s a ten-minute job that adds years to your unit’s life and prevents the moisture buildup that leads to leaks.
The only three tools you actually need in your junk drawer
You don’t need a professional-grade workshop to keep things running. I personally keep a simple telescopic mirror, a turkey baster, and a set of nylon brushes. The mirror is a lifesaver; it allows you to inspect the back of the unit for slow drips without pulling the whole 400-pound machine away from the wall and scratching your floors. According to the technical service manuals from manufacturers like Sub-Zero, even minor airflow obstructions can cause a 15% increase in internal condensation. If you find a clog, that turkey baster I mentioned earlier is the perfect tool to flush the line without causing a mess. If you find yourself in over your head, an expert guide to appliance repair and installation today can help you decide if you’ve reached the limit of your DIY skills. 
How do I maintain my fridge’s health over time?
Consistency is more important than deep-cleaning once a year. I suggest setting a calendar reminder every six months to check three things: the seal integrity, the drain line, and the level of the unit. Keeping a log of these checks isn’t just for your own peace of mind—it’s a critical part of maintaining your coverage. I’ve seen many homeowners lose out on claims because they couldn’t prove they performed basic upkeep. It’s also why I always tell people that the document every technician needs to see for a valid warranty visit is actually your own maintenance log. In the future, I expect we’ll see more AI-driven sensors built into mid-range appliances that will text your phone when a drain is 20% restricted, but until then, we have to rely on our own eyes and a few simple tools.
Setting yourself up for a stress-free 2025
If you are planning a kitchen refresh or just bought a new unit, don’t overlook the setup phase. Many leaks start at the very beginning because of a pinched water line or a poorly leveled base. Learning how to ensure reliable appliance installation in 2025 is the best way to prevent a service call in 2026. If you do run into an emergency, prioritize warranty-backed appliance services you can rely on rather than just the cheapest option on a search engine. My advanced tip for you this week? Go pull your fridge out just four inches and check the floor for salt-like deposits. These are often dried minerals from a ‘micro-leak’ that hasn’t pooled yet. Catch it now, and you’ll save yourself a thousand dollars in floor repairs later.
What I Learned After Three Flooded Kitchens
Over the years, I’ve realized that the physical leak is rarely the biggest problem; it’s the procrastination that kills your bank account. If you see a drip, you have exactly 48 hours before mold starts thinking about moving into your subflooring. My most expensive mistake wasn’t the repair itself, but failing to verify your new appliance is covered under the original warranty before I started ripping off the back panels. I also learned that if you find yourself calling for scheduling your appliance repair for same-day service in 2025, you should have your model number and a clear photo of the leak ready to go before the tech arrives—it saves them time and saves you a headache.
The Small Kit That Saved My Hardwood Floors
You don’t need a van full of heavy machinery to be your own hero. I keep a dedicated ‘kitchen emergency’ drawer that has saved me thousands in flooring repairs. [image-placeholder] I keep three things in there: a flexible nylon brush for that pesky drain line, a high-quality leveling tool to ensure the fridge tilt is perfect, and a printed maintenance log. I also keep a digital copy of warranty-backed appliance services you can rely on bookmarked on my browser. These tools are my first line of defense because they address root causes like airflow and drainage before they turn into a flood.
Master Your Kitchen Without the Anxiety
Dealing with a puddle under the fridge is a rite of passage for every homeowner. But once you’ve cleared that drain yourself and checked that seal with a dollar bill, you gain a level of confidence that no manual can provide. Don’t let a little moisture intimidate you into an unnecessary and expensive replacement. Most of the time, a bit of persistence and the right expert guide to appliance repair and installation today are all you need to keep your home dry and your kitchen functioning perfectly. Did the dollar bill test reveal a gap in your freezer seal, or are you still hunting for the source of that puddle? Let me know below.