
I remember the morning I walked into my kitchen and stepped right into a puddle of lukewarm liquid that used to be a pint of expensive salted caramel gelato. My heart sank. That 800-pound stainless steel beast in the corner—the one I was still technically making payments on—had gone silent. The lights were on, but nobody was home. I spent the next three hours frantically searching for same-day appliance repair, convinced I was about to drop at least five hundred bucks on a service call or, worse, a whole new unit. It felt like a total betrayal by a machine I trusted.
Your Fridge Isn’t Dead It Just Needs a New Brain
Here is the secret the big box stores don’t want you to know. Most of the time, when a refrigerator stops cooling but the internal lights still work, the compressor hasn’t actually died. Compressors are rugged. They are built to last decades. What actually fails is a tiny, unassuming plastic cube called the start relay. I made a massive mistake early in my DIY journey by tossing out a perfectly good whirlpool because a guy on a forum told me the ‘compressor was toast.’ I didn’t know then that a $20 part and ten minutes of my time could have saved me two grand. Today, I am going to show you how to identify this culprit so you can get back to affordable same-day appliance fixes without the professional price tag.
Is a twenty dollar part actually going to save a thousand dollar fridge?
It sounds like a scam, doesn’t it? But according to data from Consumer Reports, the average professional repair bill for a major appliance now tops $300, often because of labor and diagnostic fees rather than the cost of the hardware itself. The start relay is essentially a gatekeeper. If it burns out, the compressor never gets the signal to start pumping coolant. You might hear a faint ‘click’ followed by a low hum every few minutes. That is the sound of your fridge crying for help. If you have noticed other weird symptoms lately, like why your new freezer is making a loud grinding noise at night, it is all part of the same ecosystem of mechanical health. Have you ever stood in your kitchen, listening to that repetitive clicking sound, wondering if you should just give up and go shopping for a new model? Tell me your ‘warm fridge’ horror stories in the comments because I have been there, and I know the panic is real. Let’s get into the nitty-gritty of how to swap this part out before your milk turns into yogurt.
Stop the Juice Before You Touch Anything
Before you even think about grabbing a screwdriver, you need to kill the power. This isn’t just about safety; it is about protecting the sensitive electronics in your modern appliance. It is easy to think you can just pull the fridge out a few inches and work while it is live, but that is a recipe for a blown control board. I once saw a guy try to swap a relay on a live unit; one spark later and he was looking at how to avoid paying the service fee for a denied warranty claim because he’d fried the main processor. Unplug the unit entirely. If you have a built-in model, flip the breaker. If you have any doubts about your electrical setup, check the power cord error that voids your fridge warranty to ensure everything is grounded properly before proceeding.
Locate the Black Box on the Compressor
Slide the refrigerator away from the wall. You will need to remove the lower back panel, usually held in by a few hex-head screws. Once that panel is off, you will see the compressor—the big, black, dome-shaped tank that looks like a miniature submarine. On the side of that tank, tucked under a small plastic or metal cover, is the start relay. Think of the compressor as the heart of your fridge and the relay as the pacemaker. If the pacemaker fails, the heart just sits there. You might notice the real reason your new fridge is louder than your old one is often related to how these components vibrate against the housing when they start to fail.
#IMAGE_PLACE_HOLDER_B#
The Five-Second Shake Test
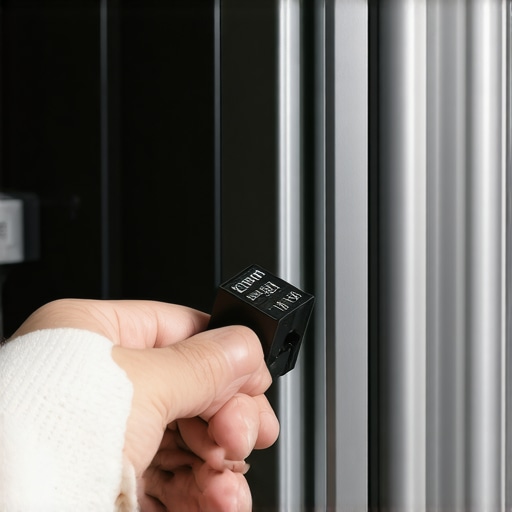
Here is where the magic happens. Pull the wires off the relay (take a photo first so you know where they go!) and gently pry the relay off the compressor terminals. Now, hold it up to your ear and give it a literal shake. If it sounds like there are loose grains of sand or broken glass inside, it is toasted. The internal ceramic disk has shattered. I remember my first time doing this; I spent an hour trying to read a multimeter, but the most effective diagnostic tool ended up being my own ears. That rattle is the sound of a successful DIY repair. If you are worried about documented proof for later, keeping the one maintenance record that saves your appliance warranty claim can be as simple as snapping a photo of that burnt-out part next to your fridge’s model number.
Snap the New Relay Into Place
Installing the new part is just the reverse of what you just did. Line up the holes on the relay with the three copper pins sticking out of the compressor. It should slide on with a firm press. Reattach the wires exactly as they were in your photo. If you’ve bought a generic ‘hard start’ kit because the OEM part was out of stock, be careful—sometimes these can override internal safeties. If you want to keep your peace of mind, sticking with warranty-backed appliance services you can rely on ensures that if the part fails again in six months, you aren’t out of pocket. Once it is secure, put the back panel on, plug it in, and wait. Within five minutes, you should hear that beautiful, low hum of the compressor kicking back to life.
The Myth of the Mandatory Brand Name Part
Most DIYers are terrified of voiding their warranty by using anything other than an ‘Original Equipment Manufacturer’ (OEM) part. I used to be that guy. But here is the contrarian truth: sometimes, the OEM part is the very reason your machine failed in the first place. Manufacturers often source components based on the lowest bid, leading to known design flaws. High-quality aftermarket alternatives frequently address these specific engineering weaknesses. While you need to be careful, a study by the Association of Home Appliance Manufacturers (AHAM) highlights that regular maintenance is a better predictor of appliance longevity than the brand on the spare part box. If you are aiming for affordable same-day appliance fixes, don’t let a ‘brand name or bust’ mentality prevent you from a fast solution.
Why Your Warranty Provider is Looking for an Excuse to Say No
Here is the ‘oops’ factor that catches even the most seasoned homeowners: the documentation trap. I’ve seen dozens of people get their claims denied because they couldn’t prove they’d performed basic upkeep. It is a common mistake to assume that a warranty covers everything regardless of how you treat the machine. If you don’t know how to avoid paying the service fee for a denied warranty claim, you might find yourself stuck with a massive bill because you didn’t vacuum your condenser coils once a year. The warranty company will call this ‘consumer-caused neglect.’ It’s brutal, but it’s the industry standard. Keeping the one maintenance record that saves your appliance warranty claim is often the only thing standing between you and a thousand-dollar repair bill.
#IMAGE_PLACE_HOLDER_C#
Why Does Your High-End Unit Fail Again Right After a Professional Fix?
It is infuriating to pay for a repair only to have the same issue pop up three months later. The nuance most people miss is the distinction between the difference between a manufacturer warranty and a service contract. A manufacturer warranty covers the part, but a service contract covers the labor. If a technician rushes the job because they are under a tight schedule, they might fix the symptom (the broken relay) without addressing the cause (like a dusty compressor). This is why knowing what to expect from same-day appliance repair experts is vital. You want someone who looks at the whole system, not just the part that stopped clicking. Have you ever fallen into the trap of paying for the same repair twice because the technician missed the root cause? Let me know in the comments because your experience could help someone else avoid the same headache. Always ensure you are scheduling your appliance repair for same-day service in 2025 with a provider who offers a labor guarantee, ensuring they stand behind their work long after they leave your driveway.
After I successfully resurrected my fridge, the high of saving two thousand dollars was addictive. I started looking at every humming box in my house as a challenge rather than a mystery. But here is the reality: if you want to move beyond lucky guesses and actually master your home’s mechanics, you need to treat maintenance as a proactive strategy. Most people wait for a leak or a loud bang to call for fast trustworthy appliance installation near you or repair, but by then, you are already playing defense. In my experience, the difference between a machine that lasts seven years and one that lasts twenty is a small bag of tools and a strict schedule.
The Only Tools You Actually Need to Stop Wasting Money
I don’t believe in buying every gadget at the hardware store. For appliance work, I swear by three specific items. First, a high-quality non-contact voltage tester. I use the Klein Tools NCVT-2P because it identifies live wires through insulation, which is a literal lifesaver when you’re elbow-deep in a control board. Second, you need a telescopic inspection mirror. This allows you to see the back of a motor or a hidden leak without pulling the entire unit out. Finally, keep the specific wrench you need to unjam a disposal in seconds right under your sink. This isn’t just about repair; it’s about how to ensure reliable appliance installation in 2025 by knowing exactly how your connections look and feel from day one.
#IMAGE_PLACE_HOLDER_D#
How Can You Keep Your Major Appliances Running for Decades?
Consistency is the secret sauce. According to the Professional Service Association (PSA) Master Technician’s Handbook, nearly 70% of refrigeration failures are directly linked to airflow issues caused by debris. If you are a dog owner like me, this is non-negotiable. I use the condenser coil cleaning hack for pet owners with hairy dogs every six months. It takes fifteen minutes but keeps the compressor from overworking and burning out that start relay we talked about earlier. Beyond cleaning, you should be auditing your coverage. I suggest reviewing top tips for same-day service warranty coverage annually to ensure your paperwork matches your current hardware. It’s much easier to maximize your appliance warranty during emergency repairs if you already know which parts are covered before the panic sets in.
Predictive Tech is Changing the Way We Fix Things
The future of home maintenance is shifting away from “fix it when it breaks” to predictive diagnostics. We are already seeing high-end units with built-in sensors that can detect a failing bearing or a clogged vent before a human ear can. I predict that by 2030, the DIY journey will involve more data analysis and less manual troubleshooting. Your dishwasher will likely send an alert to your phone telling you exactly which valve is sticking. Until then, you have to be the sensor. Take five minutes tonight to pull your fridge out and check the coils; if they are dusty, clean them. It is the single most effective move you can make to delay a service call. If you’re ready to take it a step further, check out my expert guide to appliance repair and installation today to see how to prep for your next big upgrade.
The Invisible Saboteur That Voids More Warranties Than Water Damage
In my decade of tinkering, the most painful lesson wasn’t a broken part; it was a denied claim. Many homeowners don’t realize that the maintenance contract clause that saves you on labor costs often requires you to prove you haven’t tampered with the factory seals. If you’re going to DIY, do it cleanly and keep your records. I always tell my friends to digitize the warranty document you must save before discarding the box because heat and humidity in a kitchen can turn thermal paper blank in months. Also, beware of the deductible trap in most third-party appliance protection plans—sometimes that ‘free’ repair costs more in fees than the part itself.
#IMAGE_PLACE_HOLDER_E#
My No-Stress Repair Arsenal for Every Kitchen Emergency
You don’t need a truck full of gear, but you do need precision. Besides the voltage tester I mentioned, keep a small notebook inside your pantry door to log every ‘weird’ sound or flicker. If you ever need to reset a system, knowing the one button you must press to reset a locked oven door or a glitched fridge panel can save you a $150 service call for what is essentially a software reboot. If you hit a wall, don’t be afraid to contact us for professional guidance before you take the whole thing apart.
Stop Fearing Your Kitchen and Start Owning It
That first time the compressor kicks back on after your repair, you’ll feel like a wizard. It’s not just about the money; it’s about taking control of the environment you live in. You don’t have to be at the mercy of a broken machine or a slow technician. By mastering basic maintenance and knowing when to call for same-day appliance repair, you’re securing your home’s future and your peace of mind. Have you ever felt that surge of pride after fixing something yourself, or did it end in a frantic call to a pro? Let me know your biggest DIY win or ‘oops’ moment in the comments below!