I’ll never forget the day I walked into my living room and was greeted by a soggy ceiling and a frustrated sense of helplessness. The AC unit was dripping water relentlessly, and despite my best efforts to clean out the drain pan, the leak persisted. It was a lightbulb moment—realizing that simple tricks could save me from costly repairs and a flooded home. If you’ve ever faced a similar situation where water leaks through your ceiling from your AC, you’re not alone. It feels like such a mystery until you discover a straightforward fix that can make all the difference.
The Drain Tube Trick That Stopped My AC Water Leak
This is a story about how I learned an effective method to prevent water from seeping through my ceiling, saving me both time and money. The key lies in understanding and properly troubleshooting your drain line and applying a simple but powerful trick. Whether you’re experiencing minor drips or a flooding situation, resolving this issue can be surprisingly easy once you know what to do. Today, I’ll walk you through the exact steps I took, so you can avoid the hassle and damage caused by water leaks from your AC unit.
Is This Trick Really Worth the Hype or Just Another Myth?
Early on, I made the mistake of assuming every leak was due to a clog or a broken part, which led me down a costly rabbit hole. It wasn’t until I tried this specific drain tube method that I finally saw the light. According to experts, such as those at Discount Appliance Hub, many AC leaks are caused by overlooked or improperly installed drainage loops and clogs. Overlooking these simple details often results in water damage and mold growth, which nobody wants.
Understanding and correctly implementing this trick can prevent the recurring headaches associated with AC water leaks. Plus, it’s a remedy that doesn’t require fancy tools or hours of work—you just need to know where to look and what to do. But I’ll admit—I initially ignored the basics and paid the price. Learning from my early mistake, I’ll now guide you through what I wish I knew from the start, so you can fix your problem quickly and effectively. Ready to get your ceiling dry and your peace of mind restored? Let’s dive into the solution that changed everything for me—and can do the same for you.
Locate Your Drain Line and Clear Potential Obstructions
The first step in fixing a recurring AC leak involves pinpointing the drain line. I remember the exact day I stood on a ladder, armed with a flashlight and a long, flexible brush, trying to find where the water was backing up. To do this, turn off your AC unit to prevent additional water flow, then locate the drain pipe—usually a PVC pipe near the indoor air handler. Inspect for any visible clogs or blockages. Using a wet/dry vacuum, I sealed the drain outlet and sucked out debris, which immediately improved the flow. If the vacuum doesn’t clear the obstruction, consider using a small plumbing snake to dislodge stubborn deposits. Restoring proper drainage prevents water from accumulating and leaking into your ceiling. Regular maintenance, like cleaning the drain line with vinegar or a mild cleaning solution, can prevent future clogs. For detailed steps on maintaining your AC drain line, visit this guide.
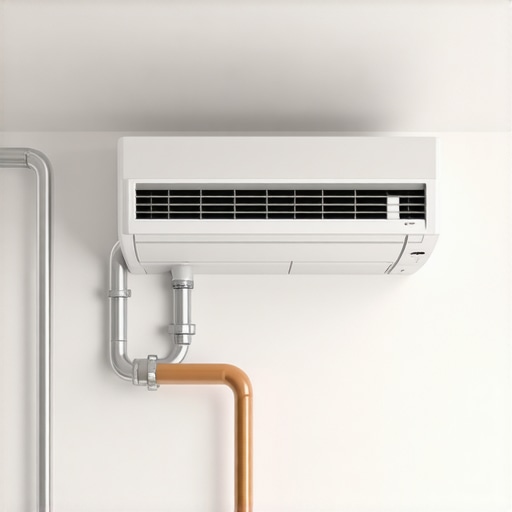
Install a Proper Drain Loop for Continuous Water Flow
Many leaks stem from improper drain line installation, especially lacking a proper loop or vent. A drain loop creates a trap that prevents air from entering and allows gravity to steadily move water away. I once found that my leak worsened after a service tech installed my system without a proper loop, leading to a backup. To fix this, disconnect the drain pipe, then reattach it with a gentle bend or loop that’s above the level of the drain pan. Ensure the pipe slopes downward continuously to facilitate gravity drainage. Using a riser clamp, secure the loop to prevent sagging or misalignment. This simple step creates a siphoning effect, dramatically reducing leak chances. Avoid the error of installing a drain line that dips below the air handler; it defeats the purpose of the loop. For detailed installation practices, check this article. Proper looping also assists in preventing mold growth and bad odors, which can be costly to remediate.
Use a Drain Blocker or Tubing Extension
If your drain line is clear and correctly installed but leaks persist, consider adding a drain blocker or extending the tubing. I once used a clear, silicone-based drain cover to cap the drain outlet temporarily, which prevented water from leaking through the ceiling during peak humidity. For a permanent fix, I attached a longer, flexible PVC tube to the existing drain line, directing water further outside or into a drain pan. This extension must have a continuous downward slope for gravity to work effectively. Additionally, inserting a small mesh screen at the outlet prevents debris from entering and causing future clogs. Be cautious not to block airflow or compromise the drain line’s integrity. Regularly inspecting and cleaning these extensions ensures they stay free-flowing. For a durable extension, visit this resource to choose the right fittings and tools for installation.
Test the System and Prevent Future Leaks
After completing these steps, turn your AC back on and observe the drain line for at least an hour. I did this on a warm summer afternoon, watching the water flow steadily into the outside drain. If leaks persist, recheck the slope and ensure the drain line isn’t kinked or clogged again. Implement preventative measures such as monthly flushing with vinegar, especially during high humidity seasons. Keep an eye out for mold or foul odors, which indicate bacteria buildup. To ensure ongoing protection, consider scheduling professional maintenance, which includes cleaning and inspecting the system thoroughly. This proactive approach saves money and prevents damage to your ceiling or walls. For expert tips on maintenance schedules and warranties, see this article.When it comes to appliance repair and warranty claims, many homeowners hold misconceptions that can cost time and money. One prevalent myth is that warranties cover any repair, but in reality, they often exclude issues caused by improper installation or neglect. For instance, neglecting to install a dishwasher with the anti-tip bracket can void your warranty, leading to costly repairs that could have been avoided. It’s essential to understand the fine print and ensure professional installation aligns with manufacturer guidelines. Additionally, many believe same-day service is a guarantee, but availability varies significantly by provider and region. A critical oversight is assuming that all repair technicians are equally qualified; some may lack the certification or experience for complex issues, risking further damage. Advanced problems, such as electrical wiring faults, require specialized diagnostics that a generic technician might not provide, emphasizing the importance of choosing certified specialists. Misjudging the importance of proper installation, regular maintenance, and qualified service can lead to recurring breakdowns and warranty disputes. According to industry experts at this guide, understanding your equipment’s nuances and adhering to best practices ensures longevity and warranty validity. One common mistake is neglecting to document maintenance or repairs, which can be vital when proving coverage or diagnosing issues later. Advanced users should also scrutinize the warranty exclusions—some cover only parts, not labor, or exclude damage from power surges, which are often overlooked. Being proactive about appliance care and knowing the specifics of your warranty can save you from unexpected expenses. So, do you know what truly is covered in your warranty? Have you ever fallen into this trap? Let me know in the comments.
Tools I Recommend for Reliable Appliance Maintenance
Having the right tools on hand can make all the difference in preventing small issues from becoming costly repairs. I personally rely on a high-quality precision screwdriver set to handle most appliance disassemblies. Its magnetic tips help me work efficiently without losing tiny screws, especially when I need to access delicate components like oven thermostats or dishwasher control boards. I also keep a flexible drain hose loop kit handy to improve drainage in washing machines and dishwashers, which prevents leaks and prolongs appliance lifespan.
For diagnosing electrical issues, I swear by my digital multimeter, which provides instant voltage and resistance measurements. Accurate diagnostics can save you time and avoid unnecessary replacements; according to industry experts, a good multimeter is essential for identifying faulty wiring or malfunctioning sensors reliably. Additionally, a barcode scanner or maintenance log app helps me keep track of service dates and warranty periods, ensuring I follow through with timely repairs or replacements.
Keep Tools Sharp and In Good Condition
Regularly checking your tools for wear and tear is vital. Dull screwdrivers or broken drill bits can damage fasteners or make repairs more frustrating. Investing in a tool sharpening kit ensures your equipment remains effective for years to come. Remember, the key to long-term appliance health is consistent, proactive care — which starts with having the right precise tools at your disposal.
How Do I Maintain My Appliances Over Time?
The secret to keeping appliances in top shape lies in regular, scheduled maintenance. For instance, flushing your dishwasher with a specialized cleaning solution every three months prevents buildup that can cause odors and inefficiency. Similarly, inspecting door seals and gaskets on your refrigerator or oven ensures they stay airtight, saving energy and avoiding moisture issues. Setting reminders in your calendar or using dedicated maintenance apps can simplify this routine. According to industry guidelines, documenting each maintenance activity not only prolongs appliance lifespan but also protects your warranty rights. Make it a habit to review your appliances’ manual recommendations and stick to those schedules, adjusting for usage frequency and environmental conditions.
Preparing for Future Challenges and Scaling Solutions
As technology advances, appliances are becoming smarter, more interconnected, and, consequently, more complex. Embracing diagnostic software or apps like smart home integrations can streamline troubleshooting and reduce downtime. I predict that in the coming years, AI-powered diagnostics and remote monitoring systems will become standard, allowing homeowners and technicians to catch issues early, sometimes before symptoms even appear. To stay ahead, investing in learning about these emerging tools or consulting professionals who utilize these innovations can pay dividends in the long run.
One practical tip is to regularly update your appliance firmware if available. For example, some smart dishwashers or refrigerators require firmware updates to fix bugs or improve efficiency. Refer to this guide for instructions on managing your smart device updates effectively. I highly encourage you to try applying a firmware update to one of your appliances this week; it’s simple but can significantly enhance performance and prevent future issues.
Maintaining your appliances proactively is more than a chore; it’s an investment in their longevity and your peace of mind. Keep your tools sharp, stay informed, and don’t hesitate to leverage technology to stay ahead of problems. Remember, the more you learn about your specific models—like how to properly install anti-tip brackets or secure your connections—the better equipped you’ll be to ensure smooth operation for years to come. Don’t wait for problems to arise—start applying these expert tips today and enjoy worry-free appliance performance.
Lessons the Repair World Taught Me About Appliance Warranties and Quick Fixes
After years of troubleshooting and repairing appliances, I realized that the most valuable lessons came from unexpected moments—like a simple drain line fix preventing my ceiling from flooding. The importance of proper installation practices and routine maintenance can’t be overstated; skipping these steps often costs more in repairs and warranty disputes. I also learned that trusting your instincts and seeking knowledge from reliable sources, such as industry experts, sets the foundation for proactive care. Embracing the concept that a little effort today can save you from costly emergencies tomorrow is a game-changer for homeowners and DIY enthusiasts alike.
My Go-To Tools and Resources for Reliable Appliance Maintenance
Over time, I curated a toolkit that transformed the way I approach repairs. The precision screwdriver set helps me handle delicate components without damage, while a flexible drain hose loop kit prevents leaks and clogs—saving both time and money. A digital multimeter is my eyes for electrical diagnostics, giving me confidence when troubleshooting wiring issues. Additionally, I rely on resources like professional installation guides to ensure every fix stands the test of time. These tools and references form the backbone of my maintenance routine, making appliance care less stressful and more effective.
Your Next Step: Keep Moving Forward with Confidence
Remember, appliance repair and maintenance isn’t just about fixing what’s broken—it’s about staying ahead, understanding your equipment, and preventing issues before they escalate. Whether tackling a stubborn leak or updating your smart home setup, taking proactive steps today ensures smoother operation tomorrow. Don’t be discouraged by past challenges; instead, view each problem as an opportunity to learn and improve. The world of appliance care is ever-evolving, and with the right mindset and tools, you’re fully equipped to handle whatever comes your way. Ready to implement what you’ve learned? Now’s the time to start making that difference in your home maintenance journey.