Have you ever stepped into your living room only to be greeted by a damp carpet and a weird, musty smell coming from your AC vent? I remember the day I finally understood what was happening when I found water leaking onto my floor during the peak of summer heat—turns out, my AC drain line was backing up. It was a frustrating moment, especially since I had imagined my new unit was supposed to make my home more comfortable, not turn it into a mini swimming pool. That experience was a lightbulb moment for me. I realized countless homeowners deal with this sneaky problem, often without even knowing the real cause.
Why Your Home Gets Drained When Your AC Gets Backed Up
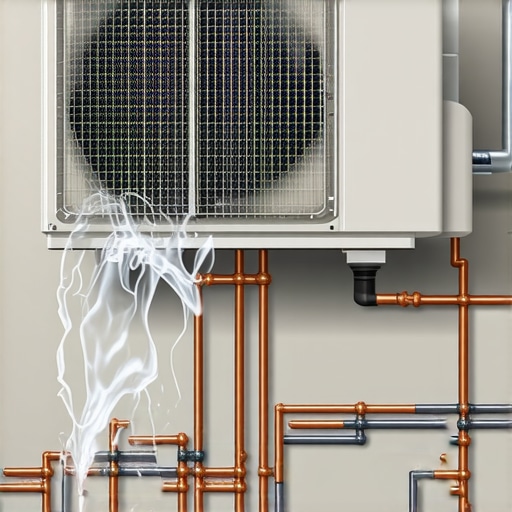
The truth is, your air conditioner is designed to remove humidity from your air by pulling moisture away and directing that excess water through a dedicated drain line. But if that line gets clogged or blocked, the water has nowhere to go. It spills out, leaks into your home, and causes all sorts of headaches.
This isn’t just about a wet carpet. Over time, continued back-ups can cause mold growth, structural damage, and even compromise the safety of your electrical systems. I learned this the hard way when I ignored the early warning signs—like a slight musty smell or tiny puddles near my HVAC unit. That negligence cost me more time and money, which is why understanding this issue is crucial.
What’s worse? A lot of folks dismiss the problem as a minor inconvenience. But the root cause is often simple to fix if you know what to look for. And trust me, the fix is well within reach once you understand the basics. Fans of DIY can even tackle it themselves if they follow a few straightforward steps. For example, did you know that a frequent cause of drain line failure can be simply accumulated debris or algae growth blocking the pipe? When I first encountered this, I was surprised to learn that routine maintenance could prevent many of these issues altogether. (Interestingly, proper drainage can extend the life of your system—some experts say maintenance can double the longevity of your AC unit.)
Now, before we jump into solutions, I want to give you a taste of common pitfalls. Like the mistake I made early on—assuming that little puddle was just a leak that would evaporate on its own—many homeowners miss the warning signs of a developing problem. If you’ve noticed water pooling near your HVAC, or if your AC suddenly shuts off or turns into a drippy nightmare, don’t ignore it. You’re not alone, and frankly, I’ve been there too.
So, have you already faced this issue, or is your system still running silently, hiding potential problems? Either way, understanding the root causes will empower you to fix it fast—saving money and headaches in the long run. Let’s explore what exactly causes these backups and how you can clear the blockages without calling a service technician every time.
Locate Your Drain Line
First, find the external or indoor drain pipe connected to your AC unit. Usually, it’s a PVC pipe running from your furnace or air handler to an outside vent or basement drain. I once spent 15 minutes searching before realizing mine was behind a panel I overlooked, which caused unnecessary delay.
Disconnect and Inspect the Pipe
Carefully detach the drain pipe from the unit—use a wrench if necessary—and examine it for blockages. Look for debris, algae, or mold. During my first cleaning, I found a nest of leaves and some slimy buildup, which explained the backup. Wear gloves and prepare a bucket to catch residual water.
Flush Out the Blockage
Pour a mixture of hot water and white vinegar into the pipe to dissolve algae and debris. Use a funnel for control. For stubborn clogs, a plumbing snake or a flexible brush can be inserted to dislodge obstructions. I recommend starting with a gentle approach—force can damage the pipe. When I cleared mine, the water flowed freely afterward, halting the leak.
Clear the Drain Pan and Surrounding Area
Check the drain pan beneath the AC coil; clean out any standing water and settled debris. A dirty pan can harbor mold spores and contribute to future backups. Use a mild detergent and rinse well. After cleaning, drying the area prevents mold growth, especially in humid climates.
Reassemble and Test
Reconnect the drain pipe securely. Turn on the AC and observe if water flows properly through the pipe. Watch for leaks or spills around the unit. During my last fix, I noticed residual water escaping initially, which stopped after the pipe was properly seated—indicating a successful fix.
Prevent Future Clogs
Regular maintenance is key. Schedule a cleaning every 6-12 months, especially in humid areas where algae flourish. Consider installing a drain overflow pan or a trap to catch debris before it clogs the pipe. Plus, periodically pouring vinegar or a commercial drain cleaner can keep buildup minimal.
To further ensure your system remains in top shape, verify the installation of the drainage loop; improper setup here can cause recurring issues, which you can learn about here.
When to Call a Professional
If after your efforts the drain line still backs up or water leaks persist, it’s time to consult an HVAC technician. Persistent problems might be linked to a faulty pump or venting issues. Remember, attempting complex repairs without proper tools and knowledge can damage your system or void warranties—so don’t hesitate to seek professional help when needed.
 When it comes to appliance warranties and repairs, many homeowners believe they understand the basics—like warranties covering everything or that installation is a simple plug-and-play process. However, the truth is far more nuanced, and common misconceptions can lead to costly mistakes. For instance, a prevalent myth is that all warranties are automatic and fully protective, but in reality, many warranties exclude specific issues, such as damage caused by improper installation or DIY repairs. According to a study by consumer advocacy groups, nearly 30% of repairs fail due to overlooked warranty fine print, emphasizing the importance of reading the warranty documents carefully.
Another trap many fall into involves installation. It’s tempting to think that professional installation is just about plugging in the appliance, but experts agree that improper setup—like missing grounding or incorrect drainage connections—can void warranties and cause early failures. A notable example is the drainage loop in dishwashers, where incorrect installation often leads to water leaks and warranty voidance. Ensuring proper setup, such as following manufacturer guidelines or consulting experienced technicians, can save months of frustration.
Advanced repair mistakes often stem from a superficial understanding of appliance mechanics. For example, quick fixes like replacing a burned-out fuse without diagnosing the actual fault can lead to recurring issues. Tech-savvy homeowners know that some problems—like a smart fridge that keeps disconnecting—are symptom of deeper circuitry or software glitches. Regularly updating firmware and understanding device-specific troubleshooting, as discussed in expert forums, can make a significant difference.
Making a compelling case, a 2022 report by appliance repair professionals highlighted that a lack of knowledge about warranty exclusions often results in repair delays and unexpected expenses. This underscores the importance of diagnostic accuracy and knowing when to call a professional, especially for same-day service requests. Quick responses are essential, but rushing into repairs without proper assessment can damage the appliance or void the warranty.
What can I do if my appliance fails just outside the warranty period?
It’s common for homeowners to face repair costs just as warranties expire. The key is understanding the typical lifespan of appliances and maintenance practices that extend their life. Regular cleaning, like cleaning filter screens in washing machines, can prevent unexpected breakdowns. Additionally, purchasing extended warranties or service plans from trusted providers—like those offering same-day service—can provide peace of mind. Remember, professional service providers often have access to manufacturer-specific parts and diagnostic tools that DIY efforts lack, reducing the risk of further damage.
Lastly, beware of the hidden costs associated with certain repair services. Some technicians may promote unnecessary replacements or quick fixes, which can inflate your bill and diminish trust. Always ask for a detailed diagnostic and cost estimate in advance, and don’t hesitate to seek a second opinion if an offer seems inflated. Having a clear understanding of your warranty rights, installation practices, and repair options can safeguard your investments. If you want more insight into avoiding these pitfalls, check out tips on proper dishwasher drain hose installation or how to verify your manufacturer warranty is valid after maintenance.
Have you ever fallen into this trap? Let me know in the comments.
Investing in Quality Tools for Reliable Repairs
When it comes to maintaining your appliances, having the right tools can make all the difference. I personally swear by a high-quality multi-bit screwdriver set, like the Wiha Precision Screwdriver Set, because it covers most screw types you’ll encounter, saving me time and preventing stripped screws. Additionally, a digital multimeter, such as the Fluke 115, allows me to quickly diagnose electrical issues without guesswork. These tools are essential for safe, accurate, and efficient repairs, and they pay for themselves by helping me avoid unnecessary professional service calls.
Using Software to Track Maintenance and Troubleshoot
Beyond physical tools, I rely on appliance-specific diagnostics apps for certain smart devices. Manufacturers like Samsung provide companion apps that can run self-diagnosis tests and reset procedures remotely. For more complex troubleshooting, I use wiring diagrams and troubleshooting flowcharts from the manufacturer’s technical documentation, which I access through online repair forums or manufacturer portals. These resources help me pinpoint problems faster and ensure that I don’t miss small details that can lead to bigger issues down the line.
Scheduled Maintenance Acts as a Long-Term Investment
Regular routine maintenance can extend appliance lifespans significantly. For example, routinely checking and cleaning your washer’s filter screen can prevent grime buildup that causes the motor to strain, which you can learn more about here. Additionally, inspecting and replacing worn parts, like door seals or filters, before they fail, reduces unexpected breakdowns. Setting calendar reminders or using maintenance-tracking software helps me keep up with these tasks without forgetting. With consistent upkeep, your appliances can serve reliably for years, saving you money and stress.
Planning for Scaling and Upgrades
As your household grows or your needs evolve, scaling your maintenance practices becomes vital. Upgrading to smart tools, like Wi-Fi-enabled multimeters or leak detectors, enables remote monitoring and early alerts. This trend is set to accelerate as appliances become more connected, giving homeowners proactive control over potential issues. To prepare for future upgrades, I recommend investing in modular repair kits, which allow you to replace specific parts rather than entire units—cutting costs and reducing waste.
How do I maintain tools and procedures over time?
Maintaining your repair arsenal involves regular calibration, proper storage, and staying updated with the latest troubleshooting techniques. For example, recalibrating digital multimeters annually ensures measurement accuracy — a step I perform following manufacturer guidelines. Proper storage, like keeping screwdrivers in organized cases and cleaning tools after use, prolongs their lifespan. Additionally, subscribing to manufacturer newsletters and online forums keeps me informed about new repair hacks and updates, ensuring my skills stay sharp. This proactive approach helps me stay prepared for anything that goes wrong and reduces long-term repair costs.
By combining high-quality tools, digital diagnostics, routine maintenance, and ongoing education, you can keep your appliances humming efficiently for years. I’ve found these methods invaluable in avoiding expensive service calls and extending the life of my equipment. For a deep dive into advanced maintenance tips, try implementing a comprehensive tracking system or switching to smart troubleshooting tools — the investment pays off in peace of mind and appliance longevity.
,
The Hidden Traps That Cost Me Time and Money
One of the most eye-opening lessons I learned was realizing that not all warranties are created equal—many come with fine print that can catch you off guard, especially when DIY repairs inadvertently void coverage. I once thought that as long as I followed the installation instructions, I was safe, only to find out later that improper drainage setup, like neglecting to install the drainage loop correctly, voided my warranty and led to costly repairs. This taught me to read warranty documents thoroughly and verify that every installation step aligns with manufacturer guidelines.
A particularly stubborn myth was believing that all repairs should be DIY-friendly. While initial troubleshooting can often be handled at home—like clearing a clogged AC drain line—more complex issues, especially those involving electrical or plumbing components, are better left to professionals. Rushing into repairs without proper tools or knowledge risks damaging the appliance further or voiding warranties, which is why I now invest in quality tools like a reliable multimeter and consult manufacturer troubleshooting resources before taking action.
Tools and Resources I Swear By
Over the years, I’ve discovered that investing in a good set of repair tools makes all the difference. My go-to has been a high-quality multimeter, which helps me accurately diagnose issues like faulty sensors or electrical faults. For appliance-specific guidance, I rely on manufacturer websites and detailed wiring diagrams available in online repair forums—that’s how I fixed my smart oven’s flashing display by following a troubleshooting flowchart.
In addition, subscribing to appliance maintenance checklists and setting reminders has helped me catch problems early—like regularly cleaning my fridge’s condenser coils, which I learned about from trusted appliance blogs. These resources and habits significantly extend my appliances’ lifespans and save me from unexpected breakdowns, especially before a major holiday or family gathering.
Embrace the Challenge: Your Repair Journey Awaits
Remember, maintaining your appliances is more than just fixing things after they break—it’s about empowering yourself to troubleshoot confidently and prevent issues from escalating. Small steps like routine cleaning, understanding warning signs, and investing in quality tools transform your approach from reactive to proactive. So go ahead, pick up that wrench, read up on your specific model, and turn appliance maintenance into a rewarding skill. Your home will thank you, and you’ll gain a new sense of control over your household comfort.