Ever experienced that sinking feeling when your washing machine suddenly smells musty, leaves your clothes grubby, or just stops performing like it used to? I sure did. It was one quiet afternoon when I finally peeked behind my machine and discovered a tiny, overlooked culprit—a grimy filter screen nestled within the hose—something I had ignored for ages. That lightbulb moment changed everything.
Why Neglecting the Filter Screen Could Be costing You More Than You Think
This little piece, often hidden from view, plays a crucial role in keeping your appliance running smoothly. When it gets clogged with lint, detergent residue, and mineral deposits, it hampers water flow, leading to longer cycles, poor cleaning results, or even damage over time. I learned the hard way—my stubbornness in skipping routine maintenance turned a minor annoyance into a costly repair.
Interestingly, according to appliance maintenance experts, a blocked filter screen can be responsible for as much as 30% of washing machine malfunctions. Over time, neglecting this part can cause leaks, mold buildup, and even reduce the lifespan of your machine. Yet, surprisingly, many homeowners remain unaware of its existence, let alone how to clean it properly.
Have you ever faced a persistent odor or unseen leaks and wondered if something simple like this filter might be the culprit? If so, you’re not alone. I used to think these issues required professional help, but trust me, a quick filter check can often save you a trip or a hefty invoice.
To prevent these problems, regular inspection and cleaning of your washing machine’s filter screen should become part of your routine. It’s a simple, cost-free step that can extend your appliance’s life and improve its performance. Ready to learn how to do it yourself and wave goodbye to those pesky issues? Let’s dive into the practical steps that will keep your washing machine running like new.
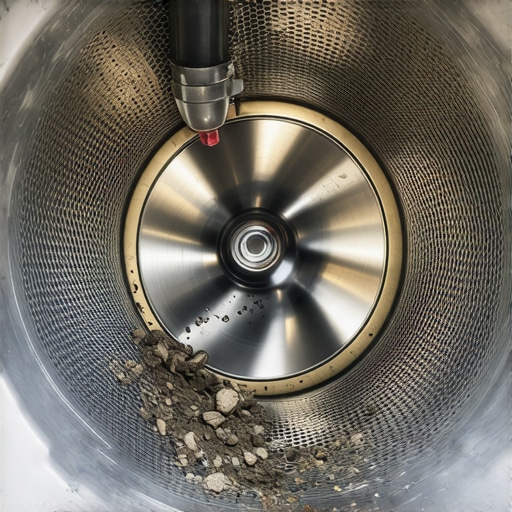
Locate the Filter Screen in Your Machine
Before starting, unplug your washing machine to ensure safety. Pull out the unit gently, and examine the front bottom panel or access panel—most models hide the filter behind a small door or panel at the front bottom. Use a flashlight if needed to see the exact location. It’s similar to finding a hidden treasure; once you identify it, the next steps become straightforward.
Gather Necessary Tools and Prepare for Cleanup
Grab a shallow container, gloves, and a soft brush or old toothbrush. Place a towel or a shallow basin underneath the filter compartment to catch any residual water or debris that might spill during removal. Think of this as your quick cleanup station, just like when you prepare your workspace before a delicate repair job. I once missed this step, and water soaked my socks—lesson learned!
Remove and Inspect the Filter
Carefully unscrew or pull out the filter screen. It’s often twisted counter-clockwise or may simply pull out. If it’s stuck, gently wiggle it to loosen. Once free, examine it for lint, soap scum, mineral deposits, or any foreign objects. Imagine this step as cleaning a clogged drain—neglecting it can lead to bigger issues, like the ones discussed in this guide.
Clean the Filter Thoroughly
Soak the filter in warm water mixed with a small amount of vinegar or mild detergent to loosen grime. Use your brush to scrub away stubborn buildup. Rinse well to remove any residual residue. This is similar to cleaning a filter in your car’s air system, which if ignored, can cause engine strain and reduce efficiency. My first try took longer than planned because I used harsh chemicals—stick to gentle cleaners for safety.
Reinstall the Filter and Test Your Machine
Once cleaned, reinsert the filter securely, turning clockwise or clicking it into place. Close the access panel tightly. Plug the machine back in and run a short cycle without laundry to ensure no leaks or issues. Think of this as a quick test drive after servicing your vehicle—just a few minutes confirm everything’s in good shape. After doing this, I noticed a significant reduction in musty smells and better water flow—proof that regular cleaning pays off.
Schedule Routine Checks
Make filter cleaning a monthly habit, especially if your water is hard or your laundry volume is high. Regular maintenance prevents buildup, extends your washer’s lifespan, and keeps it running efficiently, much like changing oil in a car. Remember, a little effort saves costly repairs down the line. For more tips on appliance upkeep, check this article about dishwasher maintenance.
Many homeowners operate under common assumptions about appliance warranties, installation, and repair services that can be misleading or even costly. Let’s dig deeper beyond the surface to understand what most people get wrong, the nuances involved, and how to protect yourself.
Do Manufacturers Truly Cover All Repairs or Are There Hidden Exclusions?
One prevalent myth is that appliance warranties are all-inclusive, covering any repair needed within the warranty period. In reality, most warranties have fine print exclusions—like damages from improper use or DIY repairs—that can void coverage. Experts from the Consumer Technology Association highlight that understanding warranty terms can save you from unexpected repair bills later. For instance, attempting DIY fixes without proper documentation or following manufacturer guidelines can inadvertently void your warranty, as shown in this article about how DIY maintenance can void warranties.
Why Proper Installation is More Critical Than Most Think
Many believe installation is a one-and-done step, but in reality, improper setup can cause long-term damage or safety hazards. For example, installing a refrigerator without verifying the level, or a dishwasher without correct drainage, can lead to leaks or operational issues. Often, homeowners skip professional installation to save money, but this can result in problems that no warranty covers. Check out this guide on installation pitfalls to avoid. Remember, an improperly installed appliance can quickly negate warranty benefits and lead to costly repairs down the line.
Same-Day Service: Is It Always the Best Choice?
Many assume that opting for same-day repair guarantees quick resolution, but this isn’t always true. The rush to fix an emergency may lead to less thorough diagnostics or rushed work, which can cause future issues. Additionally, urgent services often come at a premium, and quick fixes might overlook underlying problems. According to industry insiders, a detailed inspection—even if it takes a day longer—can save money and prevent recurring breakdowns. Make sure that fast service providers are qualified, too, by verifying credentials.
In the end, understanding these nuances helps you make informed decisions, prevents costly mistakes, and ensures your appliances serve you well for years. If you’re considering new installations or repairs, always read warranty terms carefully, hire qualified professionals, and weigh the benefits of thorough diagnostics over quick fixes. Have you ever fallen into this trap? Let me know in the comments.
Maintaining your household appliances over time can seem daunting, but with the right tools and consistent habits, you can extend their lifespan and ensure reliable performance. One key aspect is investing in quality diagnostic equipment. For instance, I personally rely on a digital multimeter like the Fluke 117, which allows me to quickly test electrical connections and spot issues before they escalate. This proactive approach saves time and money, especially when dealing with complex components like thermostats or capacitors. Additionally, a good appliance repair software, such as SmartRepair Pro, helps me keep track of maintenance schedules, error codes, and warranties, enabling precise troubleshooting and documentation. Over the years, I’ve found that regularly scheduled inspections using these tools catch problems early, preventing costly breakdowns. Looking ahead, I predict that IoT-enabled diagnostic devices will become standard, offering real-time alerts and remote assistance, making appliance upkeep even more seamless.
How do I keep my appliances functioning smoothly over the long haul?
Starting with basic habits like cleaning filters, checking for leaks, and verifying proper installation is essential. Investing in specific tools, such as a ultrasonic leak detector or a condenser coil brush, can make these tasks more effective. For example, cleaning your refrigerator’s condenser coil with a specialized brush can prevent frost buildup and overheating, as explained in [this detailed repair guide](https://discountappliancehub.com/why-your-refrigerator-is-leaking-water-from-the-bottom-front). Consistent inspections and minor repairs not only prevent major failures but also maintain energy efficiency, reducing utility costs. When faced with unexpected issues, quickly diagnosing with the right tools can determine if it’s time for professional service or a simple fix. For instance, a buzzing fridge might just need an adjustment to a loose fan blade, which I tackle with a precision screwdriver set. Remember, preventive maintenance is your best defense against unexpected breakdowns and costly repairs. If you’re serious about keeping your appliances running smoothly and want to dive into advanced techniques, I recommend trying out a digital multimeter for electrical testing—it’s an invaluable asset in any homeowner’s repair arsenal. Maintaining your appliances may seem complicated, but with consistent practice and the right equipment, it’s entirely manageable.
What the Hardest Lesson About Appliance Repair Taught Me
One of the most valuable insights I gained was that no matter how much you research, hands-on experience will always teach you more. I once tried to fix a refrigerator myself, ignoring the warning signs, only to end up with a more costly repair. Now, I understand that knowing when to call a professional can save both time and money.
How Ignoring Routine Checks Can Cost You Big Time
If I had listened to the advice to schedule regular inspections of my washing machine’s filter and condenser coils, I might have avoided many issues. Overlooking these simple maintenance tasks often leads to unexpected breakdowns, which can be prevented with a little proactive care.
The Common Myth That All Warranties Cover Everything
Initially, I thought a warranty would shield me from all repair costs. However, I learned that many warranties exclude common repairs like DIY fixes or damage from neglect. Reading the fine print has become a part of my maintenance routine to truly understand what’s covered and what’s not.
Skipping Installation Checks Might Be Costlier Than You Think
When I installed a new dishwasher myself, I didn’t verify the drainage hose properly. Soon after, I faced leaks that could have been avoided with a professional check. Proper installation is crucial for longevity, and a small investment upfront can prevent significant headaches later.
Why Fast Service Isn’t Always the Best Choice
Opting for same-day repairs might seem convenient, but I found that thorough diagnostics sometimes require a little patience. Rushing can lead to missing underlying issues, causing repeated breakdowns. Always ask if the technician performs comprehensive inspections before rushing into repairs.
More Than Just Tools — Cultivating Appliance Wisdom
Over the years, I’ve come to rely not only on a good toolkit but also on continuous learning through trusted sources. Reliable guides, like those from reputable appliance repair websites, help me make informed decisions and ultimately extend the lifespan of my appliances.
Embracing a Proactive Repair Mindset
Proactively checking components like filters, coils, and seals has transformed my approach. Instead of waiting for noticeable problems, I now perform regular quick inspections, which keeps my appliances running efficiently and saves me money in the long run.