It was a quiet Saturday morning when I first heard that maddening squeak from my dryer—sharp, persistent, and completely annoying. I stared at the machine, wondering if I’d accidentally turned it into a tiny violin. As the noise intensified, I realized that ignoring it wouldn’t make the problem disappear; in fact, if left unattended, it could lead to more costly repairs down the line.
Like many homeowners, I underestimated the importance of routine maintenance and misdiagnosed the culprit. It took a lot of trial and error, some online research, and a few frustrating missteps to finally crack the case. But one thing was clear: that squeak was a warning sign. If I didn’t address it, I risked my dryer breaking down completely and being hit with an expensive replacement.
Today, I want to share my experience with you—specifically, how to tackle that annoying squeak caused by a faulty belt tensioner. We’ll delve into a simple, step-by-step process that can save you money and frustration. Whether you’re a seasoned DIYer or a beginner, I promise this guide will shed light on troubleshooting and fixing your dryer’s tensioner, so you can get your laundry routine back on track.
Why the Belt Tensioner is the Real MVP in Your Dryer
The belt tensioner might sound like a small piece tucked away inside your dryer, but it plays a crucial role in keeping your machine running smoothly. Essentially, it maintains the right tension on the drum belt, ensuring that the drum turns evenly without slipping or making noise. When this part wears out or becomes misaligned, the first sign is usually that dreaded squeak. Over time, neglecting this issue can cause the belt to slip entirely, leading to a complete breakdown of your appliance.
I learned this the hard way—early in my repair adventure, I replaced the entire belt, thinking that was the problem. However, the squeak persisted. That was my mistake; I had overlooked the tensioner’s vital role. Properly tuning or replacing the tensioner can extend your dryer’s lifespan significantly. In fact, a well-functioning tensioner ensures your dryer operates quietly and efficiently, saving you energy and potential repair costs. To help you visualize the process, I recommend checking out this detailed guide on [the specific screwdrivers needed for most appliance repairs](https://discountappliancehub.com/the-specific-screwdriver-you-need-for-most-appliance-repairs), as having the right tools makes all the difference.
If you’ve faced that persistent squeal or worry that your dryer might be on its last legs, don’t worry. We’ll walk through the exact steps to diagnose and fix the belt tensioner, so you can take control of your appliance maintenance. Ready to quiet that annoying noise and revive your dryer? Let’s get started.
Disassemble the Dryer to Access the Tensioner
Start by unplugging your dryer for safety. Remove the back panel or front panel, depending on your model, to expose the drum and drive belt. Use a proper screwdriver to undo screws securing panels. Remember, I once overlooked the panel screws, causing a minor headache, but carefully labeling parts kept me organized. Gently set aside the panel to reveal the belt assembly.
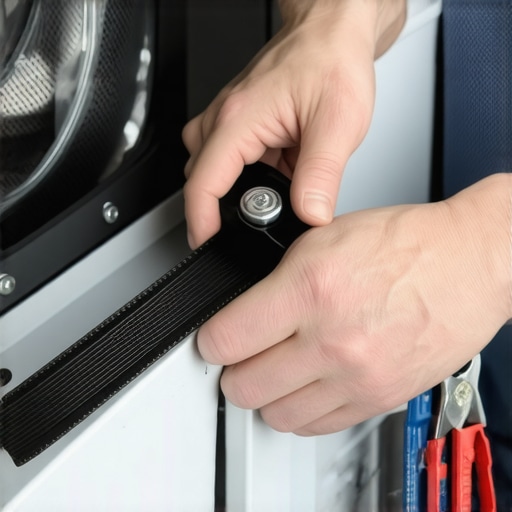
Identify and Remove the Old Tensioner
Locate the belt tensioner—it’s typically a spring-loaded pulley arm maintaining tension on the belt. Observe if it’s worn, cracked, or misaligned. Use a set of pliers or a screwdriver to release tension if needed, then slide the old tensioner out. I once found a tensioner completely seized, which made removal tricky; applying penetrating oil beforehand eased the process. Keep track of screws and springs for reassembly.
Inspect and Prepare the New Tensioner
Compare the new tensioner to the old one to confirm compatibility. Check the condition of the belt as well, replacing it if it’s frayed or slipping. During my last repair, I noticed a worn belt alongside the tensioner, which I promptly replaced. Ensure the new tensioner is clean and free of debris before installation. This prevents future issues down the line.
Install the New Tensioner and Reassemble
Attach the new tensioner in the same position as the old one, securing it with screws and fasteners. Carefully re-route the drive belt around the drum and pulleys, ensuring that it sits properly on all rollers and the tensioner. Apply pressure to the tensioner to keep it in place while tightening. Once assembled, double-check the pulley moves smoothly. I vividly recall testing the drum manually post-installation—it spun freely and quietly, confirming success. Then, replace the panels and screws, plug the dryer back in, and run a short cycle to verify the repair’s effectiveness.
Final Checks and Tips
Always prioritize safety by unplugging your appliance before beginning work. Use the right tools for each step to prevent damaging parts. If the tensioner appears damaged or doesn’t restore proper tension, replacing the entire assembly is more economical than risking future breakdowns. Remember, routine maintenance, like checking belts and tensioners, can prolong your dryer’s lifespan and keep it running smoothly. Want more repair tips? Check out this guide on preventing warranty voids through proper appliance care. Keeping your appliance in top shape ensures quieter operation and efficiency for years to come.Many homeowners operate under widely held but flawed beliefs about appliance repair, warranties, and installation, which can lead to costly mistakes and frustrations. One misconception is that warranty coverage always protects against any repair costs; however, many warranties exclude damage caused by poor installation or lack of maintenance. For instance, neglecting to clean coils or filters, such as in refrigerators, can void warranties, as explained in this guide on how a dirty condenser coil voids your warranty. Another common myth is that same-day service is always guaranteed, but availability depends on the provider and your location. Rushing to get an appointment without understanding their policies can backfire. Additionally, there’s a trap in assuming that DIY repairs are always cost-effective; without proper knowledge, you risk damaging sensitive components or voiding warranties. For example, tampering with smart appliances without understanding the technical nuances of their connectivity or software can lead to inadvertent damage, diminishing the lifespan of your device. This is especially true when trying to resolve issues like a smart fridge disconnecting from Wi-Fi, which may require specific reset procedures outlined in this article on smart fridge disconnections. Experts emphasize that understanding the details—like power surges or proper installation techniques—is crucial for maintaining warranty validity and ensuring long-term appliance performance. For example, faulty installation that neglects the anti-tip bracket can result in appliances becoming unstable, which poses safety risks and may void warranties. Find out more in this guide on anti-tip brackets. Remember, knowing the nuances of your appliance’s warranty terms and the correct installation protocols isn’t just for professionals—it’s essential for homeowners who want to avoid common pitfalls. Don’t make the mistake of rushing into repairs or installation without doing your homework; it can save you both money and peace of mind. If you’re unsure about any process, consulting a qualified technician is often the wisest choice. Have you ever fallen into this trap? Let me know in the comments.
Tools I Recommend for Reliable Appliance Repairs
When it comes to maintaining and repairing appliances, having the right tools can make all the difference. I personally rely on a high-quality digital multimeter to diagnose electrical issues accurately. Unlike analog testers, a digital multimeter provides precise readings, which is crucial when troubleshooting components like thermostats or control boards. For instance, checking the continuity of the heating element in your oven or ensuring your washer’s motor wiring is intact becomes straightforward with a reliable multimeter.
Another essential tool I swear by is a set of precision screwdrivers. Different appliances use various screws, and using the correct driver prevents stripping those tiny fasteners. I prefer magnetic-tip screwdrivers for holding screws securely, which is a lifesaver when working in tight spaces or when dealing with delicate plastic panels.
For belt-driven components like dryers, I recommend a stubby pry tool. It allows you to gently lift or remove panels without damaging clips or bending plastic. In my experience, this tool is invaluable for accessing hard-to-reach tensioners or pulleys, especially in models with limited clearance.
Now, for cleaning and preventive maintenance, a compressed air canister or an air compressor is indispensable. Regularly blowing out lint, dust, and debris from vents, fans, and filters significantly reduces the risk of overheating or fire, and it prolongs the lifespan of your appliances. I make it a habit to clean my dryer’s blower wheel and vent ducts quarterly, which you can read more about in this guide on appliance maintenance.
Investing in quality tools isn’t just about fixing things—it’s about building a system that allows you to troubleshoot confidently and efficiently. In the near future, I predict that smart diagnostics and IoT-enabled tools will become more prevalent, making appliance upkeep even easier. Stay ahead of the curve by equipping yourself with the essentials now.
Maintaining Your Appliances Over Time
To ensure long-term performance, routine checks are critical. Regularly inspecting belts for wear, cleaning condenser coils in refrigerators (to avoid voiding your warranty, see this article), and testing safety features like thermal fuses can prevent unexpected breakdowns. Also, keep an eye on appliance manuals—many manufacturers now recommend software updates and calibration checks, especially for smart appliances, to optimize operation.
How do I keep my appliances functioning seamlessly over time?
Adopting a proactive approach is key. Schedule periodic maintenance, such as cleaning filters, checking door seals, and verifying power sources with a digital multimeter. Furthermore, consider investing in a power surge protector rated for your specific device, especially for smart refrigerators, to prevent damage from voltage spikes (more on this here). A small upfront investment now can save you hundreds in repairs later.
For ongoing peace of mind, keep records of maintenance and repairs. This documentation proves valuable if warranty claims or future troubleshooting arises. And don’t forget—if you ever feel overwhelmed, reaching out to a qualified technician can save you time and prevent inadvertent damage.
What They Never Tell You About Dryer Tensioners and Why I Wish I Knew Sooner
One of the most surprising lessons I learned in my appliance repair journey is that seemingly small parts like the belt tensioner can make a huge difference in your dryer’s performance. I once overlooked its importance, only to realize that neglecting this component could lead to costly repairs and persistent noise. The lightbulb moment came when I discovered that a simple tension adjustment or replacement could restore quiet operation and extend the machine’s lifespan. This experience taught me to respect the detailed inner workings of appliances, understanding that each part, no matter how minor it seems, plays a vital role in overall functionality.
Top Tools That Never Fail to Save Me During Repairs
Over the years, I’ve curated a toolkit that makes appliance troubleshooting less daunting. A high-quality precision screwdriver set is my go-to—using the wrong screwdriver can strip screws or damage delicate plastic covers. I also rely on a digital multimeter to quickly diagnose electrical issues, preventing guesswork. Additionally, a stubby pry tool helps me access tight spaces without risking damage to panels or wiring. For cleaning vents and coils, I swear by a compressed air canister—regular cleaning can prevent overheating and improve efficiency, saving you from future breakdowns. These tools have transformed my approach from guesswork to confident repairs.
Take Charge of Your Appliance Care — You’re Capable
Thinking about fixing your dryer or other appliances might seem intimidating at first, but the truth is, you’re more equipped than you believe. Every successful repair reinforces your confidence and understanding of how your appliances operate. Remember, routine maintenance—like inspecting belts, checking for worn parts, and cleaning filters—can prevent emergencies. Approaching repairs with patience and knowledge not only saves money but also empowers you as a homeowner. So, next time that squeak appears, don’t hesitate to roll up your sleeves—you might surprise yourself with what you can accomplish. Are you ready to tackle your next appliance challenge? Share your experiences or questions below and join our community of proactive homeowners.