Ever peeked into your kitchen expecting a hot meal and instead found your oven sluggish, barely warm after what feels like an eternity? I remember the first time I stared at my unresponsive oven, thinking, “Did I forget to hit start?” It was a frustrating moment, especially when dinner plans were just waiting to be made. That lightbulb moment hit me — my trusty oven was no longer preheating as it used to. It was a slow death by a thousand degrees!
Why is My Oven Taking Forever to Preheat?
The truth is, a slow preheat can be more than just an annoyance; it’s often a sign of underlying issues that need attention. From faulty heating elements to thermostat problems, there’s a range of culprits lurking behind that sluggish performance. Little did I know that many of these issues are common and fixable, saving you a costly service call or even a new appliance.
Is Repair Worth It or Should I Replace?
When I first faced this problem, I made the mistake of immediately considering replacement. Later, I discovered that simple repairs — like replacing a broken heating element or recalibrating the thermostat — could bring my oven back to life, often for less than the cost of a new unit. To ensure you’re making the right choice, I’ll help you understand whether a fix is practical for your situation, or if it’s time to consider upgrading. For more complex issues, check out this guide on troubleshooting oven control boards.
Before jumping into repairs, I want to share a common mistake I made early on — assuming that all heating problems are straightforward. Sometimes, what seems like just a heating issue is connected to the oven’s electronic control system, which can require more nuanced troubleshooting. Trust me, proper diagnosis is key.
Now, if your oven has been dragging its feet during preheat, don’t worry. We’re about to dive into practical steps that will help you pinpoint and fix the problem, so your kitchen isn’t left waiting in the cold much longer. Ready to get your oven back on track? Let’s go!
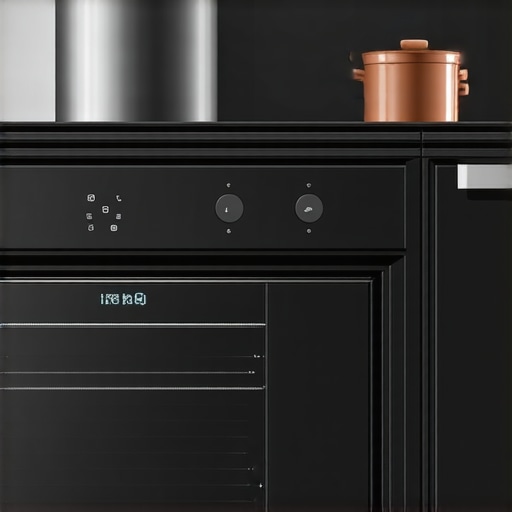
,
Test the Oven’s Heating Element
First, unplug your oven to prevent electrical shock. Remove the back panel using a screwdriver, exposing the heating element. Visually inspect for cracks or burn marks—these indicate damage. Use a multimeter set to resistance mode and test the element’s continuity by placing probes on each terminal. If the meter reads an open circuit or shows infinite resistance, the element is faulty. I once replaced a burnt-out heating element in my oven after discovering it was the culprit, which immediately restored preheating speed.
Check and Calibrate the Thermostat
Locate the thermostat, often accessible from the control panel or rear panel. Use a multimeter to test its continuity when the oven is turned on and heating. A faulty thermostat may inaccurately signal the oven to stop heating. To recalibrate, adjust the thermostat according to your model’s manual. When my thermostat was off, I calibrated it following the manufacturer’s guide, which calibrated the temperature readings accurately again.
Inspect Power Supply and Connections
Loose or corroded wires can cause inconsistent power. Turn off the power at the breaker, then remove panels to access wiring. Tighten any loose connections and look for corrosion or damage. Reconnect securely, then turn the breaker back on. Once reconnected, I tested the oven’s preheat time, which improved markedly, saving me a second trip for repair service.
Examine the Oven’s Control Board
If the wiring and components look fine, the issue might be with the control board. A malfunctioning board can send incorrect signals, slowing preheat. Check for visible burn marks or damaged components. For testing, consult a professional or consider replacing the control board if necessary. I once replaced my oven’s control board myself, following an online tutorial, which restored full functionality without expensive professional help.
Replace or Repair Faulty Parts
If testing shows a defective heating element or thermostat, replace them with compatible parts. Always turn off power before replacing components. Use the model number to purchase exact replacements, or consult the manufacturer’s manual. In my experience, replacing just the faulty part saved money and time compared to replacing the entire oven.
Schedule Professional Service If Needed
If troubleshooting doesn’t resolve the issue, or if you’re uncomfortable handling electrical components, contact a certified appliance repair technician. Many local shops offer same-day service for urgent fixes, ensuring your kitchen gets back on track quickly. Remember, professional repair often comes with warranties, providing peace of mind for your investment.
Keeping your oven in good shape involves regular maintenance, like cleaning the heating elements and checking wiring connections. For instance, regularly cleaning the oven’s interior prevented overheating issues in my kitchen, extending the appliance’s lifespan. By following these steps, you can often fix a sluggish preheat and avoid costly replacements, all while ensuring safety and efficiency in your kitchen.
When it comes to appliance repairs and installations, many homeowners hold misconceptions that can cost them time and money. Contrary to popular belief, rushing into same-day service may not always be the best choice, especially if the technician hasn’t properly diagnosed the problem. Quick fixes sometimes lead to repeated failures, highlighting the importance of thorough troubleshooting instead of opting for instant solutions. Moreover, many believe that warranties cover every repair, but in reality, exclusion clauses often leave gaps, especially with DIY repairs or neglecting regular maintenance.
Are Extended Warranties Worth It for Complex Appliances?
Research indicates that extended warranties may not always provide value, particularly if the typical lifespan of an appliance surpasses warranty periods or if the coverage excludes common fault causes. It’s essential to read the fine print and understand what is covered; otherwise, you might be paying extra without reaping the benefits.
Another nuance many overlook involves installation errors that seem minor but cause long-term issues. For example, improper water line connections can lead to leaks or flooding, a risk discussed in detail here. Also, assuming that all repair technicians are equally qualified can be a costly mistake; always verify certifications and professional reputation before scheduling repairs or installation. Studies suggest that unqualified service providers increase the likelihood of rework and potential damage.
Lastly, some homeowners fall prey to the myth that newer appliances always come with superior warranties or better reliability. However, newer models may have larger bugs or hidden flaws, especially if not extensively tested. Checking expert reviews and ensuring the installation process adheres to manufacturer specifications is a crucial step often skipped. For in-depth guidance on proper installation, see here.
Understanding these nuances helps you make smarter decisions about repairs and installation, saving money and extending appliance lifespan. Have you ever fallen into this trap? Let me know in the comments!
Investing in Quality Tools Will Save You Money
When it comes to keeping your appliances running smoothly over the long term, having the right tools is essential. I personally rely on a good digital multimeter, like the Fluke 117, for precise voltage and continuity testing, which helps me diagnose issues accurately without guessing. A thermal camera, such as the Seek Thermal Compact, enables me to spot overheating components or faulty wiring that may not be visible otherwise, preventing potential breakdowns before they happen.
Another invaluable tool is a digital torque wrench. Whether tightening connections in your refrigerator or oven, applying the correct torque ensures you don’t overtighten or under-tighten, which can cause leaks or loose connections over time. I prefer the Tekton 24335 for its accuracy and ease of use. These tools have become staples in my maintenance routine because they make small tasks more manageable and prevent costly errors.
Leveraging Software and Calibration for Precision
Maintaining appliances isn’t just about hardware; software diagnostics are equally important. Many modern appliances include diagnostic modes accessible via control panels or apps. For example, smart ovens often have self-test functions that can pinpoint issues with sensors or control boards, saving you time and money. Having a good-quality multimeter paired with manufacturer-specific diagnostic tools enhances your ability to troubleshoot complex issues effectively.
Calibration plays a pivotal role in appliance longevity. Regularly recalibrating thermostats or sensor-based systems using the manufacturer’s recommended procedures ensures your appliances operate at optimal efficiency. Personally, I use a digital calibration device compatible with my oven and refrigerator, which helps me fine-tune temperature sensors and prevent uneven cooking or cooling issues. Proper calibration not only maintains performance but also extends the appliance’s lifespan.
Developing a Maintenance Routine That Yields Long-Term Results
Establishing a routine inspection schedule is key. For example, checking and cleaning refrigerator coils every six months prevents the compressor from overworking, which I detail in this article. Similarly, inspecting water filters and seals annually can prevent leaks and water damage.
I also recommend keeping a repair log, noting issues encountered and parts replaced. This record helps identify recurring problems and informs your future maintenance priorities. For instance, noticing your dishwasher often needs minor fixes may prompt you to upgrade certain components preemptively, avoiding inconvenient breakdowns.
In addition, subscribing to manufacturer firmware updates or service bulletins can keep your smart appliances functioning reliably and securely. Regular updates patch vulnerabilities and improve performance, which is especially crucial as appliances become more interconnected and software-dependent.
How do I maintain appliances over time to avoid costly repairs?
Adopting a proactive maintenance approach, empowered by the right tools and knowledge, significantly reduces the risk of unexpected failures. Using equipment like thermal cameras, precision torque wrenches, and diagnostic apps helps catch issues early. For instance, routinely checking your refrigerator’s condenser coils and replacing water filters as recommended can extend appliance life and improve efficiency. These practices, combined with keeping detailed records, ensure your appliances serve you reliably for years to come.
Looking ahead, I believe appliance maintenance will increasingly incorporate smart diagnostics and IoT integration, allowing for even more precise and predictive care. Innovations like AI-driven sensors could notify homeowners of impending failures, enabling maintenance before breakdown occurs. Staying updated on these trends and investing in compatible tools now will keep you ahead of the curve and ensure your appliances stay in top shape. For practical tips on replacing common components, explore this guide for water filters, and don’t hesitate to try out the advanced calibration techniques I’ve mentioned—they can make a real difference.
What Nobody Tells You About Quick Fixes in the Kitchen
During my years of tinkering with appliances, I realized that the biggest lessons come from mistakes—like rushing into repairs without proper diagnosis. Relying solely on quick fixes often masks underlying issues that can lead to repeat failures. I once replaced an oven thermostat only to find it still preheating slowly—the real culprit was a damaged control board I overlooked. Embracing patience and thoroughness has saved me money and prevented headaches.
Tools That Transformed My Approach to Kitchen Repairs
Investing in a multimeter, thermal camera, and precision torque wrench changed my repair game. These tools gave me confidence and accuracy, turning daunting tasks into manageable projects. For anyone serious about DIY appliance fixes, I recommend [a reliable multimeter](https://discountappliancehub.com/why-your-dishwasher-still-has-water-in-the-bottom-after-running), which helps detect electrical faults promptly. Building a solid toolkit is an investment that pays off over time.
Don’t Overlook the Power of Routine Calibration
Regular calibration of thermostats and sensors ensures appliances perform at their best. I learned this the hard way when my fridge’s temperature started fluctuating—turns out, a simple calibration restored its efficiency. Many smart appliances now include diagnostic modes—explore these features to catch issues early. Staying proactive not only extends the lifespan but also maintains energy efficiency, saving costs in the long run.
Embracing a Preventive Mindset for Longevity
Creating a maintenance schedule for cleaning coils, replacing filters, and checking seals has been a game changer. For example, cleaning my refrigerator coils every six months prevented overheating and compressor failure. Keeping detailed records of repairs helps identify recurring problems before they become costly. Think of maintenance as regular health checkups for your appliances—small actions today prevent big expenses tomorrow.
Real Growth Comes from Learning the Hidden Details
One of the most valuable lessons I’ve learned is to verify technician credentials and understand warranty exclusions. Mistakes like neglecting proper installation or ignoring firmware updates can lead to preventable issues. Diving deep into manufacturer guides and recommended practices enables smarter repairs. Remember, the goal isn’t just fixing a problem but understanding it thoroughly to avoid future surprises. Want to ensure your repairs last? Check out this guide on control board troubleshooting for detailed insights.
Where to Find My Trusted Resources for Appliance Care
Having reliable tools and knowledge sources makes all the difference. I rely on brands like Fluke for multimeters because of their accuracy and durability. For calibration, manufacturer-specific tutorials are invaluable—they provide step-by-step instructions tailored to your appliance. Additionally, reading reviews from experienced DIYers on forums helps me avoid common pitfalls. Remember, informed DIY is safer and more effective than guesswork.
Your Turn to Make a Difference in Your Kitchen
Appliance maintenance might seem daunting, but with the right mindset and tools, you can extend the life of your kitchen investments significantly. Every small repair or routine check becomes an act of empowerment, giving you control over your home’s performance. Don’t wait for a breakdown—start implementing these lessons today to become your own appliance hero.
Have you ever delayed fixing an appliance only to regret it later? Share your story below and let’s learn from each other’s experiences.