
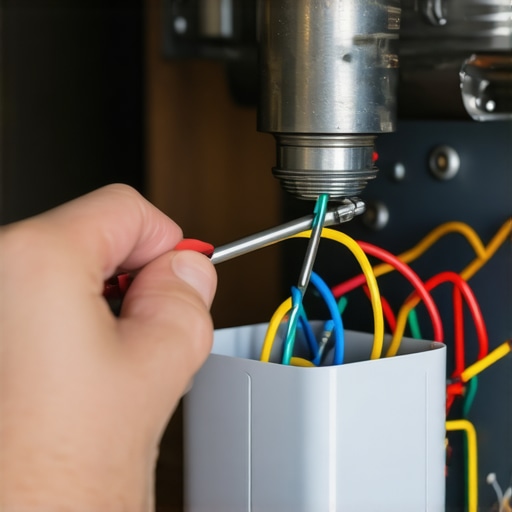
It started with a sink full of cold, greasy water and a plate of half-eaten lasagna. I flipped the switch, expecting the usual roar, but instead, I got a low, vibrating hum. That sound is the universal signal for ‘your evening just got more expensive.’ I’ve been in that exact spot, staring at a swampy mess, wondering if I should just move houses. Early in my DIY journey, I made the classic mistake of poking a metal spoon into the drain while the switch was on—thankfully, I only lost the spoon, but I learned my lesson about respect for the motor. Today, we’re going to bypass the panic. We’re going to figure out how to silence that hum and get the blades spinning again. Whether you eventually need affordable same-day appliance fixes with warranty benefits or just a bit of elbow grease, I’ve got you covered.
Stop the Hum Before You Call a Plumber
That annoying sound actually tells us something very specific: the motor is getting power, but it can’t turn. It’s like a car stuck in the mud. Before you assume the whole unit is trash, we need to check the basics. Most disposals have a built-in circuit breaker that trips to prevent the motor from burning out. If you haven’t checked the red reset button on the bottom, you might be missing the easiest fix in the world. I’ve seen people pay a hefty service fee just to have a tech press that little button. If that doesn’t work, we have to look at the flywheel. You’ll often need the specific wrench you need to unjam a disposal in seconds to manually wiggle the motor free from whatever bone or fruit pit is holding it hostage.
Is Messing with the Wiring Actually Safe?
I know what you’re thinking—electricity and water are a bad mix. You’re right to be skeptical. But once you disconnect the power at the source, it’s just a matter of checking that the wire nuts haven’t vibrated loose over the last five years of heavy use. According to the Electrical Safety Foundation International, poor wire connections are a leading cause of localized overheating and failure in household appliances. If your disposal was installed poorly, those wires might just be hanging by a thread inside the junction box. Ensuring a tight connection is a fundamental part of how to maximize your appliance warranty during emergency repairs because it prevents long-term electrical damage to the motor. Have you ever been intimidated by the wires under your sink? Trust me, if I can learn to do this without burning my eyebrows off, you can too. Let’s get our hands a little dirty and save some cash.
Unstick the Flywheel with a Quick Twist
The most common reason for that dreaded humming sound is a physical obstruction wedged between an impeller blade and the drain chamber wall. Imagine a small pebble getting caught in the gears of a clock; the clock wants to tick, but it’s physically locked. To fix this, you don’t need to take the whole machine apart. Look at the very bottom of the disposal unit under your sink. You’ll find a small, circular hole in the center of the motor housing. This is where you use the specific wrench you need to unjam a disposal in seconds. By inserting the hex wrench and cranking it back and forth, you are manually forcing the motor to turn. I remember a humid Tuesday when a stray cherry pit brought my kitchen to a standstill. I was convinced the motor had fried. After a few forceful turns with the wrench, I heard a satisfying ‘pop’ as the pit dislodged. If you can’t get it to budge, you might be facing a more serious internal failure, in which case same-day appliance repair quick solutions with warranty support becomes your best safety net. 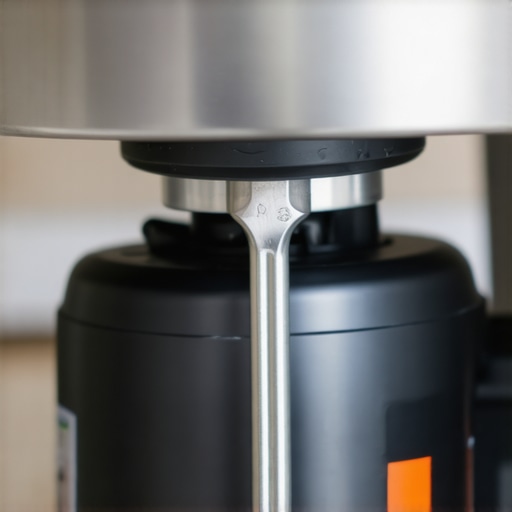
Press the Little Red Button of Life
If you’ve cleared the jam but the unit won’t even hum anymore, you’ve likely tripped the internal breaker. This is a safety feature designed to save you from an electrical fire. On the bottom or side of the unit, there is a small red reset button. It’s like the ‘GFCI’ outlet in your bathroom but for your sink. Give it a firm press. If it clicks and stays in, you’re back in business. However, be careful—resetting a motor that is still jammed can cause permanent damage. Always ensure the flywheel is spinning freely with your wrench before hitting that button. If the button keeps popping out immediately, you might have a short circuit in the wiring. This is where you have to weigh the risks. While DIY is great, there are the hidden costs of diy repairs on warranty covered items to consider, especially if a mistake voids your protection plan.
Stop Your Sink from Backing Up into the Dishwasher
Many people think a humming disposal is just a motor issue, but often it’s a symptom of poor plumbing geometry. If your sink is gurgling or draining slowly, it puts extra stress on the disposal seals. You should check for the secret drain loop every plumber knows but installers skip. This is a high loop in the drain hose that prevents dirty water from siphoning back into your appliances. I once helped a neighbor who had standing water in her dishwasher for weeks. It turned out the disposal was fine, but the installation was missing this crucial loop, causing a vacuum lock. Implementing the drainage trick for a kitchen sink that gurgles when the dishwasher runs can prevent the motor from ever getting overworked in the first place.
Verify the Power Connection and Grounding
If the reset button is fine and the blades are clear but there is zero sound, it’s time to look at the plug. Vibrations from the disposal can actually loosen the power cord over time. Ensure the plug is seated deeply in the outlet. If it’s hard-wired, you’ll need to check the junction box under the unit. Learning how to ensure reliable appliance installation in 2025 means knowing that a loose ground wire can cause intermittent power drops. A simple tightening of a wire nut can often be the difference between a working kitchen and a $200 replacement bill. Just remember to always flip the breaker at the main panel before you start touching copper.Most people believe that calling for ‘same-day service’ is the ultimate solution to a dead garbage disposal, but there is a nuance that even experienced DIYers miss. Everyone says the goal is to get a technician through the door before the sun sets, but in my experience, the speed of the arrival is often a distraction from the speed of the actual resolution. The industry secret is that ‘same-day’ usually refers to the diagnostic visit, not necessarily the finished repair. If your disposal has a burnt-out motor or a cracked housing, the tech might show up in two hours just to tell you the part is three days away. To truly get affordable same-day appliance fixes with warranty benefits, you have to provide the model number and a recording of the sound the unit is making before they even leave the shop.
The Speed Trap Most Homeowners Fall Into
The ‘oops’ factor here is assuming the professional has every possible disposal part in their van. A study by the Association of Home Appliance Manufacturers (AHAM) indicates that parts logistics are the primary cause of repair delays, not labor availability. If you want to bypass this, you need to follow top tips for same-day service warranty coverage which emphasize pre-diagnostic communication. I’ve seen homeowners wait all day for a pro, only for the tech to realize the disposal is a specific high-end model that requires a non-standard mounting gasket. By then, the ‘same-day’ window has slammed shut. 
Does a DIY Reset Actually Void Your Manufacturer Protection?
This is the advanced question that keeps many people from touching their appliances at all. The short answer is: usually not, but your documentation matters. Most manufacturers expect you to perform basic troubleshooting, like using a hex wrench to clear a jam. However, the moment you start unscrewing the motor housing or bypass the internal thermal protector, you are entering dangerous territory. To keep your warranty-backed appliance services you can rely on, you must avoid ‘invasive’ repairs. There are significant the hidden costs of diy repairs on warranty covered items if you accidentally strip a screw or melt a wire nut while trying to be a hero.
Don’t Ignore the Paper Trail During the Panic
When your sink is overflowing, the last thing you want to do is look for a receipt. But if you want the repair to be covered, you need the one maintenance record that saves your appliance warranty claim. I once saw a claim denied because the homeowner couldn’t prove the disposal was installed by a licensed professional, which was a specific requirement for that brand’s lifetime casing warranty. It’s these small, administrative details that separate a successful ‘same-day’ fix from a week-long headache. Have you ever fallen into this trap where the ‘quick’ service ended up taking much longer than promised? Let me know in the comments below, because your experience might help the next person avoid a swampy kitchen sink.I’ve learned that the best tool in my cabinet isn’t actually the hex wrench, but a simple $10 long-handled scrub brush. Most homeowners assume the disposal is a self-cleaning beast, but it’s actually quite delicate. Sludge builds up under the rubber splash guard, which is exactly why your kitchen starts to smell like a dumpster in the middle of July. I personally use a bio-enzyme liquid once a month to break down organic matter. This is far better than using harsh bleach, because bleach is actually the one cleaning agent that ruins your stainless steel interior and can dry out the rubber seals that keep the water where it belongs. If those seals fail, you are looking at a slow, hidden leak that rots your floorboards before you even notice the dampness. In the technical specifications for their high-end models, InSinkErator notes that over-tightening the mounting assembly can lead to premature seal failure by creating excessive stress on the rubber gaskets. It’s a delicate balance that many DIYers miss. If you aren’t confident in the fit, researching how to ensure reliable appliance installation in 2025 is a smart move for any homeowner. I also keep a pair of 11-inch needle-nose pliers near the sink; they are perfect for pulling out that stray bottle cap or wedding ring without ever risking your fingers near the grind chamber.
How do I maintain my garbage disposal over time?
The secret is consistent, small actions rather than occasional big fixes. Once a week, I fill the sink with four inches of soapy water and then pull the plug while the disposal is running. This creates a scouring effect that clears out the drain lines and prevents the p-trap mistake that causes your dishwasher to smell like sewage. Also, do not ignore the mounting ring. Over time, the heavy vibrations of the motor can loosen the three bolts holding the unit to the sink. Every six months, I give them a quick check with a screwdriver. If you find yourself constantly tightening hardware or hearing a rattle, it might be time to look for fast trustworthy appliance installation near you to get a professional reset on the mounting hardware before it drops. 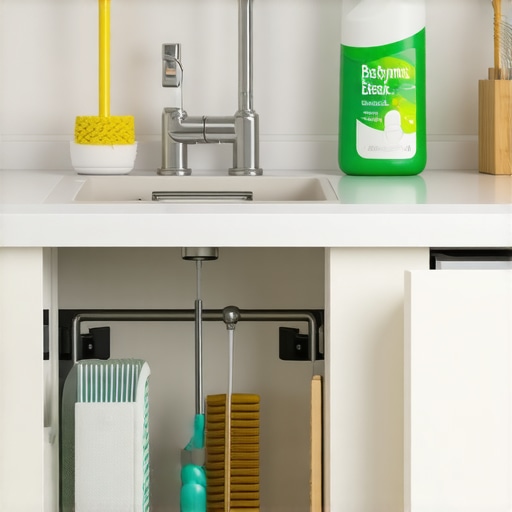 Looking ahead, I expect we are going to see a major shift toward AI-integrated plumbing systems. We are already seeing smart leak detectors, but soon, disposals will likely have internal sensors that monitor torque and vibration patterns to predict a motor failure weeks before it happens. This would allow you to maximize your appliance warranty during emergency repairs by having objective data to prove the unit was maintained despite the mechanical failure. Before you close the cabinet doors, do me a favor: grab a flashlight and check the mounting bolts under your sink right now. If they are even slightly loose, a five-minute tightening session could save you from a $500 flood next month. Trust me, your future self will thank you for being proactive.
Hard Lessons from My Most Expensive Plumbing Mistake
After years of tinkering under the sink, I realized that the loudest hum often comes from the smallest oversight. One of the biggest shifts in my perspective happened when I stopped treating my disposal like a woodchipper and started treating it like a precision instrument. If you want to avoid the cycle of constant breakdowns, keep these three lightbulb moments in mind. First, the model number is your best friend; never call for help or order a part without a photo of that silver sticker. Second, sound is a language. A metallic rattle is a foreign object, but a dull hum is a motor struggling against friction. Finally, I discovered that the one maintenance record that saves your appliance warranty claim is often just a simple dated photo of your monthly cleaning routine. Documentation is the only thing that stands between you and a denied claim when things go south.
Tools That Actually Live in My Sink Cabinet
I don’t believe in buying every gadget at the hardware store, but there are four things I never go without. To keep your kitchen running smoothly, I recommend keeping an offset hex wrench taped directly to the side of the disposal unit so you never have to hunt for it during a clog. I also rely heavily on bio-enzymatic cleaners rather than harsh chemicals. I learned the hard way that the one cleaning agent that ruins your stainless steel interior is often the high-acid drain opener people reach for first. For those times when the motor is truly toasted, I keep a bookmark on how to negotiate a repair instead of a replacement with your warranty provider. It has saved me hundreds by ensuring I get the most value out of my existing protection plans without being forced into an expensive upgrade.
#IMAGE_PLACE_HOLDER_E#
The Path Toward a Stress-Free Kitchen
The transition from panic to preparedness happens the moment you realize that most appliance failures are preventable. By taking ten minutes a month to check your mounting bolts and clear out sludge, you drastically reduce the need for emergency interventions. When a breakdown does occur, staying calm and using your troubleshooting checklist ensures you can secure affordable same-day appliance fixes with warranty benefits without overpaying for a simple reset. Your kitchen is the heart of your home, and a working disposal is the key to keeping it clean and functional. Don’t be afraid to get your hands dirty; the more you know about your machine, the less power it has to ruin your evening. Have you ever discovered a strange object inside your disposal that brought everything to a halt? Let me know in the comments below!