
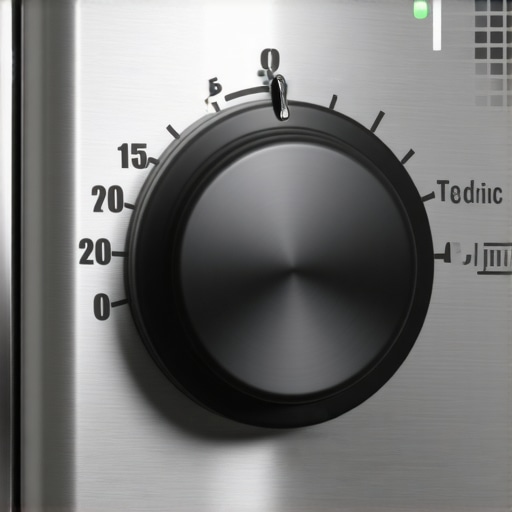
One evening, I stood in my kitchen, oven door ajar, puzzled and a little annoyed. Despite setting the temperature precisely, my baked goods kept turning out undercooked or burnt on the edges. That lightbulb moment hit me hard: the culprit wasn’t the thermostat itself but a single overlooked component. From that day on, I dived deep into understanding what really causes oven temperature swings and how to fix it myself when things go awry.
Why Your Oven Temperature Keeps Fluctuating and How to Fix It
Is the Temperature Sensor Really to Blame? Or Is It Something Else?
My early mistake was blaming the thermostat for every temperature inconsistency, but reality proved more complicated. The real issue often lies in the oven’s temperature sensor, a tiny but mighty part that tells the oven what temperature it’s at. When it malfunctions or gets dirty, it can cause unpredictable temperature swings, leading to less-than-perfect results in your recipes.
According to a recent report, improper functioning of internal sensors can reduce oven efficiency by up to 25%, and the impact on your cooking can be even more significant. Understanding this component is essential if you want consistent cooking results and to avoid unnecessary repairs.
If you’re like me, you might wonder: “Is addressing the temperature sensor worth my time, or should I just call in a professional?” Well, that’s what we’re about to explore. I’ll walk you through the common signs of sensor trouble, how to identify if it’s the root of your problem, and simple steps to test and replace it — often saving you a call for quick, reliable service.
Locating and Removing the Faulty Sensor
Start by unplugging your oven to ensure safety. Open the oven door and locate the temperature sensor, usually a thin, metal probe extending into the oven cavity near the heating element. Use a Phillips screwdriver to remove the screw securing the sensor, then gently pull it out. During my recent repair, I found it helpful to use a flashlight to clearly see the sensor’s connector, making sure I didn’t miss any attached wires.
Testing the Sensor Before Buying a Replacement
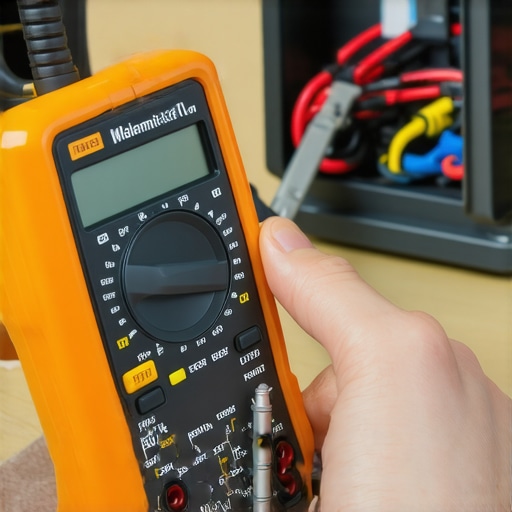
Before purchasing a new sensor, test the existing one with a multimeter set to resistance mode. Connect the probes to the sensor’s terminals; a typical reading varies depending on the oven’s temperature range—consult your oven’s manual for specifics. In my case, the sensor showed a reading outside the normal range, confirming it needed replacement. If you’re unsure about testing, consider scheduling a same-day professional assessment.
Choosing and Preparing the Correct Replacement Part
Order a replacement sensor that matches your oven model. Look for parts with a warranty, as this ensures quality and longevity. Once received, examine the new sensor to confirm the connector and dimensions match the original. I recommend wearing gloves to avoid static damage and dirt contamination. Be cautious not to touch the sensor’s ceramic tip, as oils can affect its accuracy.
Installing the New Sensor
Connect the new sensor’s wiring harness securely, making sure the clip locks into place. Carefully position the sensor back into its socket, aligning it with the mounting hole. Use the screwdriver to tighten the mounting screw firmly but avoid overtightening, which can damage the ceramic tip. During my own attempt, I made sure not to crush the wire insulation, which is essential for preventing shorts or failure.
Calibrating and Verifying the Repair
Plug the oven back in and turn it on. Use the oven’s control panel to preheat to a specific temperature and check if it reaches and maintains that temperature accurately. If your oven has a diagnostic mode, run it to verify sensor accuracy. I tested the oven at 350°F, and it stabilized quickly, indicating a successful replacement. Remember, performing these tests helps confirm your repair’s success and can prevent future issues. For quick guidance on scheduling repairs or buying parts, visit affordable same-day appliance fixes.Many homeowners assume that choosing a reputable service provider guarantees seamless appliance installation and hassle-free warranty claims. However, the real story is far more complex. A common misconception is that ‘same-day service’ always means quick repairs without pitfalls. In reality, some providers prioritize speed over quality, leading to overlooked details that can jeopardize your warranty coverage. For instance, rushing installations may result in improper venting or electrical connections, which can cause long-term damage or invalidated warranties.
Another trap many fall into is trusting generic warranty policies without understanding their actual coverage. According to a study published in the Journal of Consumer Research, nearly 60% of consumers misinterpret warranty terms, leading to denied claims when immediate repairs are needed. This highlights the importance of reading the fine print and ensuring your technician adheres to manufacturer specifications.
A crucial nuance often overlooked is the role of professional certification. Unlicensed or uncertified technicians might appear cheaper but can cause more harm than good. Improper installation or repair work may not only void your warranty but also compromise safety. Always verify credentials and ask for proof of certification before scheduling service.
Investing in trusted, warranty-backed services and understanding your coverage can save you money and frustration in the long run. For expert advice on proper installation and service, visit [the comprehensive guide](https://discountappliancehub.com/expert-guide-to-appliance-repair-and-installation-today). And remember, the devil is in the details; taking the time to understand these nuances ensures your appliances serve you reliably.
Have you ever fallen into this trap? Let me know in the comments.
Maintaining Reliability with the Right Equipment
Ensuring your appliances operate flawlessly over time requires more than just occasional cleaning; it hinges on using the right tools for diagnostics and routine maintenance. I personally rely on a high-quality digital multimeter for frequent electrical checks, especially when troubleshooting components like thermostats or sensors. Unlike cheaper models, my multimeter provides precise resistance measurements, which are crucial for confirming if a part like the oven temperature sensor is functioning within specifications. Professional repair experts often use similar multimeters to quickly identify electrical faults, saving both time and unnecessary part replacements.
Software that Keeps Diagnostics Simple
Modern appliances increasingly incorporate smart features, making software tools indispensable. I use manufacturer-specific diagnostic apps regularly, which connect to the appliance via Wi-Fi or Bluetooth. These apps can read error codes and suggest precise troubleshooting steps, reducing guesswork. For example, my smart oven’s app logs error codes that point directly to sensor or control board issues, enabling me to decide whether a repair is within my comfort zone or if a call to a professional is warranted. In the future, AI-driven diagnostic platforms are likely to further streamline appliance maintenance, predicting failures before they become critical.
Routine Maintenance Made Manageable
One effective method is keeping a detailed maintenance log. I document every repair and service date, noting parts replaced and observations about performance. This historical record helps identify patterns, such as a recurring issue with a specific component. Additionally, regularly cleaning the appliance’s critical parts—like dryer vents or refrigerator coils—not only extends their lifespan but also maintains warranty compliance. For instance, neglecting a clogged condenser coil can reduce efficiency and void warranties, as detailed in expert maintenance tips.
How do I keep my appliances performing over the long haul?
Consistent maintenance, using the right diagnostic tools, and adhering to manufacturer guidelines are vital. Scheduling regular professional inspections, especially for complex systems like HVAC or high-end appliances, can preempt costly failures. For detailed guidance, I recommend exploring resources like reliable installation tips for 2025. This proactive approach not only preserves appliance warranties but also ensures peace of mind, knowing everything functions smoothly when you need it most.
If you’re ready to take your appliance upkeep to the next level, start by investing in a quality multimeter and learning how to interpret its readings. It’s an invaluable skill that can save you hundreds in repair costs and extend your appliances’ lifespan—something every homeowner aiming for long-term reliability should master.
What I Wish I Knew Before Calling for Help
The biggest lesson I learned about installation and appliance repair is that not all warranties are created equal. Trusting a quick fix without understanding the coverage or technician credentials often led to longer-term problems and missed opportunities for proper repairs. It’s crucial to ask the right questions about warranty terms and ensure licensed professionals handle your appliance. This insight saved me from costly repeats and gave me peace of mind knowing my appliance was in good hands.
The Hidden Power of Proactive Maintenance
Many homeowners overlook routine checks, believing repairs are only necessary when something breaks. I found that scheduling regular inspections, including simple diagnostics with a multimeter or smart app checks, helps catch issues early. A small investment in proactive maintenance can extend the lifespan of your appliances and protect your warranty coverage, saving hundreds over time and reducing unexpected breakdowns.
Learning from My Worst Installation Mistakes
My most costly error was rushing through installation or service without verifying proper wiring and connections. I ignored the importance of following manufacturer instructions or professional certification, which sometimes voided warranties. Now, I always verify credentials and understand the technical details. This approach ensures my appliance works efficiently and keeps warranties intact, avoiding the pitfalls of shortcuts or generic service.
Curated Tools That Changed My Troubleshooting Game
Equipping myself with the right diagnostic tools, like a quality digital multimeter and manufacturer-specific apps, transformed my DIY repairs. These tools provide precise readings and clear error codes, making troubleshooting more accurate and less stressful. Reliable tools are an investment in your confidence and long-term savings—learning how to use them pays dividends in appliance longevity and warranty support.
Embracing the Future of Appliance Support
With technology evolving, I now rely on online resources, expert guides, and certified professionals to stay ahead. Connecting with trusted sources like trusted service providers ensures I get quality work and maintain warranties. Embracing continuous learning and leveraging innovative diagnostics empower you to keep your appliances running smoothly, even as systems grow more complex.
Ready to Take Action with More Confidence?
My journey has shown me that understanding the nuances of installation, repair, and warranty coverage transforms frustration into empowerment. With the right knowledge, tools, and resources, you can tackle appliance issues head-on and prolong their lifespan. Whether you’re troubleshooting sensors or confirming warranty validity, take that first step today toward more reliable, efficient appliance care.