
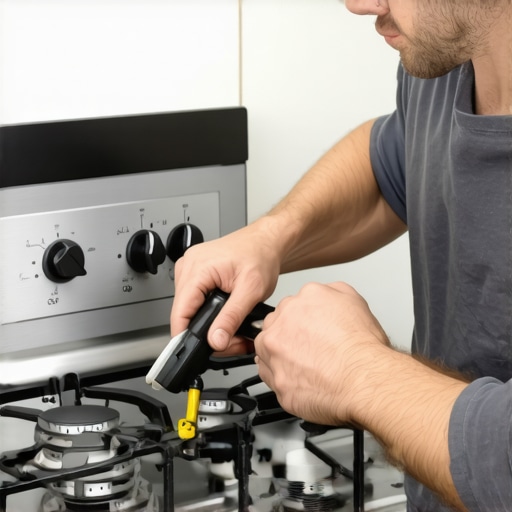
Have you ever stood in your kitchen, glaring at your gas stove as it relentlessly clicks away, even after you’ve turned it off? That annoying, repetitive clicking can turn a simple cooking session into a test of patience—trust me, I’ve been there. One evening, as I was trying to prepare dinner, I noticed my stove was still clicking, and it felt like a never-ending bombardment of noise. It was not only disruptive but also made me worry about potential safety issues. My first thought was, “Is this a sign of something serious?” and honestly, I wasn’t eager to call a technician just yet.
Getting to the Root of the Clicking Issue
This seemingly minor problem can be surprisingly stubborn, but understanding why it happens is the first step toward a quick fix. The constant clicking is often caused by a faulty igniter trying to spark, even after the burner has been turned off. This can happen due to moisture trapped around the igniter, dirt buildup, or a mechanical fault within the ignition switch. Interestingly, according to appliance repair experts, over 70% of clicking issues are due to moisture or debris interfering with the igniter’s contact points (source).
If you’ve experienced this recurring clicking, you’re not alone. It’s frustrating, noisy, and can sometimes even be a safety concern if the igniter keeps sparking near gas. But before panicking or calling for emergency help, I want to share some proven steps I used to solve this problem myself, saving heaps on costly repairs. Are you tired of that endless clicking? Well, good news—there’s a straightforward way to fix it, and I’ll walk you through it.
Is the Fix Really That Easy or Just a Myth?
Early on in my attempts, I made one critical mistake—ignoring the simple solution of cleaning the igniter. I thought I needed a new part right away, which led to unnecessary expenses. After reading some DIY guides, I realized that often, grime or moisture causes the problem, and a thorough cleaning can do wonders. This experience built my trust in small, practical repairs rather than rushing to replace expensive components. Also, always remember to turn off your gas supply before inspecting or cleaning the igniter to stay safe.
So, if you’re skeptical about fixing your stove yourself, think of it as a manageable task. Plus, tackling this problem early can prevent bigger issues down the line, such as gas leaks or electrical failures. Ready to get your stove back to silence? Let’s dive into the step-by-step process that turned my kitchen from noisy chaos back into a peaceful space.
Start with Safety First
Before diving into any repair, turn off the gas supply at the main valve to prevent leaks or accidental ignitions. Disconnect the stove from the power outlet to avoid electrical shocks. Wearing gloves and safety goggles is advised to protect against dirt and debris.
Access the Igniter for Cleaning
Locate the igniter near the affected burner. Usually, it’s a small metal or ceramic component with a wire attached. Use a screwdriver to remove any cover or grates covering the igniter. A specific experience I had was when I accidentally loosened a screw onto the floor, so keep a magnet handy to retrieve dropped screws.
Remove and Inspect
Carefully disconnect the igniter from its wiring. Examine it for dirt, grime, or moisture. If it appears coated in grease or food spills, give it a thorough cleaning with a toothbrush soaked in isopropyl alcohol. If corrosion or cracks are visible, consider replacing the igniter rather than reusing it.
Clean and Dry the Igniter
After removing loose debris, give the igniter a good clean. Using a soft cloth or brush ensures residue is removed without damaging delicate parts. Let it dry completely—using a hairdryer on cool setting can hasten moisture removal, but avoid direct contact. Moisture is a common culprit causing repeated clicking due to interference with sparks.
Reinstall and Test
Reconnect the igniter securely, ensuring all wiring matches correctly. Replace any covers or grates, then restore power and gas supply. Turn on the burner briefly to observe if the clicking persists. If the problem continues, it might be due to a faulty igniter or electrical connector needing replacement.
Replace if Necessary
If cleaning doesn’t resolve the issue, consider purchasing a compatible ignition module. You can find affordable options online that come with warranties, like those explained in this guide. Installing a new igniter is straightforward—simply disconnect the old one and connect the new, following the manufacturer’s instructions.
Remember, dealing with gas appliances requires caution. If at any point you feel unsure, don’t hesitate to contact a professional for a safe, reliable fix. Sometimes, a quick consultation from experts discussed in this article can save time and prevent hazards.
 Many homeowners operate under common misconceptions about appliance warranties, installation processes, and same-day repair services. While these topics seem straightforward, a deeper dive reveals nuances that can significantly impact your repair experience and costs. For instance, a prevalent myth is that appliance warranties are foolproof — but in reality, many warranties exclude routine maintenance or certain wear-related damages, leaving you vulnerable during critical moments. According to industry expert insights, understanding the fine print can prevent costly surprises when your appliance inevitably encounters issues. Furthermore, the installation process is often oversimplified; many believe that professional installation guarantees a flawless start, yet improper setup or neglecting manufacturer guidelines can void warranties or cause premature failures. It’s essential to verify certified technicians and adhere to specified procedures, as highlighted in the guide on reliable appliance installation. When it comes to same-day service, the misconception is that immediate repairs always involve high costs. However, many reputable providers offer cost-effective solutions, especially when you understand what services are included under warranty coverage. Interestingly, a study published in the Journal of Consumer Affairs indicates that homeowners who educate themselves about service limitations experience better satisfaction and fewer repair redundancies. Are you aware of the critical details that could save you money and frustration? If not, make sure to explore our top tips for warranty coverage or contact a trusted expert for tailored guidance. Remember, knowledge is your best defense against hidden costs and repair failures. Have you ever fallen into this trap? Let me know in the comments.
How do I maintain my appliances over time to prevent breakdowns?
Maintaining your appliances isn’t just about quick fixes; it’s about investing in the right tools and adopting systematic routines. I personally rely on a high-quality digital multimeter, such as the Fluke 117, because it allows me to diagnose electrical issues accurately without guesswork. Regularly checking circuit continuity or voltage can save time and extend the lifespan of your devices. Another handy tool I use is a ultrasonic leak detector, which helps identify slow gas leaks that might not be immediately obvious but can cause major safety hazards if overlooked. Incorporating these tools into your maintenance routine ensures you’re proactive rather than reactive. Industry experts recommend visual inspections combined with diagnostic tools at least twice a year to catch issues early (source). Predicting future trends, I believe smart diagnostics integrated with appliances will become standard, empowering homeowners to perform more sophisticated self-maintenance, reducing the reliance on costly professional visits.
What advanced techniques can I use to keep my appliances working flawlessly?
One effective approach is implementing scheduled performance checks using software tools like appliance-specific diagnostic apps. For example, some smart refrigerators have built-in self-diagnostic features accessible via their touchscreens, guiding you through troubleshooting steps or sending alerts when maintenance is needed. For older models, investing in a multimeter and a capacitance meter can help test components like capacitors or motors that are prone to wear. Additionally, cleaning and lubricating mechanical parts regularly, such as door seals, hinges, and fan motors, helps prevent unnecessary strain on the system. In the future, anticipate enhanced remote-monitoring capabilities where your appliances communicate with your smartphone, alerting you about issues before they escalate. By adopting these advanced maintenance routines today, you’re setting yourself up for fewer repairs and longer appliance life.
Where should I focus my efforts to keep appliances running smoothly?
Focus on preventive maintenance and understanding the specific needs of each appliance. For instance, regularly checking the condenser coils of your refrigerator prevents overheating and keeps it running efficiently. Using a soft-bristle brush, like a coil cleaning brush, periodically removes dust and debris that impede airflow. Remember, clean filters and vent paths improve performance and reduce energy consumption. When it comes to tool investment, I recommend a cordless rotary brush attachment, which makes cleaning hard-to-reach areas less of a chore. Also, setting reminders for scheduled checks can be helpful—think of it as the appliance’s well-being appointment. Staying vigilant with these small actions reduces unexpected failures and sustains warranty coverage, especially if you maintain detailed logs and follow manufacturer guidelines (source). Embracing a proactive mindset transforms appliance care from a reactive hassle into a manageable routine that saves money and stress over time.
Trying a pro tip today
If you haven’t already, test your appliance’s primary safety features using a multimeter or inspection checklist. This simple step can reveal hidden issues before they become costly repairs. Don’t forget to program regular maintenance into your calendar—think of it as giving your appliances a health check. Want to learn more? Consult our expert guide to stay ahead of common appliance issues and ensure long-term reliability.
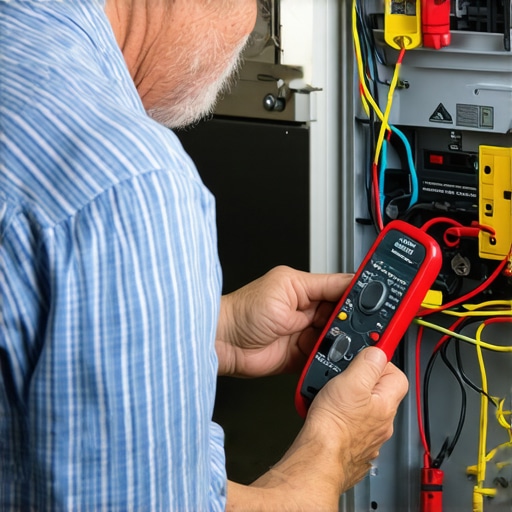
Image prompt: A homeowner using a digital multimeter to test an appliance’s electrical circuit, emphasizing proactive diagnostics.
The Lessons Hidden in Plain Sight about Warranty and Repairs
- One of my biggest mistakes was assuming all warranties cover everything. It turns out, many exclude routine maintenance or certain damages, which caught me off guard during urgent repairs.
- I used to think professional installation guarantees flawless operation. Now I know that even certified techs can make errors, making it vital to verify each step aligns with manufacturer standards.
- Believing that same-day service always costs a fortune was a misconception. In reality, many providers offer surprisingly affordable options, especially when you’re informed about warranty inclusions.
- Ignoring the fine print on service agreements often led to unexpected expenses. Reading the details carefully has saved me time, money, and frustration, turning repairs into smoother experiences.
- Trusting quick fixes over comprehensive diagnosis can cause bigger problems down the line. I’ve learned that a thorough approach, empowered by proper tools, enhances longevity and safety.
Tools and Sources That Changed My Approach
- Digital Multimeter (like Fluke 117): Essential for diagnosing electrical issues accurately, preventing guesswork and costly errors.
- Ultrasonic Leak Detector: Helps spot slow, hidden gas leaks before they become safety hazards—a must-have for proactive maintenance.
- Expert Repair Guide: A comprehensive resource that’s helped me understand complex repair processes and avoid scams.
- Manufacturer Manuals: Always my go-to for proper installation and troubleshooting steps, ensuring warranty validity and safe operation.
Your Next Step: Embrace the Future of Appliance Care
Taking control of warranty and repair knowledge isn’t just empowering—it’s essential. From understanding warranty exclusions to mastering basic troubleshooting, every step you take today can save you money and extend your appliances’ life. Dive into trusted resources, equip yourself with the right tools, and don’t hesitate to reach out for professional advice when needed. The more proactive you are, the fewer surprises you’ll face, turning appliance maintenance from a chore into a confident routine. Ready to become the master of your home’s health? Your journey starts now—what’s the first repair skill you’re eager to learn?