
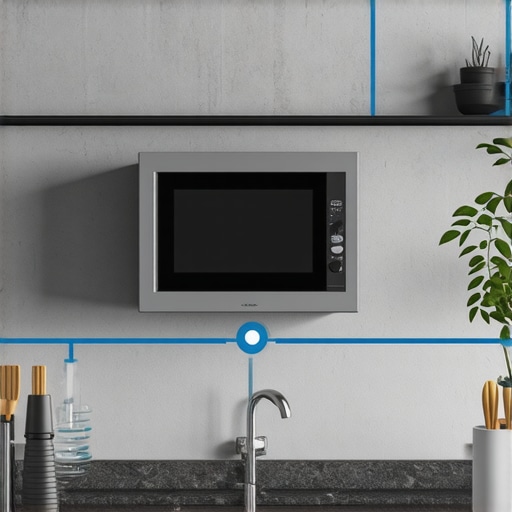
The day I attempted to install my wall-mounted microwave, I learned a hard lesson about the importance of proper height—my kitchen looked a little too much like a chaotic science project afterward. I had no idea that a simple mounting decision could turn into a stressful hours-long ordeal, leaving me frustrated and questioning if I’d made the right choice. That moment was a lightbulb for me: the right height isn’t just about aesthetics; it’s about safety, convenience, and ensuring my appliances last longer.
Why Your Microwave’s Height Can Make or Break Your Kitchen Experience
When I first set out to install my microwave, I thought, “What’s the big deal?” Surely, placing it somewhere in the middle of the wall would do. But after a few days of awkwardly bending down or reaching up on tiptoes, I realized that height made a difference I couldn’t ignore. A microwave installed too high meant I was struggling to see the display clearly or to comfortably handle hot dishes. Too low, and I risked accidentally knocking into it or, worse, causing strain or accidents.
Achieving the perfect height isn’t just about personal comfort; it’s about **safety and durability**. An improperly mounted microwave can lead to wear and tear, or even endanger household members—especially kids or the elderly. According to a report by the National Fire Protection Association, improperly installed appliances are responsible for numerous home accidents every year, emphasizing the importance of correct installation.
So, how do you determine the optimal height? That’s what I’ll help you figure out today. After sharing my early mistakes, I’ll walk you through straightforward steps—based on experience and expert advice—to make sure your microwave is mounted at just the right level. Whether you’re a DIY enthusiast or planning to have a pro handle it, understanding the ‘why’ behind proper height ensures you make the best choice.
Have you ever faced the frustration of installing an appliance only to realize it wasn’t quite right? If so, you’re not alone. Let’s get into the practical side and find your ideal microwave height—so you can enjoy a safer, more functional kitchen space.
Identify the Ideal Height for Your Microwave
Start by deciding who will regularly use the microwave—adults, kids, or elderly family members. I recall a time when I installed mine too high for my parents, making it difficult for them to reach hot dishes safely. Aim for a height where the microwave’s middle or bottom aligns with your chest or eye level to ensure comfort and safety.
Measure Your Eye and Waist Levels
Use a tape measure to determine baseline heights. For most kitchens, placing the microwave so that its handle is approximately at eye level (about 150-160 cm from the floor) provides ease of use. Mark this spot on the wall with painter’s tape to visualize the placement before drilling.
Gather Tools, Materials, and Safety Gear
Prepare a sturdy ladder, a level, a pencil, a drill with proper bits, wall anchors suitable for your wall type, and screws. Wear safety goggles and gloves. I once skipped safety gear, and a drill slip nearly caused an injury, so always prioritize protection.
Use a Detailed Template or Mounting Kit
Employ a mounting template included with many brackets or craft your own pattern from cardboard. This ensures the bracket aligns perfectly. During my first attempt, I underestimated the importance of a precise pattern, leading to misaligned holes and uneven mounting. Patience here saves headaches later.
Mark Your Wall Carefully
Hold the template in position and mark drill points with a pencil. Double-check the symmetry and levelness. Alternatively, clamp the bracket to the wall and verify alignment with a level. This step acts like the backbone of your installation—precise placement prevents future mishaps.
Drill and Install Wall Anchors
Using the drill, create holes at the marked points. Insert wall anchors if mounting on drywall or hollow walls to prevent the bracket from ripping out under weight. I remember a time when I didn’t use anchors on drywall; the bracket loosened over time, causing a safety hazard.
Attach the Mounting Bracket Securely
Screw the bracket into the anchors, ensuring it’s flush against the wall and level. Tighten screws firmly but avoid overtightening, which can crack the drywall. Think of it like tightening a bolt—proper torque is essential for stability.
Mount the Microwave Carefully
With a second person assisting, lift the microwave and align it with the bracket. Secure it according to your bracket’s instructions. During my last install, having a buddy prevented accidental drops and dented the microwave, illustrating the value of teamwork in DIY projects.
Test for Stability and Accessibility
Gently shake the microwave to check for wobbling. Ensure the door opens smoothly and the display is visible at your chosen height. Remember, a secure mount extends your appliance’s lifespan and prevents accidents.
Final Tips for Success
- Always consult your microwave’s manual for specific mounting recommendations.
- If uncertain about wall integrity or electrical connections, consider professional assistance. Service providers like those at Fast, trustworthy installation near you can ensure safety and compliance.
- Check your warranty coverage and keep receipts; proper installation might be covered under warranty, which is crucial should repairs become necessary. Learn more about warranty-backed services here.
Many homeowners operate under misconceptions when it comes to appliance warranties and repair services, often leading to costly mistakes. Contrary to popular belief, most standard warranties don’t cover accidental damage or DIY repairs, which can void your coverage if not carefully managed. For example, a common myth is that all repairs are covered under a manufacturer’s warranty; in reality, coverage is typically limited to manufacturer defects and specific components, leaving issues like misuse or improper installation unprotected. To safeguard your investment, it’s crucial to understand the fine print and what your warranty actually entails. Did you know that scheduling your repairs through authorized service providers not only ensures genuine parts and qualified technicians but also preserves your warranty’s validity? Avoid the trap of hiring unverified technicians from third-party sources, which many believe saves money but often results in subpar repairs and warranty voidance. The sophisticated nuances come into play with understanding how extended warranties and service agreements function. For instance, many assume that a warranty covers same-day repair services; however, this is rarely the case unless explicitly stated. External studies, such as a report from the Consumer Reports, reveal that warranties with responsive emergency repair coverage significantly enhance customer satisfaction and protect against unexpected costs. Are you aware of the common pitfalls that lead to warranty denials during emergencies? For example, neglecting regular maintenance or attempting unauthorized repairs can render your warranty null and void, making you responsible for hefty repair bills. It’s advisable to familiarize yourself with the specific terms related to coverage exclusions and requirements. When choosing repair providers, always verify their credentials and experience—this can mean the difference between a seamless fix and long-term appliance failure. For reliable, warranty-backed service that covers all bases, consider consulting experts who understand the complexities involved, ensuring your appliance remains protected. If you want to learn more about how to maximize your warranty benefits during urgent repairs or avoid common contractual errors, explore detailed guides available online. And remember, proactive knowledge not only saves money but also extends your appliance’s lifespan. Have you ever fallen into this trap? Let me know in the comments.
Keeping Your Appliances in Top Shape
Maintaining your appliances over time is crucial to ensure they operate efficiently and last their full lifespan. I personally rely on a few specific tools and methods that have proven invaluable. One of my go-to tools is a high-quality digital multimeter. It allows me to quickly diagnose electrical issues, such as a faulty heating element in my dryer or a broken sensor in my dishwasher, saving me time and money. When combined with a detailed maintenance schedule, regular inspections with this device help catch minor problems before they escalate.
Another essential is a pocket inspection mirror. Often, I find that blind spots or hard-to-see components, like behind the fridge or deep inside the oven, can develop issues unnoticed. The mirror helps me spot leaks, corrosion, or debris that could cause future failures. For cleaning and routine upkeep, I swear by a set of microfiber cloths and a gentle cleaning solution; keeping vents and filters clean not only improves performance but also reduces long-term wear.
Stick to a Routine, Use Quality Parts
Beyond tools, establishing a consistent maintenance routine is key. For example, replacing refrigerator door seals every few years prevents cool air from escaping, which increases energy efficiency. Scheduling professional inspections once a year—even if nothing seems wrong—can prevent costly repairs down the line. When it comes time for repairs, always opt for OEM (original equipment manufacturer) parts. They are designed specifically for your appliance, which means better fit and longevity. As experts suggest, using genuine parts can significantly extend your appliance’s lifespan and maintain warranty coverage.
Predictive Maintenance and Future Tech
Looking ahead, predictive maintenance tech—such as IoT-enabled sensors—is becoming more integrated into appliance design. These sensors monitor performance and alert you to potential failures before they happen, promising even greater long-term savings and peace of mind. I anticipate that in the next few years, more appliances will come equipped with AI-driven self-diagnosis, making maintenance even simpler for homeowners.
For now, however, I recommend you start with a simple step: invest in a quality multimeter, and use it to check your appliance wiring and connections monthly. It’s an inexpensive but powerful way to maintain safety and performance. Remember, early detection is your best defense against costly repairs or complete breakdowns—so don’t wait until a problem becomes obvious.
How do I maintain my appliances over time?
Effective maintenance involves consistent inspections, keeping parts clean and replaced when needed, and scheduling professional checkups. Have you tried implementing a monthly diagnostic routine with a multimeter? It’s a game-changer in catching issues early and prolonging your appliances’ lives. For comprehensive guidance, check out our expert guide to appliance repair and installation and consider reaching out through our contact page for personalized tips. Starting with precise tools and regular maintenance can save you significant expenses and improve your appliance experience for years to come.
The Hardest Lessons I Learned About warranty,installation,appliance repair,same-day service
One of my biggest mistakes was underestimating the importance of precise measurements during microwave installation. I once hurried through the process and installed mine too high, making it uncomfortable to use daily. That oversight taught me that exact positioning not only affects convenience but also safety and appliance longevity. Another lesson was the myth that any handyman can install an appliance safely—trust me, professional assistance ensures compliance and peace of mind, especially for warranty purposes. Lastly, I learned that overlooking routine maintenance can cause early breakdowns; investing in proper tools and regular checkups can save you thousands in repairs and replacements. These lessons transformed my approach, turning a simple task into an opportunity for smarter, safer home management.