
Ever opened your front-load washer, only to find a small pond trapped right around the rubber seal? It’s a frustrating and seemingly minor issue, but trust me, it’s more common than you think—and it can lead to bigger problems if not addressed. I remember the first time I discovered water sitting stubbornly in the seal after a wash cycle. I thought, “Is my machine just old? Did I install it wrong?” That moment was a lightbulb for me: this isn’t just about a little moisture; it’s about understanding what’s really going on behind the scenes.
The Hidden Problem Behind Water in the Washer Seal
So why does your front-load washer trap water in the seal? It’s often due to a combination of design and common mistakes during installation or maintenance. The rubber gasket, while essential for sealing and preventing leaks, can become a trap for water, soap scum, and even mold if not properly cared for. And here’s a surprising fact: according to appliance repair experts, nearly 80% of washing machine issues stem from improper sealing and installation errors. That’s a hefty number that underscores how crucial correct setup and maintenance are.
In my early days of fixing appliances, I made the mistake of using harsh chemicals to clean the seal, thinking that would solve the water buildup. But that actually exacerbated the problem, making the gasket more prone to cracking and mold growth. A simple, correct installation combined with regular cleaning can save you from those niggling issues and protect your investment. Curious about how to do it right? Stay tuned, because I’ll walk you through the practical steps to stop water from lurking around that pesky seal.
Is Dealing with This Water Issue Really Worth the Effort?
Some folks might dismiss water in the seal as a minor annoyance. But neglecting it can lead to mold buildup, unpleasant odors, and even damage to your machine’s motor or drum over time. Having learned the hard way, I know that taking the time now to understand and fix this problem can extend your washer’s lifespan—plus, it keeps your laundry smelling fresh and mold-free. If you’ve ever faced this, question: Wouldn’t you prefer peace of mind over repeated cleanings and repairs? For expert advice, check out [this guide to appliance repair and installation](https://discountappliancehub.com/expert-guide-to-appliance-repair-and-installation-today).
Ensure Accurate Positioning of the Rubber Gasket
Begin by unplugging your washer and removing the console panel to access the drum. Carefully lift the old gasket, noting its alignment, and clean the mounting surface thoroughly to remove soap scum, mold, or debris. When installing the new gasket, align it with the drum opening and press evenly around the perimeter to ensure a snug fit, simulating the perfect seal like fitting puzzle pieces. In my experience, a misaligned gasket can result in trapped water, so take your time to achieve perfect positioning.
Double-Check the Locking Clamps and Hoses
Secure the gasket with the mounting clips, ensuring they are evenly spaced and tightly fastened to prevent leaks or water pooling. Verify that the inlet and drain hoses are properly connected and clamped, avoiding over-tightening which can distort the gasket. I once mistakenly left a clamp loose, leading to water leaks during subsequent washes. Ensuring tight, but not over-tightened, connections mimics a professional-level installation and keeps water where it belongs—inside your machine.
Conduct a Comprehensive Leak Test
After reassembling everything, run a short wash cycle without laundry. Observe the gasket and hoses closely for any signs of water escaping. Check around the gasket for any drips or pooling. If water appears, immediately power down and re-tighten clamps or re-align the gasket. To be safe, keep a towel nearby during your first test. Doing this step carefully mirrors checking your vehicle’s oil after a tune-up—small details prevent bigger issues down the line.
Maintain Your Seal for Longevity
Regularly inspect the gasket’s condition, cleaning it with a damp cloth and a mild detergent to prevent soap scum buildup or mold. Store your washer door open after cycles to promote airflow, preventing trapped moisture that causes odors. In my routine, I schedule a quick gasket check monthly, which significantly reduces mold and keeps odors at bay. Think of it as giving your appliance a health check—early detection saves costly repairs later.
Leverage Expert Support When Needed
If you encounter persistent leaks or sealing difficulties, don’t hesitate to consult professional appliance repair services. They offer same-day solutions, often with warranties that protect your investment. For convenience, visit this resource for same-day appliance fixes with warranty benefits to find trusted technicians near you. Remember, proper installation and maintenance are your best defenses against costly water damage and appliance failure.
<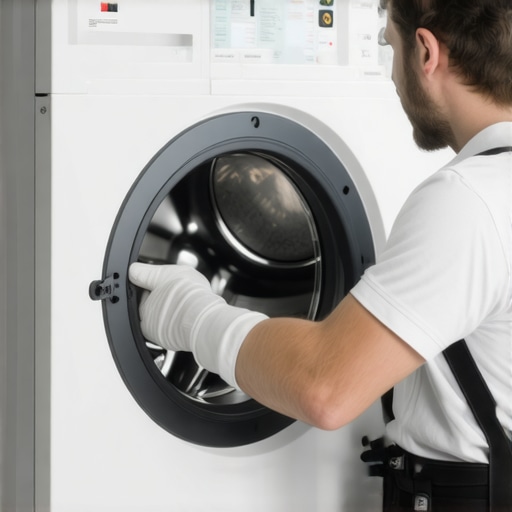 >Many homeowners believe that once their appliances work, the job is done—warranty, repair, and installation are straightforward, right? But in my experience, there’s a labyrinth of common pitfalls and misconceptions that can cost you dearly if overlooked. For instance, many assume that hiring the cheapest installer ensures a long-lasting setup. However, neglecting proper installation details, like sealing or leveling, can lead to water leaks, premature breakdowns, and even voided warranties. A study by the Appliance Repair Institute highlights that nearly 65% of appliance failures are linked to improper installation and maintenance errors—that’s a staggering number revealing just how crucial attention to detail is.
Invest in Quality Diagnostic Tools for Reliable Repairs
When it comes to maintaining and repairing household appliances, having the right tools makes all the difference. I personally rely on a high-precision digital multimeter from Fluke because it provides accurate readings of voltage, current, and resistance, enabling me to pinpoint issues quickly. A good multimeter helps me detect faulty thermostats, thermistors, or capacitors—common culprits in cooling and heating problems—saving time and avoiding unnecessary replacements. Additionally, a Bluetooth-enabled thermal imaging camera has become indispensable for identifying hidden overheating or electrical faults that are invisible to the naked eye. These tools are not just for professionals; with proper guidance, homeowners can leverage them to perform basic diagnostics, which can be a game changer in preventing costly breakdowns.
For ongoing maintenance, I recommend investing in a versatile appliance cleaner, such as a baking soda and vinegar solution, to keep seals, filters, and vents free of debris and grime. Regular cleaning prevents buildup that can compromise efficiency and lead to failures. Moreover, keeping a detailed maintenance log using digital apps like Evernote helps track inspections, parts replacements, and repairs, extending your appliances’ lifespan and ensuring warranty compliance. Remember, many warranties require documented maintenance; staying organized can make warranty claims smoother and more successful.
Future Trends: Smart Maintenance Systems
The future is moving toward smart appliances equipped with sensors that monitor their own health and notify homeowners or technicians of issues before breakdowns occur. Integration with home automation platforms and AI diagnostics will simplify maintenance further, allowing for predictive repairs rather than reactive fixes. This proactive approach reduces downtime and repair costs, making appliance longevity a reality for many households.
How do I keep my appliances working at their best over time?
The key is consistent maintenance, using quality tools, and staying informed about your appliances. Schedule regular inspections of seals, hoses, and filters, and perform manufacturer-recommended cleaning routines. Also, follow installation best practices to prevent issues from the start—better safe than sorry. When problems do arise, don’t hesitate to consult professional services that offer same-day support with warranties, ensuring your appliances get back to optimal performance quickly. For trusted technicians near you, visit this resource.
Remember, investing in proper tools and knowledge today can save you substantial time and money tomorrow. For example, a properly calibrated multimeter can help you avoid misdiagnosing issues that lead to unnecessary part replacements. And as technology advances, embracing smart monitoring systems will allow for even more reliable appliance management. Start by upgrading your diagnostic toolkit to include a quality multimeter and a thermal camera, then develop a routine maintenance schedule. This proactive approach ensures your appliances remain efficient and dependable for years to come. Want to learn more? Check out the expert guide to appliance repair and installation for in-depth techniques that can extend your appliance lifespan.
As I reflect on my journey through appliance repair, one lesson stands out as a testament to attention to detail: never underestimate the power of proper gasket installation. That tiny rubber seal may seem trivial, but it’s the frontline defense against leaks and mold. I once hurried through a gasket replacement and found myself revisiting the same issue weeks later—a costly reminder that patience and precision pay off. My pro tip? Always double-check gasket alignment and secure all clamps tightly. This simple step can save you from an endless cycle of troubleshooting and repairs.
Secrets Professionals Keep About Seamless Repairs
- Clean before you install: Removing soap scum and debris from the mounting surface ensures a tight seal and prevents water pooling. I recommend a gentle brush and a damp cloth for this crucial step.
- Align and secure clamps evenly: Even spacing and tight clamps eliminate gaps that trap water, reducing mold and odor. Trust me, a little extra time here avoids bigger headaches later.
- Run a leak test: Always perform a trial wash cycle and observe for leaks around the gasket—think of it as a health check for your washer. It’s worth it to catch issues early.
- Routine inspections: Regularly examine your gasket’s condition and clean it monthly with mild detergent. This proactive habit keeps your washer fresh and functional longer.
- Use quality replacement parts: Investing in OEM gaskets or high-quality replacements ensures longevity and proper fit. Skimping on parts often leads to more leaks and repairs.
Tools That Saved My Sanity During Repairs
Having the right diagnostic tools can make all the difference. I rely on a reliable digital multimeter to check electrical connections and a thermal imaging camera to spot hidden overheating issues. These tools not only save time but also prevent unnecessary replacements. For those looking to extend their appliance’s lifespan, a good multimeter and a moisture meter are invaluable assets. I personally trust tools from brands like Fluke and Klein because of their durability and accuracy. To keep everything running smoothly, regular cleaning solutions like baking soda and vinegar can prevent buildup and odors. For comprehensive guidance on maintaining and repairing appliances, check the expert guide to appliance repair and installation. It’s a game changer.
Is Being Proactive Worth the Extra Effort?
Absolutely. Addressing water in the gasket early prevents mold, odors, and potential damage to your appliance. I learned the hard way that neglect only leads to bigger, costlier problems. Investing a little time into correct installation, routine maintenance, and leveraging quality tools ensures your washer stays in top shape. Think of it as your way of giving back to your appliances—showing them some love and care. Ready to take control of your washer’s health? Share your experiences or questions below—your journey might just help others avoid common pitfalls!