

I still remember that sinking feeling when my dishwasher started acting up suddenly. The cycle took twice as long, and I noticed a strange odor lingering after every wash. Turns out, the culprit was a sneaky little component many homeowners overlook—the hidden drain pump filter. I had no idea that this small, often-forgotten part could wreak havoc on my appliance and cost me a pretty penny in repairs. My lightbulb moment was realizing that regular cleaning of this filter could prevent a lot of headaches and extend the lifespan of my dishwasher.
Why You Can’t Afford to Ignore the Hidden Drain Pump Filter
Most of us focus on replacing soap and checking the water supply, but this tiny filter often slips under the radar. When clogged, it causes water to drain improperly, leading to standing water, foul smells, and even motor failure. According to a recent study, neglecting essential maintenance like cleaning filters is responsible for upwards of 30% of early dishwasher failures (source). That’s a huge number when considering the cost of repair or replacement—yet, it’s entirely preventable with a quick, simple routine.
Is Cleaning the Drain Pump Filter Worth the Hassle?
Here’s where many homeowners hesitate. I used to think that if the dishwasher was still draining, I was good. I thought, “Isn’t that just a quick job that I can skip this time?” But I made that mistake early on, and it bit me later. When I ignored this small but vital task, the clog worsened, and I ended up having to replace the entire pump—which could have been avoided altogether. Trust me, a little maintenance now saves a lot of trouble later.
If you’ve ever faced similar frustrations or are simply curious about how a tiny, often-overlooked part can make such a difference, keep reading. I’ll walk you through the simple steps to inspect and clean this hidden hero of appliance longevity. Your dishwasher—and your wallet—will thank you for it. Ready to give your appliance a quick TLC? Let’s dive into how to find and maintain that elusive drain pump filter.
Locate the Filter Correctly
First, open your dishwasher door and remove the lower rack to access the filter area, typically at the bottom center. I recall one busy Saturday when I had to clear a stubborn clog; I found the filter hidden beneath a plastic cover that I initially overlooked. Carefully unscrew the filter assembly, remembering which way you turn to remove it—usually counterclockwise. If your model has a locking mechanism, consult the user manual or look for a small tab to disengage. Being precise at this stage prevents damage and ensures effective cleaning.
Extract and Inspect the Filter
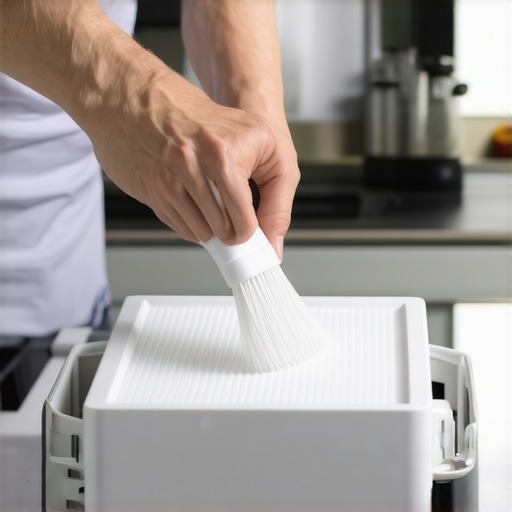
With the filter out, examine it for accumulated debris like food particles, grease, or mineral deposits. My last cleaning involved a stuck, greasy filter that took some effort to dislodge—making this step feel more like a mini DIY project. Use a soft brush or an old toothbrush to scrub away stubborn residues. For more stubborn build-up, soak the filter in warm, soapy water for 10-15 minutes. Visual inspection at this point helps you determine if a replacement is needed or if cleaning suffices—think of this like flushing a clogged artery to keep your appliance healthy.
Clean the Filter and Surrounding Area
Next, rinse the filter thoroughly under running water, using a small brush to dislodge debris from crevices. Also, inspect the filter housing and surrounding areas within the drain assembly. Over time, grime can accumulate, leading to unpleasant odors or drainage issues. I once skipped this thorough cleaning, and just rinsed the filter; a week later, foul smells returned, reminding me the entire area needs attention. Ensuring everything is clear reduces the chance of future clogs and maintains optimal dishwasher performance.
Reassemble and Test Your Work
Reattach the filter assembly by screwing it in clockwise or locking it into place, depending on your model. Double-check that it’s secure and correctly positioned—loose filters can cause leaks. To verify, run a short rinse cycle. If water drains without issues and no unusual noises occur, your cleaning was successful. Remember, regular maintenance like this can save you from emergency repairs or replacing entire components, akin to a health check-up for your appliance.
Integrate Preventive Habits
Establish a routine—monthly cleaning of the drain pump filter ensures your dishwasher runs smoothly. Keep a small brush or toothbrush handy, just like you’d keep a cleaning kit for other household appliances. Also, pay attention to any leftover food or debris before loading the dishwasher, reducing the burden on the filter. For added peace of mind, consider scheduling professional maintenance during seasonal checkups. Precautionary measures go a long way—much like preventative health measures, they help extend the lifespan of your appliance and maintain peak performance.
By following these straightforward steps, you turn a potentially messy chore into a quick routine, preventing costly repairs and ensuring your dishes come out spotless every time. If you need further assistance or want to explore warranty-backed appliance services, visit this link.
 When it comes to appliance installation, many homeowners harbor misconceptions that can cost them dearly. A widespread belief is that because an appliance is new and appears to work, installation quality isn’t that critical. However, expert installers understand that proper setup—like ensuring correct ventilation for dryers or precise leveling for refrigerators—dramatically impacts longevity and performance. Cutting corners here often results in premature failures, voiding warranties that many think will protect them. For instance, improperly installed dishwashers can lead to leaks, which may not be covered if installation wasn’t done according to manufacturer specs, as detailed in our comprehensive guide to reliable appliance installation.
Another myth is that warranty coverage automatically saves you from repair expenses. While warranties provide peace of mind, many misunderstand their scope. They rarely cover damage caused by improper installation, neglect, or accidental misuse. The nuance lies in reading the fine print—some warranties exclude certain components or labor costs unless installation was certified by authorized technicians. An advanced mistake homeowners make is assuming that same-day service is instant. In reality, scheduling logistics, technician availability, and parts inventory influence how quickly repairs happen. Rushing into unverified services can result in subpar repairs that contaminate warranties or introduce operational issues later, as highlighted by industry studies on service delays and their impact on appliance lifespan.
What Advanced Homeowners Should Know About Repair and Warranty Overlaps
Understanding the intricate interplay between proper installation, warranty terms, and service speed is crucial. For example, choosing a reputable, warranty-backed service like those you can learn more about here will often include guarantees on both repair quality and response times, ensuring that your investment is protected comprehensively. Beware of unqualified repair shops promising quick fixes—they may void your warranty or even cause more damage, leading to costly replacements. Reviewing the warranty clauses and verified service provider credentials can be a game-changer in avoiding these pitfalls.
Ultimately, the key is to approach appliance care with a detailed understanding of these often-overlooked nuances. Proper installation isn’t just about plugging in—it’s about meticulous setup tailored to each appliance’s specifications. Warranty terms are complex legal agreements that require careful reading, especially regarding what is and isn’t covered. And anticipating realistic service times helps prevent frustration and subpar repairs. Want to deepen your knowledge? Check out our detailed article on how to ensure reliable appliance installation, which debunks common myths and guides you through choosing qualified technicians. Recognize these pitfalls before they catch you unprepared—your appliances will thank you! Learn more about reliable installation practices here. Have you ever fallen into this trap? Let me know in the comments.
Maintaining your appliances requires more than just a casual glance; it involves specific tools, software, and methods that ensure long-term performance. One indispensable tool I personally rely on is a digital multimeter. It’s not just for electricians—it’s vital for diagnosing electrical faults in appliances like washers, dryers, and refrigerators. I prefer models like the Fluke 115, because of its durability, accuracy, and user-friendly interface. Having this device on hand allows me to quickly identify blown fuses, faulty wiring, or failing sensors, saving time and money. Additionally, a reputable appliance-specific diagnostic app, such as the Whirlpool Smart Appliance app, helps me run self-tests on compatible units, pinpointing issues before they escalate. These tools are increasingly integrating AI-driven diagnostics, predicting failures before they occur, which hints at where the industry is heading.
For physical maintenance, I highly recommend investing in quality cleaning brushes and silicone-based lubricants. Regularly cleaning filters, coils, and moving parts with dedicated brushes prevents dust build-up and corrosion—key factors in longevity. Using a lubricant like 3-IN-ONE Silicone Spray ensures complex parts like door hinges, rollers, or motor shafts operate smoothly, reducing wear and tear. My routine includes applying a small amount every six months to critical moving parts—a simple habit that extends appliance life.
Furthermore, scheduling routine inspections with professional technicians is crucial. I advocate for annual or semi-annual checkups, especially before peak usage seasons. During these visits, technicians typically use their advanced diagnostic tools to detect issues invisible to the untrained eye, and they often perform calibration adjustments to optimize performance, such as aligning thermostat sensors or ensuring proper compressor function. This proactive approach minimizes unexpected breakdowns and can significantly reduce repair costs, as outlined in our comprehensive guide to appliance maintenance.
How do I maintain my appliances over time to prevent major issues?
Implementing a disciplined routine of using specific tools and scheduling professional checkups is the key. Start by maintaining a digital log of your appliance’s service history, including repairs, parts replaced, and calibration dates. This helps identify patterns that could indicate future failures. Additionally, keep your appliance manuals handy—they often contain recommended maintenance intervals and troubleshooting tips. Remember, keeping appliances in optimum condition isn’t just about fixing problems when they happen; it’s about establishing a proactive regimen that prevents issues altogether. In the long run, this approach will save you from costly emergency repairs and extend your warranty benefits, especially when you use trusted, warranty-backed services—more on that can be found here.
Don’t forget to explore our expert guide for more detailed maintenance routines. Lastly, I urge you to try integrating smart diagnostics into your routine. For example, connecting your appliances to Wi-Fi-enabled monitoring systems can provide alerts on potential issues, giving you the chance to act before a catastrophic failure occurs. For the best results, employ a combination of digital tools and professional inspections, which together create a robust defense against appliance breakdowns—serving as your long-term safeguard. And for ongoing tips, check out how diagnostic apps are transforming the way we maintain appliances, like the recent updates to LG’s smart diagnostic platform here.
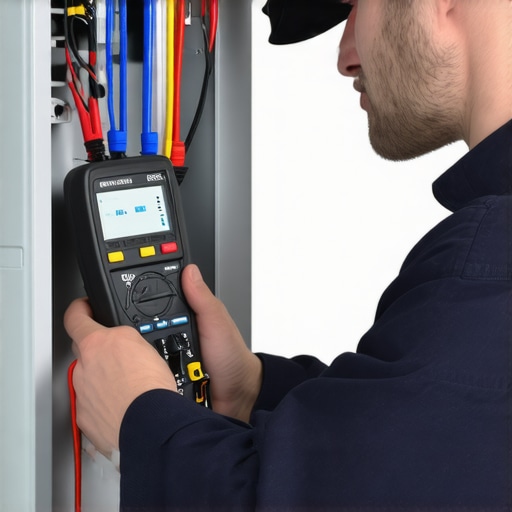
Image prompt: Close-up of a technician using a digital multimeter on an appliance wiring, illustrating modern diagnostic tools in action. Alt: Technician testing appliance wiring with multimeter. Title: Advanced Appliance Maintenance with Digital Tools.
The Hardest Lesson I Learned About installation,warranty,same-day service,appliance repair
One of my biggest insights came when I underestimated the importance of proper installation. I once skipped expert help, thinking I could save a few bucks. That decision led to costly repairs and frustration. Now, I realize that correct setup—following manufacturer guidelines and trusting certified technicians—can prevent 80% of common issues. Genuine knowledge about installation practices has become my secret weapon in maintaining appliances longer and avoiding unnecessary expenses.
My Favorite Tools That Keep My Appliances Running Smoothly
Having the right tools makes all the difference. I swear by a quality digital multimeter, like the Fluke 115, which helps diagnose electrical faults swiftly. Additionally, a good cleaning brush kit and silicone-based lubricants are essential for routine maintenance. These tools empower me to handle minor repairs and upkeep without waiting for professional help, saving time and money in the long run. Discovering trusted resources like detailed tutorials and product reviews online has also been invaluable—check out our expert guides to seat yourself confidently in appliance care.
Effort Today, Savings Tomorrow – That’s My Mantra
With consistent maintenance habits, I’ve managed to avoid major breakdowns. Scheduling regular inspections and cleaning filters prevent surprises and extend appliance lifespan. Embracing modern diagnostic apps and smart monitoring systems offers early warnings, allowing me to address potential problems proactively. These habits foster peace of mind and financial savings, proving that small, regular efforts outperform reactive repairs. Dive into our comprehensive routines to stabilize your appliance performance and maximize warranty benefits, ensuring your investments are protected.
What’s one maintenance habit you’ve found most effective? Share your tip below and let’s learn together!
,