
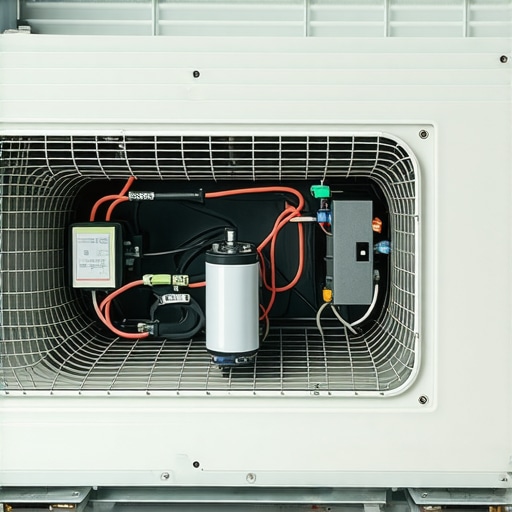
It was one of those scorching summer afternoons when my air conditioner decided to throw a fit right in the middle of a heatwave. The fan spun but the compressor refused to kick in. I felt that familiar sense of frustration creeping in—knowing I was at the mercy of a mysterious, hidden culprit lurking inside my unit. That’s when I realized I was staring at a problem rooted in a tiny, often overlooked component: the capacitor.
Why Your AC Won’t Start Might Surprise You
Many homeowners assume that when Their AC refuses to turn on, it’s a major malfunction or a need for a costly replacement. But quite often, the root cause is a small, hidden part called the start capacitor—a crucial element that helps your AC’s compressor and fan motor start smoothly. When this capacitor weakens or fails, your AC may hum softly but won’t kick into gear. Back in the day, I learned the hard way—replacing an entire unit was unnecessary when a simple capacitor swap could have done the trick. Trust me, understanding and diagnosing this component can save you a lot of time and money. If you’ve experienced similar frustrations, I promise this guide will make the process clearer.
Is the Capacitor Actually Worth Fixing?
Early on, I made the mistake of ignoring that faint humming sound and assuming my whole AC system was kaput. As I later discovered, capacitors are inexpensive compared to an entire compressor replacement. According to industry experts, a faulty capacitor is responsible for up to 80% of AC startup problems (source: EPA). This revelation changed my approach—don’t immediately jump to the worst-case scenario. Sometimes, a simple capacitor replacement is all you need.
If you’re tired of the guesswork and want to skip straight to reliable solutions, I recommend checking your unit’s capacitor and considering a professional assessment. For a quick, trustworthy service that can handle your AC issues without the wait, visit [Fast, Trustworthy Appliance Installation Near You](https://discountappliancehub.com/fast-trustworthy-appliance-installation-near-you). Now, let’s dive into how you can identify whether your capacitor is causing these issues and what steps to take next.
Accessing the Capacitor Safely
First, turn off your AC unit and disconnect it from power to prevent electrical shock. Locate the capacitor, usually a cylindrical or oval-shaped component near the motor. Use a screwdriver to remove the panel covering it. Remember, capacitors can hold a charge even after power is disconnected, so discharge it by carefully bridging the terminals with a screwdriver insulated handle or using a resistor. I once impulsively touched a capacitor without discharging it and received a jolt; now I always double-check safety precautions before proceeding.
Inspecting and Testing the Capacitor
Examine the capacitor for any visible signs of damage such as bulging tops, leaks, or discoloration. Use a multimeter set to capacitance mode to test it. Disconnect the wires and place the multimeter probes on the terminals. A reading significantly lower than the rated capacitance indicates failure. During my recent repair, I found a swollen capacitor and tested it—resulting in a reading of zero, confirming it needed replacement. This step ensures you’re replacing a genuinely faulty component, saving time and money.
Choosing the Correct Replacement
Ensure the new capacitor matches the voltage, microfarads (μF), and physical size of the original. Check the label on your faulty capacitor for these details. I recommend buying from a trusted supplier rather than a discount store to avoid counterfeit parts. Remember, using an incompatible capacitor can cause further damage or safety hazards. I always carry a spare capacitor for my HVAC projects, which keeps my repairs swift and reliable.
Removing the Old Capacitor
Carefully note each wire connection, preferably taking a photo for reference. Use insulated pliers to disconnect the wires and loosen any mounting brackets. Remove the old capacitor completely. During my last swap, I realized the capacitor was glued slightly to the bracket for stability—so I gently pried it free without damaging surrounding components. Proper removal prevents accidental damage and ensures the new component sits securely.
Installing the New Capacitor
Connect the wires to the new capacitor following your reference photo or the capacitor’s wiring diagram. Make sure the connections are tight and secure. Mount the capacitor back onto the bracket if applicable. Double-check all connections before restoring power. When I installed mine, I ensured the polarity and tight connections; a loose connection caused an hour-long troubleshooting session that could have been avoided. A secure fit is critical for reliable operation.
Final Checks and Power Restoration
Reassemble the access panel and restore power to your unit. Turn on the AC and observe whether the compressor and fan start smoothly. Listen for any unusual humming or vibrations. I tested my system after replacing the capacitor and was pleased to see it operate quietly and effectively. If the system doesn’t start or I notice issues, I immediately turn it off and consult a professional. Sometimes, a capacitor replacement isn’t enough, and a quick service from experts can save you from costly repairs later. For quick, trustworthy assistance, consider visiting this link for same-day service options.
Many homeowners operate under misconceptions about appliance installation, warranties, and same-day repair services, often leading to costly mistakes or unmet expectations. Let’s *dig deeper* into some prevalent myths and unveil the nuanced truths that experts understand.
Firstly, a widespread belief is that all installation services are interchangeable, and selecting the cheapest option guarantees savings. In reality, *not all installers are created equal*. Skilled professionals adhere to manufacturer specifications, safety standards, and local codes, ensuring your appliance functions efficiently and safely over the long term. For reliable, certified installation, consider services known for quality, like those found at trusted local providers. Skimping here can result in future breakdowns or voided warranties.
An often-overlooked aspect is warranty coverage. The myth that warranties cover all repairs for the entire appliance is widespread. In reality, many warranties exclude certain parts or types of damage, especially if installation errors or misuse are involved. Moreover, some consumers don’t register their warranties promptly, missing out on crucial protections. To maximize your warranty benefits during emergencies, explore tips to optimize coverage. This proactive approach can save significant repair costs.
Regarding same-day appliance repair, a common assumption is that services are always prompt and flawless. However, *the devil is in the details*. High demand, parts availability, and technician expertise can influence turnaround times. Relying solely on the promise of “same-day” without understanding the provider’s process might lead to disappointment. To truly benefit from swift solutions backed by warranty support, consider professionals who prioritize transparent scheduling and quality work, like those highlighted here. Furthermore, advanced repair technicians do more than just fix; they identify underlying issues to prevent recurring problems.
Here’s a critical question for seasoned DIY enthusiasts and industry veterans alike:
How can you tell if a quick-fix service truly lasts or just masks the problem temporarily?
Surprisingly, many homeowners accept quick fixes without verification, risking repeat breakdowns. Experts recommend requesting detailed diagnostics, genuine parts, and warranties on repairs. Checking reviews and certifications can also reveal whether a service provider commits to lasting solutions. Remember, a reputable technician will be transparent about limitations and ensure your appliance’s longevity.
Avoid falling into the trap of assuming that cheap installation, generic warranty offers, or rushed repairs are sufficient for complex appliances. True peace of mind comes from understanding these hidden nuances—partnering with qualified professionals who prioritize quality over expediency. Ready to upgrade your service approach? Start by exploring tips on reliable appliance installation and repair. Have you ever fallen into this trap? Let me know in the comments.
Investing in the Right Maintenance Tools Boosts Reliability
Staying ahead of appliance issues requires more than just routine checks; it demands the right tools that provide precision and durability. Personally, I rely heavily on a high-quality digital multimeter like the Fluke 117, which offers accurate readings for diagnosing electrical faults in appliances. Its True RMS feature ensures precise measurements even on complex circuits, a must-have for safe and effective troubleshooting. Additionally, I recommend a dedicated capacitance meter for checking components like start capacitors—these are invaluable for confirming whether a capacitor is truly failing or just giving false alarms. Having specialized equipment means you can pinpoint problems early, saving you from costly repairs or replacements down the line.
Why Using the Right Software Can Save Time and Money
In recent years, diagnostic software such as the HVAC QuickCheck app has become essential. I use this app to interpret error codes and receive step-by-step repair guidance tailored to specific models. It connects to smart appliances via Bluetooth, providing real-time data and troubleshooting tips. This approach reduces guesswork and ensures my repairs are accurate first time. As technology evolves, integrating these tools into your maintenance routine can significantly extend your appliance’s lifespan and prevent unexpected breakdowns. For example, paired with a reliable inspection routine, these digital solutions are game-changers for DIY enthusiasts and professional technicians alike.
Long-Term Strategies to Maintain Appliance Performance
Beyond immediate repairs, maintaining your appliances over the years involves meticulous documentation and scheduled checkups. Keep a detailed log of repairs, parts replaced, and service dates—this helps track recurring issues and validates warranty claims if needed. I also set yearly calendar reminders for professional inspections, especially for critical components like HVAC filters or refrigerator coils. This proactive stance not only prevents minor issues from escalating but also maximizes warranty benefits. Remember, many warranties require proof of regular maintenance; a well-documented history can be the difference in getting coverage for expensive repairs.
Scaling Up Maintenance Efforts
If you manage multiple appliances or a commercial setup, automation becomes vital. Consider installing smart monitoring systems that provide alerts when an appliance operates outside optimal parameters. Sensors integrated into your laundry room or kitchen can flag issues like unusual vibrations or temperature drops before they cause damage. For example, the Philips HomeConnect app allows remote diagnostics and scheduling, giving you peace of mind whether you’re home or away. As these systems incorporate AI-driven diagnostics, expect a future where appliances notify you directly of issues and even schedule repairs autonomously, further reducing downtime and costs.
How do I maintain appliances over time?
Establish a routine maintenance schedule that includes regular cleaning, inspections, and testing with your essential tools like multimeters and specialized testers. Keep detailed records of all service activities and stay informed about manufacturer updates or firmware upgrades, especially for smart appliances. Subscribing to manufacturer newsletters or industry blogs can provide insights into emerging issues or recall notices. Combining these practices ensures your appliances remain reliable and can help you catch potential problems well before they become costly repairs.
To make your maintenance even more effective, try scheduling a comprehensive professional inspection annually—this can uncover issues that might be invisible during routine checks. If you want guidance on how to schedule your next service efficiently, check out [scheduling your appliance repair for same-day service in 2025](https://discountappliancehub.com/scheduling-your-appliance-repair-for-same-day-service-in-2025). Remember, the key to long-term appliance health is consistency and investing in the right tools and knowledge—your appliances will thank you for it.
What I Wish I Knew About Installation and Warranty from the Start
One of the hardest lessons I learned was that not all installation services are equal. Choosing a cheap option often meant sacrificing quality and risking voided warranties. Now I prioritize certified, reputable professionals, which saves me time and money in the long run. Additionally, understanding that warranties don’t automatically cover every issue has taught me to document every service meticulously—something I wish I had done earlier.
Another eye-opening realization was the importance of proactive maintenance. Regular professional inspections, combined with the right tools, have prevented many emergencies. Investing in a good multimeter and diagnostic apps has empowered me to identify problems early and avoid costly breakdowns.
Tools and Resources That Keep My Appliances Running Smoothly
Over the years, I’ve relied on a few trusted tools that revolutionized my troubleshooting routine. My top choice is the Fluke 117 multimeter, renowned for its accuracy and durability. Pairing it with diagnostic apps like HVAC QuickCheck has drastically reduced my diagnosis time. For appliance parts, I prefer sourcing from reputable suppliers, ensuring authenticity and compatibility.
Additionally, reading comprehensive guides from experts, such as those available on this site, has kept me informed about best practices and emerging issues.
Your Journey Starts with a Trusted First Step
Embracing these lessons has transformed my approach to appliance and HVAC care. Now, I feel confident tackling minor repairs and knowing when to call in professionals who will deliver reliable, warranty-backed service. Remember, the key is continuous learning and investing in quality tools and resources. Take charge of your home comfort today—your appliances will thank you.
Have you ever doubted whether a repair or installation was worth it? Share your experiences below—I’d love to hear your story!