
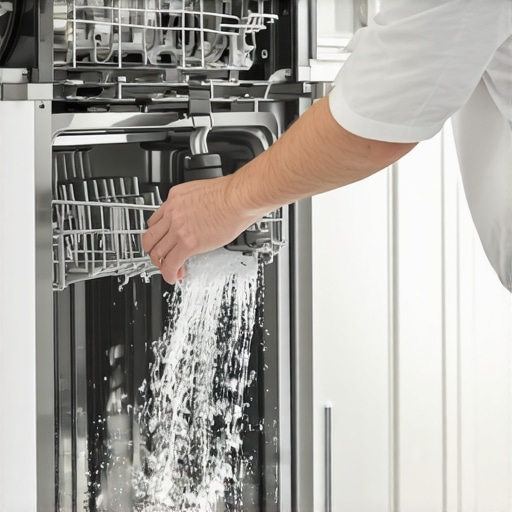
It was late at night when I realized my dishwasher was refusing to drain. Power had just flickered out, and I was left staring at a mountain of dirty dishes, half of them still soaking in water. That moment? It felt like a mini disaster. Suddenly, the convenience of just loading and pressing start felt miles away. Honestly, I thought, “Now what?” If you’ve ever faced a similar situation, you know how frustrating it can be when your appliance stops cooperating during an outage.
Why Draining Your Dishwasher Manually Matters When the Power Goes Out
In my experience, knowing how to manually drain your dishwasher isn’t just a nifty trick—it’s a lifesaver. When the power goes out unexpectedly, your dishwasher’s automatic drainage system might not work once power is restored. Water can back up, leading to leaks or even mold problems if left sitting. Plus, if you rely on your dishwasher daily, being able to fix it temporarily ensures your kitchen stays clean and hygienic, without waiting for a technician or risking further damage.
Ever Wonder If All This Effort Is Worth It?
Many folks assume that draining water manually could be complicated or risky. I used to think so too—until I made a mistake early on by ignoring instructions and trying to force tools where they didn’t belong. Turns out, with a few simple steps, you can do it safely and effectively. I’ll guide you through a proven method that works in most cases, saving you time and stress. Want to avoid calling a costly repair service when a power outage hits? Keep reading, and I promise you’ll be equipped to handle this hiccup confidently.
Locate the Drain Hose and Prepare Tools
First, identify the dishwasher’s drain hose, usually at the back or beneath the appliance. You’ll need a towel and a shallow container or bucket to catch any residual water. I remember the first time doing this—water spilled out unexpectedly, so having towels ready prevented a mess. Carefully disconnect the hose by loosening the clamp with a screwdriver, ensuring the container underneath is in place to catch water.
Drain the Water Safely and Effectively
Once disconnected, tilt the hose downward over the container and gently squeeze or unblock it to release trapped water. If the hose is clogged, use a long, flexible brush or a pipe cleaner to clear any debris. During my first attempt, I found a buildup of soap residue blocking the flow, and cleaning it out restored proper drainage. Be patient—this step may require gentle wiggling to dislodge stubborn clogs.
Remove Standing Water from the Bottom of the Dishwasher
After disconnecting the hose, check the dishwasher’s sump or filter area at the bottom. Use a sponge or turkey baster to sop up or siphon out remaining water. I once overlooked this and had water leak onto the floor when I turned on the appliance again. Ensuring this area is dry is crucial to prevent leaks and mold growth. Wipe down with a clean cloth to absorb any leftovers and confirm no debris is blocking the drain pump.
Inspect and Clear the Pump and Filter
Remove the filter cover according to your dishwasher’s manual. Carefully check for any trapped debris, hair, or food particles. Clean the filter thoroughly with warm water, avoiding harsh chemicals that could damage components. During my repair, I discovered a small coin lodged in the pump impeller—removing it restored normal drainage, avoiding costly repairs later. Regular inspection keeps your dishwasher running smoothly post-outage.
Reconnect the Drain Hose and Test
Attach the drain hose securely back onto its fitting, tightening the clamp with a screwdriver. Ensure it’s seated properly to prevent leaks. As I learned from experience, a loose connection can cause water to drip onto the floor. Turn on the dishwasher and run a short cycle to verify that the drainage system functions correctly and no water remains pooled.
Maximize Your Repair Confidence and Warranty Support
If you encounter persistent issues or want professional assurance, consider contacting a reliable appliance expert. Quickly resolving drainage problems can save you time and prevent further damage. For faster solutions backed by warranty, review your options at this link. If the problem persists, understanding your warranty coverage can be crucial—see how to maximize your warranty.
Many homeowners operate under misconceptions that can cost time and money when dealing with appliance issues. While it’s tempting to rely on popular advice or assumptions, understanding the finer points can make a significant difference.
One prevalent myth is that installation is a straightforward step that doesn’t impact warranty or future repair costs. In reality, improper installation—such as incorrect leveling or inadequate ventilation—can void warranties and lead to premature appliance failure. For instance, professional installation guidelines emphasize precise setup to ensure longevity and warranty validity.
Many believe that warranty coverage is automatic and covers all unforeseen repairs. However, warranties often have fine print, exclusions, or require regular maintenance to remain effective. Overlooking these details can leave you unprotected during emergencies.
Another mistake involves assuming that same-day service is always available without added costs or scheduling limitations. While many providers advertise quick turnaround times, service availability can vary based on your location, appliance type, and current demand. Rushing into urgent repairs without proper scheduling can result in subpar work or additional charges.
Is there a particular aspect of appliance repair or warranty that confuses you? Let’s explore a more nuanced issue—how do manufacturers determine coverage for special cases? For example, some warranties exclude damages caused by improper maintenance, yet customers might not realize that routine inspections and documentation are required to uphold their claims. According to expert advice, keeping records of your maintenance activities can serve as proof of proper care, protecting you during disputes.
Moreover, many people don’t recognize the importance of confirming the quality of installation before signing off. An overlooked bolt or misaligned component might not be immediately apparent but can cause cascading failures later. Consulting specialized guides, like trusted installation tips, can help prevent these pitfalls.
Finally, a subtle but critical nuance involves understanding the role of third-party warranties. They can seem appealing but often come with strict conditions or limited coverage, especially for complex components like smart boards or advanced sensors. Studies indicate that most third-party claims get denied due to procedural errors or misunderstood coverage, emphasizing the need to read the fine print thoroughly. For comprehensive info, check out this guide.
Have you ever fallen into this trap? Let me know in the comments. Being aware of these nuanced issues empowers you to make informed decisions, saving money and frustration in the long run.
Get Your Tools in Order for Long-Term Success
Maintaining appliances over time requires more than just knowing the right procedures—it demands the right tools. I swear by a high-quality set of screwdrivers with insulated handles to safely access electrical components without risking shock. A digital multimeter is indispensable; I use mine to diagnose issues like faulty thermostats or blown fuses reliably. For clearing blocked vents or drains, a flexible snake or auger saves hours of frustration, especially when dealing with stubborn clogs in dishwasher drain hoses or refrigerator coils.
Beyond physical tools, investing in reliable diagnostic software can streamline troubleshooting. Apps like SmartThings or manufacturer’s dedicated apps enable remote monitoring and quick error code interpretation, saving me trips to the appliance. Over the years, I’ve found that keeping a set of common replacement parts—like rubber gaskets, fuse holders, and contact switches—on hand accelerates repairs and minimizes downtime.
Where Do I Find These Essential Tools?
Many of these tools are available through specialized hardware stores or online retailers. For example, a digital multimeter with auto-ranging capability makes troubleshooting easier, and I prefer models with backlit displays for working in tight, poorly-lit spaces. Regular calibration and battery checks keep my multimeter performing accurately, which I consider crucial for sensitive diagnostics. Using the proper tools not only ensures safety but also enhances repair precision, helping extend the lifespan of your appliances.
How Will Technology Shape Appliance Maintenance in the Future?
As smart appliances become more prevalent, the integration of IoT (Internet of Things) technology will transform maintenance routines. Predictive diagnostics will alert homeowners to issues before failures happen, reducing emergency calls and costly repairs. Indeed, some manufacturers now embed sensors that track component wear and performance, allowing remote monitoring via smartphone apps. This trend suggests that, in the near future, maintenance will shift from reactive to proactive, with data-driven insights guiding timely interventions.
How do I maintain my appliances over time?
Establishing a routine maintenance schedule is key. Regularly inspecting filters, coils, and vents keeps your appliances running efficiently. For instance, cleaning refrigerator coils every six months prevents overheating and prolongs compressor life. Also, scheduling professional checkups periodically can catch minor issues before they turn into expensive repairs. To ensure your appliance setup remains reliable, review guidelines from trusted sources like same-day repair experts and understand your warranty coverage. Using the right tools, staying informed about technological advancements, and adhering to maintenance routines will keep your appliances humming for years to come.
 In my journey repairing appliances and navigating warranties, I’ve uncovered truths that often go unnoticed. One invaluable lesson is that not all warranties are created equal; understanding the fine print can save you from unexpected expenses. For instance, many homeowners assume routine maintenance is covered, but manufacturers frequently exclude such costs unless documented meticulously. From my experience, proactively keeping records of service and repairs can bolster your claims, especially when disputes arise. Additionally, investing in high-quality diagnostic tools transformed my approach—accurately identifying issues prevents unnecessary part replacements and reduces downtime. Moreover, choosing certified installers ensures your appliances meet warranty conditions, avoiding pitfalls that void coverage. These lessons—gained through trial, error, and a keen eye for detail—equip you to handle repairs confidently and make informed decisions about service plans. Beyond technical knowledge, embracing a proactive mindset about warranties can lead to long-term savings and peace of mind. Remember, the difference often lies in the nuances—so stay vigilant, ask questions, and never hesitate to seek expert advice when in doubt.