

I spent three weeks wondering why my milk felt slightly warm before I finally noticed the condensation pooling on the floor. I wasn’t just dealing with why your fridge is leaking water on the floor; I was witnessing a slow-motion disaster for my bank account. The culprit wasn’t a broken compressor or a fancy circuit board. It was a $30 strip of vinyl and magnets that had simply given up the ghost. If you’ve noticed your unit running constantly, you’re likely paying for the privilege of cooling your kitchen floor. Today, I’m going to show you exactly how to diagnose and swap that gasket yourself, so you don’t have to rush into scheduling your appliance repair for same-day service for something you can handle with a screwdriver and a little patience. Have you ever checked your seal only to realize it’s caked in years of mystery gunk or has a visible tear?
Stop Throwing Cold Cash Out the Refrigerator Door
When I first started tinkering with my own appliances, I made a classic rookie mistake. I noticed why your freezer is building up snow around the gasket and tried to massage the old rubber back into place with a heat gun. I ended up melting a hole right through it. Trust me, if the seal is brittle or torn, there’s no amount of coaxing that will bring it back to life. You need to replace it. A refrigerator is essentially a giant thermal box, and the gasket is the only thing keeping the heat of your home from invading your leftovers. According to the U.S. Department of Energy, a well-maintained refrigerator can save homeowners significant amounts on their annual utility costs compared to one with degraded seals. Beyond the money, you’re also preventing the hidden costs of ignoring a slow fridge leak, which can lead to mold or floor damage.
Is a DIY Gasket Swap Really Worth the Hassle?
I get it. You’re worried that you’ll pull the old seal off and never get the new one to sit right, leaving you with a fridge that won’t even close. Have you ever felt that sinking feeling when a simple repair suddenly feels way over your head? I promise it’s more straightforward than it looks. We’re going to cover the dollar bill test and the secret to getting a new gasket to lose those annoying factory kinks. By the time we’re done, you’ll be able to tell if you can fix this in twenty minutes or if you truly need to look for fast trustworthy appliance installation near you for a more serious issue.
Softening the Rubber Is Your First Move
Before you even think about touching the fridge, you have to deal with the “box effect.” New gaskets arrive folded in a box, and they usually look like a tangled mess of stiff rubber. My first time doing this, I tried to slap it on straight from the packaging. It was a disaster; the kinks were so deep that the door wouldn’t even stay shut. I ended up having to search for how to get an emergency fridge repair before your food spoils because I’d already ripped the old one off. The trick is to give the new seal a warm bath in the sink for about ten minutes or use a hair dryer on a low setting to massage out the creases. You want that rubber as supple as a fresh rubber band. While it’s warming up, it is a great time to perform the refrigerator thermostat test every diyer should know to make sure your cooling issues aren’t actually internal. 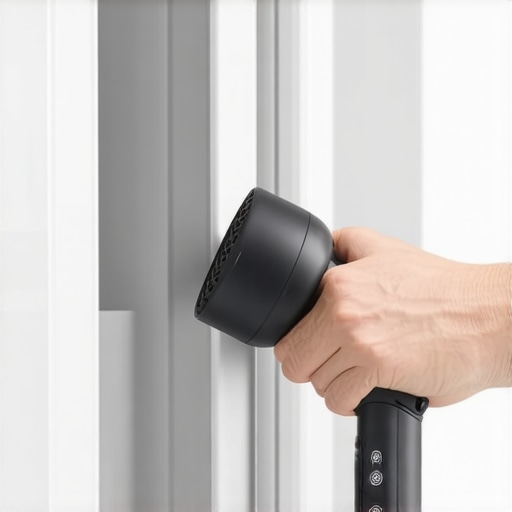
Pull the Old Seal Without Damaging the Door
Most modern gaskets are held in by a press-fit groove, but older models might have screws hidden behind the rubber flap. When I tackled my 2012 model, I assumed it was a simple pull-and-go. I yanked hard and nearly cracked the inner door liner. Take a peek behind the flap first. If you see screws, loosen them just enough to slide the gasket out; don’t take them all the way out, or the whole door assembly might fall apart in your hands. If it is a press-fit, start at a corner and pull steady and slow. You’ll likely find a collection of “refrigerator fossils”—crumbs and spilled juice—hiding in the track. Clean this track thoroughly with a 50/50 mix of water and vinegar. If the track is damaged or the door is warped, you might find that how to challenge a warranty claim rejection for your fridge becomes your next reading assignment if you’re trying to get a manufacturer to cover a structural defect.
Seat the Corners Like a Pro
The secret to a perfect seal is working from the outside in. Don’t start at the top and work your way around like a circle. Instead, push the new gasket into the four corners first. This ensures the tension is distributed evenly across the frame. Once the corners are anchored, tuck the middle sections in. If you find a spot that won’t stay in the groove, it usually means the rubber is still too cold. Use your hair dryer again to soften that specific section. I remember my second attempt where the bottom edge kept popping out; I realized I hadn’t cleaned the grease off the track, and the rubber just couldn’t grab the plastic. If you’re feeling overwhelmed by the technicality of the fit, you can always rely on warranty-backed appliance services you can rely on to handle the precision work for you.
Check for Light Leaks and Final Gaps
Once the gasket is seated, close the door and look for gaps. A classic trick is to put a bright flashlight inside the fridge, close the door, and turn off the kitchen lights. If you see beams of light escaping, the seal isn’t tight. This is often what causes the clogged capillary tube making your fridge run constantly, as the unit works overtime to fight the incoming heat. For minor gaps, apply a thin layer of petroleum jelly to the hinge side of the gasket. This reduces friction and helps the magnet pull the rubber flush against the metal frame. It might seem like a small detail, but these final adjustments are what separate a professional job from a weekend headache. If the door still feels wonky, you might need a more comprehensive expert guide to appliance repair and installation today to check the door hinge alignment itself.Let’s dig deeper into the nuances that the instruction manuals often skip. A common myth in the DIY community is that as long as the door stays shut, the gasket is doing its job well enough. This is a dangerous assumption for your wallet. According to the Association of Home Appliance Manufacturers (AHAM), even a tiny 1mm gap can spike energy consumption by 25% and force your compressor to cycle 30% more frequently than designed. This extra strain is the primary reason homeowners eventually find themselves needing affordable same-day appliance fixes with warranty benefits. In my experience, calling for professional help isn’t just about convenience; it is a financial protective measure to stop thermal runaway before it kills your most expensive components.
Why Waiting Even One Day for Repair Can Kill Your Compressor
Most people view the gasket as a simple piece of plastic, but it is actually part of a complex thermal management system. If you notice a leak and ignore it, you are essentially asking your fridge to cool your entire house. This constant operation quickly leads to mechanical fatigue. If you are handling this yourself, you must be meticulous about how you document the process. If you ever need to file a claim later, knowing how to prove periodic maintenance to keep your warranty valid can be the difference between a free repair and a thousand-dollar bill. Here is the ‘oops’ factor that ruins many DIY attempts: using the wrong lubricant. I’ve seen countless people apply petroleum jelly to the seal to help it ‘seat’ better. On modern synthetic EPDM or PVC gaskets, petroleum-based products act as a solvent, causing the material to swell and lose its magnetic pull within months. This mistake is a classic example of how the wear and tear clauses that might void your warranty can bite you. Always use a food-grade silicone spray or a very light coating of paraffin wax if you must use anything at all.
Can You Save a Door That Does Not Close Straight?
Sometimes the seal is perfect, but the door itself is ‘racked’ or out of square. If you’ve installed a new gasket and still see a gap at the top or bottom, the weight of heavy milk jugs in the door bins might have physically warped the hinges. You can often ‘re-square’ the door by loosening the hinge bolts slightly, having a partner hold the door perfectly level, and then re-tightening. This level of precision is vital for how to ensure reliable appliance installation in 2025. If the frame is misaligned, even a brand-new magnetic seal cannot bridge the gap. Have you ever spent hours on a repair only to realize the problem was a simple alignment issue? Let me know in the comments. Falling into these traps is exactly the reason your warranty claim was denied in the past for many frustrated homeowners. Take the extra five minutes to check the square of the door before you blame the rubber.I always keep a small tub of food-grade silicone grease and a 0.003-inch feeler gauge in my kitchen junk drawer. You might think that is overkill, but after years of DIY mishaps, I’ve learned that ‘close enough’ is the enemy of a low electric bill. When I finish following an expert guide to appliance repair and installation today, I use that feeler gauge to ensure the gap is non-existent. If the gauge slides through with zero resistance, the seal isn’t tight enough. This level of detail is exactly what separates a weekend hack job from warranty-backed appliance services you can rely on. Beyond the tools, the secret to long-term success is a monthly wipe-down. Most people wait until they see mold to clean their gaskets, but by then, the spores have already begun to degrade the synthetic polymers. I use a simple mix of warm water and a drop of mild dish soap—never harsh chemicals. According to the technical service manuals from major manufacturers like Whirlpool (specifically their ‘Job Aid’ series for refrigeration units), chemical cleaners can leach the plasticizers out of the vinyl, making it brittle and prone to cracking within just two years.
How do I maintain my fridge seal over time?
The best way to ensure your DIY effort lasts is to address spills immediately. Sugary drinks are the worst; they act as a glue that pulls the gasket away from the track every time you open the door. If you feel a ‘stick’ when you pull the handle, that’s your cue to clean it. If you ignore this, you’ll eventually find yourself needing same-day appliance repair quick solutions with warranty support because the constant tugging will tear the rubber right out of its mounting groove. 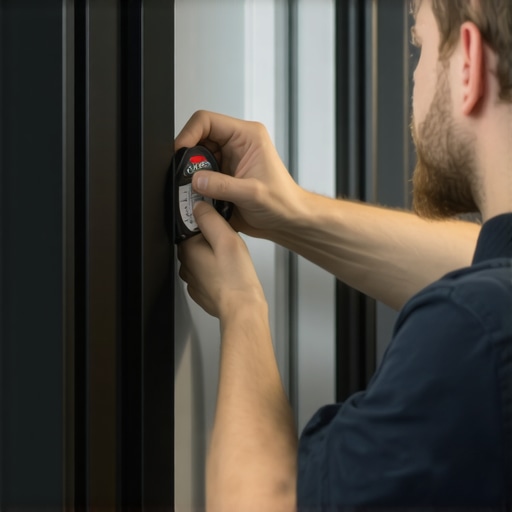
The Future of Smart Seals and Pressure Sensors
Looking ahead, I suspect we are moving toward ‘active’ sealing systems. Some high-end industrial units already use vacuum-assisted door seals to ensure a perfect 100% airtight environment. In the next few years, I bet we’ll see consumer fridges that alert your phone if the internal pressure changes—meaning you’ll know you have a leak before your milk even has a chance to get warm. This technology will likely change what to expect from same-day appliance repair experts, shifting the focus from ‘fixing’ to ‘preventative calibration.’ If you really want to level up, try the ‘dollar bill’ test once a month on all four sides of the door. If the bill pulls out too easily, it’s time to re-seat the gasket or check your hinge alignment. Don’t wait for the frost to build up; proactive checking is the hallmark of someone who knows how to ensure reliable appliance installation in 2025. It’s a small habit that saves you from the stress of hunting for affordable same-day appliance fixes with warranty benefits during a holiday weekend.
My Hardest Lessons from Underneath the Fridge Door
After years of tinkering with kitchen units, I have learned that a gasket replacement is 10% physical labor and 90% preparation. One major lightbulb moment was realizing that magnets within the vinyl strip have a ‘memory.’ If you store the new seal folded for too long, the magnetic pull weakens in those specific spots. I also discovered that ignoring a tiny tear is exactly the reason your warranty claim was denied when the compressor eventually burns out. Most people do not realize that manufacturers view the gasket as a consumable part, much like tires on a car. If you fail to keep it clean, the resulting mechanical strain is often labeled as ‘owner neglect.’ Finally, if you ever feel like you are in over your head, remember that seeking affordable same-day appliance fixes with warranty benefits is often more cost-effective than accidentally warping your fridge door during a frustrated DIY attempt.
Tools and Guides That Actually Make a Difference
To get a factory-level finish on your repair, skip the generic hardware store advice and stick to these specific resources. I always keep a copy of the expert guide to appliance repair and installation today bookmarked because it covers the specific hinge torque specs that most YouTube videos skip. For tools, I never start a job without a 0.003-inch feeler gauge; if this gauge can slide between the seal and the frame, your fridge is still losing money. I also highly recommend using a food-grade silicone lubricant rather than petroleum-based products. If you are planning a more permanent upgrade or a new setup, reading up on how to ensure reliable appliance installation in 2025 will help you avoid the common leveling errors that cause gaskets to fail prematurely.
Reclaim Your Refrigerator Performance
You do not have to be a master technician to keep your kitchen running smoothly. By taking twenty minutes to check your seal today, you are actively preventing the need for an emergency appliance repair later this year. A tight seal means a quieter kitchen, fresher food, and a much lower utility bill. Do not let a $30 piece of rubber dictate the lifespan of your expensive refrigerator. Take the time to soften the vinyl, seat the corners properly, and perform the dollar bill test regularly. Have you ever tried the dollar bill test only to have the bill fall right out? Let me know your results in the comments below!