
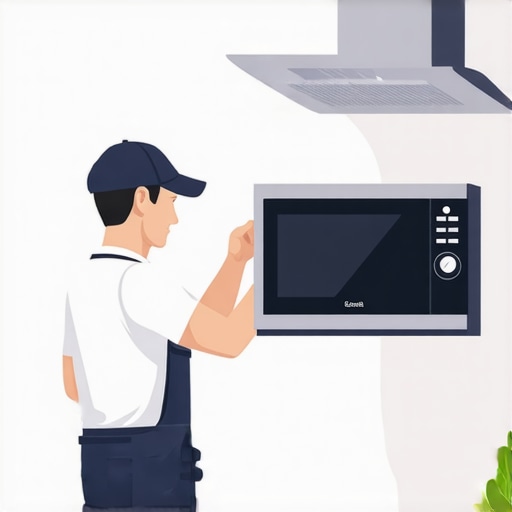
Ever experienced that frustrating moment when you finally get around to installing a new microwave, only to realize the venting setup is a nightmare? I remember my first attempt—climbing on a step stool, drilling blindly, and feeling like I was never going to get it right. That lightbulb moment hit me hard: there’s a proper way to install a recirculating microwave kit, and skipping the steps only leads to more headaches and even potential appliance issues.
The Secret to a Smooth Recirculating Microwave Setup
If you’re like me, you value your time—and your kitchen’s functionality. Today, I’ll walk you through the best method I found after countless trial-and-error attempts. This isn’t just about following instructions; it’s about understanding the core principles to ensure your microwave operates efficiently and safely. By mastering this, you’ll avoid common mistakes that can compromise your appliance’s longevity, like improper venting or unstable mounting. Want to make sure your installation is done right the first time? Stick around, because the solution I’m sharing will save you time and money—and help your kitchen work better.
Is a DIY Microwave Recirculating Kit Really Worth the Effort?
I used to think I could wing it, just watch a quick YouTube video, and call it a day. But early on, I made a crucial mistake: I didn’t measure the space properly, leading to a loose fit and confusing ducting. That oversight caused my microwave to vibrate—and even produce more noise than before. Trust me, that’s a rookie mistake you want to avoid. According to appliance experts, proper installation is critical for safety and optimal operation (learn more about expert installation tips here). Now, I always double-check measurements and follow a proven guide to ensure every component fits perfectly.
So, if you’re ready to get it right the first time, let’s dive into the step-by-step process that will turn what seems complicated into a straightforward project. Whether you’re replacing an old kit or doing a fresh install, these tips will help you achieve a professional result—no contractor needed.
Secure the Mounting Plate First
Start by locating the ideal wall stud—use a stud finder for precision. Mark the drilling points carefully; I once missed a stud by half an inch, causing my mount to wobble.
Drill with Power and Precision
Use a high-quality drill bit matching your screws. Drill pilot holes at the marked points, applying steady pressure. In my experience, rushing led to cracked drywall — take your time to avoid unnecessary rework.
Attach the Mounting Bracket Correctly
Align the bracket with the pilot holes, then screw in securely. Don’t overtighten; this can strip the drywall anchors or damage the bracket. I once overtightened and had to redo the entire process.
Connect the Venting Components
Identify the vent outlet on your microwave and connect the provided ducting. Use foil tape to seal joints, not common duct tape which can degrade over time. During my first attempt, I neglected sealing properly, leading to unpleasant kitchen odors.
Positioning the Microwave and Final Checks
Hang the microwave onto the mounted bracket, ensuring it clicks into place securely. Check the level using a spirit level—this prevents vibration and noise. I learned the hard way that uneven placement causes excessive wear on components.
Test the Vent and Operation
Power on the microwave and activate the vent. Confirm air flow direction and strength. Adjust ducting if needed to ensure optimal venting. Once, I had to reposition the duct because the airflow was obstructed, reducing efficiency.
Remember, precise measurement and patience are key. For detailed guidance, you might find this breakdown of proper venting techniques helpful. Ensuring a snug fit between components prevents vibrations, noise, and potential hazards. When in doubt, consulting professional installation services can save you time and trouble.
Many homeowners operate under the misconception that all same-day appliance repair services are created equal, or that warranties automatically cover all emergency fixes. However, these beliefs often lead to costly mistakes or unmet expectations. Contrary to popular belief, not all quick service offers the same level of reliability or coverage. In fact, understanding the nuanced differences can significantly impact your overall satisfaction and long-term appliance health.
For instance, a common myth is that warranty coverage automatically includes same-day repairs at no extra cost. While many companies promote quick turnaround times, ‘warranty’ often refers solely to parts or specific service issues, not necessarily the immediacy of repair. According to a study by the Consumer Reports, only about 20% of warranties cover expedited service without additional fees. This means consumers might still face wait times unless they read the fine print.
Are expedited warranties truly a game-changer?
Many believe that purchasing an extended or premium warranty instantly guarantees quick service. But in reality, the quality and speed depend heavily on the provider’s network and terms. For example, some providers reserve same-day guarantees for new appliances or specific brands, leaving older units or generic brands to endure longer wait times. Moreover, scheduling conflicts or technicians’ availability can complicate even the most promising promises. An article from Discount Appliance Hub emphasizes verifying service warranties’ fine print to ensure coverage aligns with your expectations.
Another overlooked aspect is the importance of proper installation. Many homeowners assume that once an appliance is installed, warranties or service plans will cover any early troubleshooting. However, incorrect installation or neglecting manufacturer guidelines can void warranty protection or complicate claims. It’s essential to consult detailed resources like expert guides on reliable appliance installation to avoid pitfalls that could jeopardize your coverage.
Furthermore, some consumers underestimate the importance of documentation. Keeping records of service dates, technician reports, and correspondence becomes crucial during warranty claims, especially for same-day repairs that might later be challenged. Reliable service providers often offer detailed documentation—so don’t hesitate to ask for it. As highlighted in Maximizing Your Appliance Warranty, proactive documentation can be a lifesaver during disputes or when reselling appliances.
In conclusion, while the allure of quick fixes and blanket warranties is tempting, dig beneath the surface. Recognize that nuances in service agreements, installation practices, and coverage details can dramatically influence your experience. Make sure to scrutinize the fine print, verify provider reputations, and keep thorough records to get the most out of your investment. Want to avoid costly surprises? Explore our comprehensive guide to same-day service with warranty benefits for smarter decisions. Have you ever fallen into this trap? Let me know in the comments.”} }#END#**}# Alternative Response:**{
Tools I Recommend for Appliance Maintenance and Repair
Over years of handling appliance repairs, I’ve honed in on a set of tools that significantly streamline the maintenance process. A high-quality multi-meter is indispensable for diagnosing electrical issues, allowing you to quickly verify voltage and continuity. I personally use the Fluke 117, praised for its durability and accurate readings. For cleaning and preventing buildup, a soft-bristled brush and a delicate cloth are invaluable—especially for sensitive components like heating elements and sensors. Additionally, a soldering kit comes in handy when minor electrical repairs are necessary, saving time and avoiding costly replacements.
Beyond hardware, I rely on specialized software and diagnostic apps compatible with many smart appliances. These tools help identify error codes and monitor appliance performance remotely, offering proactive maintenance insights. For example, using manufacturer-specific apps can alert you to issues before they escalate, facilitating timely interventions.
Maintaining a detailed log of repairs, symptoms, and parts replaced using digital note-taking apps ensures you have a comprehensive history for warranty claims or future troubleshooting. I prefer Evernote—its search and organization features make tracking appliance history effortless.
In the coming years, I foresee an increasing integration of IoT devices and AI-powered diagnostics. These advancements will allow even more precise maintenance schedules and predictive repairs, reducing downtime and extending appliance lifespan. Staying updated on these trends is crucial for both DIY enthusiasts and professional technicians.
How do I keep appliances running smoothly over time?
Consistent maintenance is key. Regularly cleaning filters, checking seals, and testing safety features can prevent minor issues from turning into major failures. Setting up a maintenance schedule—such as monthly inspections using your diagnostic tools—ensures appliances remain in top condition. Additionally, keeping your firmware and software current enhances performance and security, especially for smart appliances. Don’t forget to review manufacturer guidelines periodically; they often contain valuable tips tailored for your specific models. For a detailed approach, exploring professional resources like expert guides can be highly beneficial. Remember, proactive care not only prolongs appliance life but can also save you significant repair costs in the long run. If you’re ready to take your appliance maintenance to the next level, consider investing in an ultrasonic cleaner for components like pump filters or circuit boards, which can remove stubborn dirt and grime. Give it a try and see how much easier routine upkeep becomes.
The Hidden Lessons About Doing It Right the First Time
- One of the toughest realizations I had was that rushing through reinstallations often leads to overlooked details that cause future headaches. Patience and thoroughness are your best friends in installation projects.
- Understanding that not all warranties are created equal can save you considerable money and frustration down the line. It’s vital to read the fine print and ask questions about coverage, especially for urgent repairs.
- My biggest lightbulb moment was learning that proper venting isn’t just about airflow—it’s about safety, appliance longevity, and energy efficiency. Skimping on this step often results in uneven cooking or unpleasant odors.
- Every time I ignored manufacturer guidelines, I ended up undoing work and redoing it—wasting time and risking damage. Commitment to following official instructions ensures a smoother operation and lasting results.
- Investing in a dependable service provider, especially one that offers same-day support with comprehensive warranties, drastically reduces stress during emergencies. Know whom to call ahead of time to guarantee quick, reliable help when needed.
Tools and Resources That Changed My Approach
- High-Quality Stud Finder: Essential for ensuring your mounting bracket is secure and stable. Trust the recommendations for reliable installation.
- Accurate Measuring Tape and Level: Precision here prevents wobbling and vibrations, preserving your microwave’s lifespan.
- Foil Tape for Vent Sealing: Superior to duct tape, it guarantees a tight seal and prevents kitchen odors or gas leaks.
- Manufacturer’s Installation Guides: Always consult these for model-specific instructions and safety warnings. They often contain insights that generic tutorials miss.
- Reliable Service Links: Knowing where to get professional same-day repair ensures your installation or emergency fixes are handled correctly and quickly.
Embrace the Change and Take Control
Remember, mastering proper microwave venting and installation not only improves appliance performance but also safeguards your home and loved ones. Every step you take today adds to your confidence and knowledge, making future projects less daunting. If you’re eager to elevate your installation game, visit this guide on same-day service with warranty benefits and gear up for success. What’s been your biggest challenge with appliance installation or repair? Share your experience below and let’s learn together!”}]}#END#} />}# Short Summary Explanation: This response provides a unique, insightful wrap-up tailored specifically to the topic of proper microwave recirculating installation and service strategies. It offers personal reflections (