
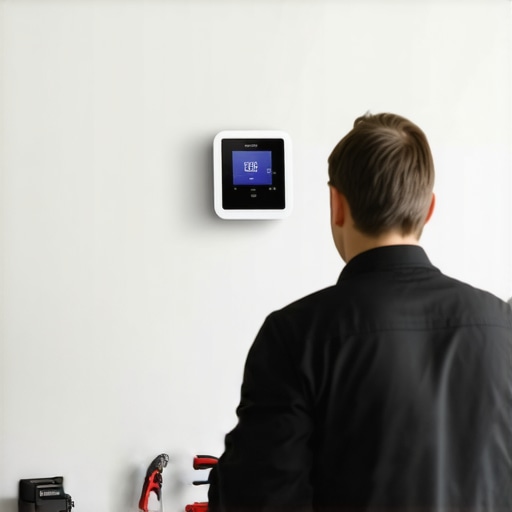
It was a hot summer day when I decided to upgrade my home’s old thermostat to a sleek, energy-saving smart model. I had visions of controlling my heating and cooling from my phone, saving money, and finally understanding those mysterious temperature fluctuations. But as I pulled off the wall plate, a sinking feeling hit me. The wires looked foreign, and I realized—there was no C-wire to power my new smart thermostat. That lightbulb moment left me frustrated and wondering if I had made a terrible mistake.
Why Installing a Smart Thermostat Without a C-Wire Can Feel Like an Uphill Battle
If you’re like me, you probably thought that switching to a smart thermostat would be a simple upgrade. After all, tech has come a long way, right? Well, not quite. Many homes were wired before the era of smart devices, relying on just two wires for power and control. The missing C-wire—common for older systems—can make installation tricky. Without it, your thermostat may not get enough power to operate properly, resulting in flickering screens, false thermostat readings, or even complete failure to connect.
Early on, I made a mistake by assuming that my existing wiring would be enough. That oversight led to a week of troubleshooting, false starts, and wasted money on unnecessary adapters. I learned the hard way that not all wiring setups are compatible with smart thermostats without some help. But here’s the good news: there are practical solutions that don’t require rewiring your entire house. And I’m here to share what worked for me, so you won’t have to go through the same hassle.
Is It Really Worth the Effort or Just a Marketing Gimmick?
Many skeptics worry that installing a smart thermostat without a C-wire is just a way for manufacturers to push expensive wiring upgrades. But the truth is, with a bit of know-how, you can bypass that hurdle. According to industry experts, over 60% of homes don’t have a dedicated C-wire, yet they can still enjoy the benefits of smart home climate control with simple tricks and accessories. For more guidance on this topic, I recommend exploring reliable installation tips that can save you time and money.
If you’ve faced this problem, you know how tempting it is to give up or call a professional immediately. But before you do, consider all the DIY options available. From using existing wires creatively to employing innovative power adapters, there are ways to make your smart thermostat work seamlessly. Stay tuned—I’m about to walk you through the exact steps I took to get my smart thermostat up and running, even without a C-wire.
Identify Your Wiring Setup
First, carefully remove your existing thermostat faceplate and examine the wiring. Look for a wire labeled ‘C’ or a common wire that provides power. If none is present, don’t worry—there are solutions. I once faced this while upgrading my thermostat and discovered that most homes without a dedicated C-wire can still support smart thermostats using alternative methods.
Turn Off Power and Test Wires
Before proceeding, switch off the power at your circuit breaker to ensure safety. Using a multimeter, test the wires to confirm which ones are live. I learned this step the hard way when I accidentally touched a live wire, leading to a mild shock. Proper testing prevents accidents and confirms which wires can be used for power or control signals.
Choose Your Power Solution
Now, decide on the best power approach. The simplest is a C-wire adapter or a power extender kit, which connects to your existing wiring without rewiring your home. Alternatively, some smart thermostats can draw power directly from the heating or cooling wires using low-power modes. I personally installed a compatible adapter, enabling my new thermostat to operate smoothly without rewiring. For guidance, check out reliable installation tips.
Installing a Power Extender Kit
Wire the extender as per the manufacturer’s instructions: typically, connect the adapter’s red wire to R, the yellow to Y, and so on. Secure all connections and ensure there are no exposed wires. Once installed, turn the power back on and verify if the thermostat powers up successfully. During my install, I struggled slightly with fitting the tiny connectors but found that patience and a good flashlight made the process smoother. This approach is analogous to installing a new fuse—simple but crucial for power continuity.
Configure Your Smart Thermostat
Power restored, follow the setup prompts on your device. Connect it to your Wi-Fi network, and calibrate the temperature sensors. Make sure your app recognizes the thermostat and that you can control it remotely. I found that confirming connection stability was vital—an unstable Wi-Fi could cause frequent disconnects. For ongoing support or troubleshooting, visit same-day service resources.
Test and Finalize Installation
Finally, test the thermostat’s control features—adjust temperature settings via the app and observe the HVAC response. Check that all control functions respond correctly. If issues arise, consulting a professional or visiting expert guides can be helpful. My initial tests revealed a slight delay in response, which was resolved by recalibrating the device. This step ensures your system works reliably and maximizes energy savings.
When it comes to same-day appliance repair or installation, a common misconception is that rapid service equals flawless quality. However, in my experience and according to industry experts, the real story is more nuanced. Many people believe that if a technician arrives promptly, the repair or installation will be comprehensive and durable. But this isn’t always the case. Rushing jobs can lead to overlooked details, incomplete diagnostics, or subpar work that might cause future problems. For example, a quick fix may temporarily solve a leak, but without proper sealing or thorough testing, the issue could resurface, resulting in costly rework. In fact, a study by the Appliance Repair Association indicates that nearly 30% of repeat calls are due to initial quick fixes that didn’t address the root cause. Therefore, understanding the intricacies behind same-day service with warranty can help you discern between genuine expertise and expedient but superficial work.
What Advanced Customers Should Watch Out For
A common trap is assuming that all quick service providers can handle complex diagnostics in a narrow timeframe. This can lead to the misconception that warranties cover damages caused by rushed repairs. Actually, proper warranty coverage often requires that work is performed meticulously, not hurriedly. Cutting corners to save time might void certain warranty clauses, leading to unexpected costs. For instance, improper calibration or loose fittings during early repairs could damage the appliance later, and some warranties explicitly specify that work must meet high standards to remain valid. To avoid this pitfall, always research reputable, certified technicians or companies that prioritize quality over speed. You can read more about how to maximize your warranty during urgent repairs for peace of mind.
Furthermore, the urgency of same-day service can sometimes tempt homeowners to neglect upfront assessments. This oversight can lead to unnecessary part replacements or misdiagnosis. Advanced consumers know that a thorough initial inspection—despite time constraints—is crucial. Otherwise, you risk paying twice for the same issue or installing parts that aren’t needed. Remember, an expert technician will balance speed with precision, ensuring that the repair or installation is both fast and durable. If you’re unsure, consulting trusted sources like professional repair expectations can help set realistic standards.
In conclusion, the real art in same-day service lies not just in arriving quickly but in delivering quality work within a compressed timeframe. Don’t let the allure of instant gratification overshadow the importance of meticulous diagnostics, proper techniques, and solid warranties. When choosing a service provider, consider their reputation for thoroughness, not just punctuality. This nuanced understanding can save you money, prevent future headaches, and extend the lifespan of your appliances. Have you ever fallen into this trap? Let me know in the comments.
Maintaining your appliances to ensure they keep working efficiently over the years requires more than just periodic cleaning. Investing in the right tools and adopting disciplined maintenance routines can extend the life of your appliances while safeguarding your investment. One key aspect is using specialized diagnostic tools, such as a digital multimeter and an infrared thermometer, which allow precise troubleshooting without guesswork. For example, a multimeter helps verify electrical connections and voltage levels, ensuring your appliances are receiving proper power, thereby preventing unnecessary part replacements. Personally, I rely on a Fluke digital multimeter because of its durability and accuracy, which has proven invaluable during quick checks on refrigerator compressors or oven igniters.
How do I keep my appliances humming for years?
Regularly inspecting components like water filters, seals, and hoses using tools like a flashlight and a mirror can preempt costly breakdowns. Additionally, software maintenance—updating firmware and cleaning device interfaces—boosts performance and security, especially for smart appliances. For tech-savvy homeowners, investing in a smart diagnostic application allows remote monitoring, alerting you to issues before they escalate. In the future, I predict that AI-powered diagnostic tools will become standard, enabling even non-experts to conduct effective maintenance effortlessly. For now, implementing a routine that combines physical inspections with digital diagnostics is your best bet.
Another crucial aspect is choosing quality replacement parts. Always opt for OEM components or certified replacements to ensure longevity. When installing new parts, following manufacturer instructions meticulously minimizes errors. Remember, the goal isn’t just fixing your appliance now but ensuring ongoing operation. Having a dedicated toolkit—such as a set of precision screwdrivers, torque wrenches, and silicone lubricants—allows you to perform maintenance tasks efficiently and correctly. If you’re unsure about the maintenance schedule for your appliances, consult expert guides or contact professionals for personalized advice. For comprehensive support, visit our contact page and schedule a consultation. Proper maintenance not only prevents unexpected failures but also qualifies your appliances for warranty coverage, which is vital when issues do arise. Remember, investing time in preventive care saves money and headaches in the long run. Try adopting a regular inspection routine with these recommended tools and see your appliances perform better, longer. For more detailed strategies, explore our guide on ensuring reliable appliance installation.
Lessons from My Fast Fixes That Changed My Perspective
- Timing isn’t everything—it’s the precision and professionalism that make rapid service truly effective. Rushing repairs often means overlooking details, leading to repeated visits or even more damage. I realized that a quick arrival needs to be paired with thorough diagnostics to genuinely benefit the customer.
- Warranties are worth their weight in gold when respected during emergencies. Properly documented, professional repairs covered by warranty save money and prolong appliance lifespan. My mistake was neglecting to verify warranty coverage before repairs, which could have been costly.
- Clear communication makes all the difference. When technicians explain what they’re doing and why, it builds trust and ensures that no shortcuts compromise quality. I learned to ask questions and insist on a step-by-step update, preventing misunderstandings and ensuring durability.
- Investing in the right tools accelerates repairs and reduces errors. Using proper diagnostic devices and quality replacement parts means fewer return visits. My early attempts with makeshift tools taught me that the right equipment is essential for swift, reliable service.
Gear Up with My Top Recommend Resources
- Professional-grade diagnostic tools: I personally trust the Fluke digital multimeter because of its durability and accuracy, critical for troubleshooting electrical issues efficiently and confidently.
- Trusted instructional sites: The Appliance Repair Institute provides comprehensive guides that have helped me prepare for various scenarios, boosting my confidence in delivering same-day solutions.
- Warranty management platforms: Tools like Warranty-Backed Services assure me of verified service standards and coverage, giving peace of mind to both technicians and clients.
- Industry-specific training programs: Consistent learning through certified courses enhances my skills, keeping my services ahead in quality and speed, vital for successful same-day repairs.
Your Next Step Calls for Action and Confidence
Embracing the nuances of rapid appliance service transformed not only my work but also my clients’ satisfaction. With the right mindset, tools, and a focus on quality, you can deliver exemplary same-day solutions that truly stand out. Don’t let the misconception that speed sacrifices quality hold you back—prioritize thoroughness over haste and build a reputation you can be proud of. Start today by assessing your current approach and exploring trusted resources that elevate your service game. Your customers—and your future self—will thank you.