
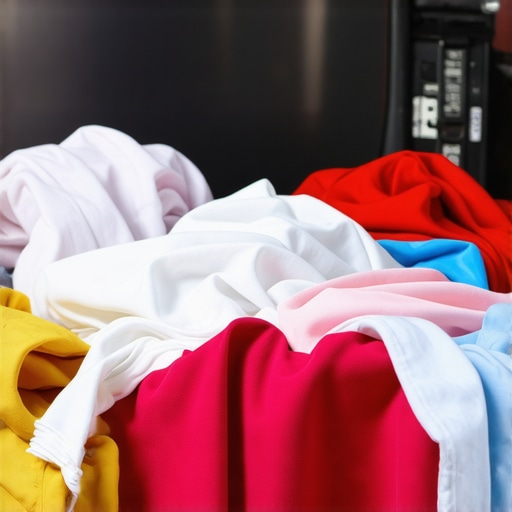
I remember the first time I pulled a load of freshly washed clothes out of the machine and noticed those stubborn white streaks across my shirts and pants. My heart sank—I thought I had messed up the wash cycle or maybe used the wrong detergent. That little moment of panic turned into a bigger question: why does this happen, and how can I fix it without calling in an expensive repair person?
Uncovering the Mystery of White Streaks in Your Laundry
Many of us have faced this frustrating issue, and it often feels like one more inconvenient problem to add to a long list of household chores. But here’s the thing—these streaks aren’t just cosmetic; they can indicate underlying problems with your washer or detergent choices. Understanding the *why* behind these streaks can save you time, money, and a lot of laundry room headaches.
Is Your Laundry Routine Actually Making Things Worse?
Early on, I made a common mistake: I used too much detergent, thinking more soap meant cleaner clothes. Instead, excess detergent can leave residue—white streaks included—that cling to fabrics after washing. This is especially true if your washer isn’t rinsing thoroughly or if you’re using a low-quality or overly fragrant detergent.
According to the Environmental Protection Agency, using traditional detergent in excess can also cause build-up in your machine, leading to poor rinsing performance. This buildup can harbor mold and bacteria, further complicating your laundry issues.
Are you tired of seeing those unwelcome streaks every time you do laundry? I’ve been there, and I promise, there’s a solution. But first, let’s address some of the most common reasons behind this problem, so you can identify what might be going wrong in your own laundry routine. If you’re curious about ensuring your appliance operates reliably, you might want to explore how to [ensure proper appliance installation](https://discountappliancehub.com/how-to-ensure-reliable-appliance-installation-in-2025). Now, onto what really causes those stubborn streaks and how to fix them for good.
Start with a Thorough Washer Inspection
Begin by ensuring your washing machine is clean and free of detergent buildup. Turn off the machine, open the lid, and perform a quick visual check for any residue or mold, especially in the detergent dispenser and door seals. A soaked cloth with white vinegar can be used to wipe down these areas, dissolving soap scum that could cause streaks. Last year, I discovered mold in my washer’s door gasket; cleaning it drastically reduced residue on my clothes. Regular maintenance prevents buildup that causes streaks.
Adjust and Measure Your Detergent Correctly
Next, measure your detergent carefully. Use the manufacturer’s recommended amount—more isn’t better. I used a plastic measuring cup to ensure accuracy, which eliminated excess soap and residue. For high-efficiency washers, it’s crucial to use HE detergent formulated for low-sudsing performance; otherwise, leftover soap can cling to fabrics.
Use Hot Water Cycles Smartly
Switch to a hot water cycle once a month to break down detergent residue and eliminate mold. When I switched to a monthly hot wash with a cup of white vinegar, it cleaned out residue and prevented streaks. Hot water helps dissolve and flush out stubborn buildup, restoring your machine’s rinsing power.
Ensure Proper Rinsing
Verify that your washer is filling with enough water for effective rinsing. If your machine permits, select extra rinse cycles to ensure detergent and residue are fully rinsed away. I experimented with increasing rinse cycles and noticed a visible reduction in streaks on my shirts.
Check for Drainage and Pump Issues
Poor drainage leads to leftover detergent in the drum. Listen for unusual noises or test drainage by manually draining the machine. If water is slow to drain, it might indicate a clogged pump or filter. Clearing these ensures all excess detergent is expelled, minimizing streaks.
Maintain and Periodically Deep-Clean Your Machine
Set a monthly reminder to run a cleaning cycle using washer cleaner or a mixture of vinegar and baking soda. During one such cleaning, I noticed mineral deposits and soap scum washing away, which improved rinse quality. Proper maintenance keeps your washer functioning optimally, preventing residue accumulation.
Address Underlying Mechanical Problems
If issues persist, consider calling a professional to inspect internal components like the water inlet valves or the control board. A malfunctioning valve might restrict proper water flow, leading to incomplete rinsing and streaks. Professionals can replace faulty parts promptly, restoring wash quality.
Verify Installation and Water Pressure
Ensure your washer is installed level and connected correctly. An uneven installation can cause uneven water distribution, affecting rinsing. Verify water pressure is adequate; low pressure may prevent sufficient water flow into the drum. You can check pressure with a simple gauge or consult a technician. Proper setup plays a crucial role in effective rinsing, preventing residues from sticking to fabrics.
Utilize Reliable Service for Troubleshooting
If you’ve tried these steps without success, seek trusted experts for repair or installation. I used a reputable service, which not only fixed my washing machine’s drainage problem but also provided tips on maintenance to avoid future streaks. Proper diagnostics and timely repairs ensure your laundry remains fresh and streak-free.
When it comes to appliance warranties and same-day repair services, many homeowners operate under misconceptions that can cost them time and money. Sure, everyone knows that warranties provide protection, but few realize the critical nuances that can make or break your experience. For instance, many believe that warranties cover all repairs automatically, but in reality, some exclusions or conditions—like improper installation—may void your coverage. Ensuring your appliance is installed by certified professionals, such as through reputable services, is vital to keep your warranty valid; you can learn more at professional installation tips.
Another common myth involves same-day service. Many assume that requesting urgent repairs always guarantees same-day turnaround, but this isn’t true—availability depends on factors like your location and the repair company’s scheduling policies. Understanding these limitations can prevent disappointment. Moreover, some homeowners overlook the significance of verifying a repair service’s credentials or warranty-backed support—these ensure that you’re covered if the repair fails. For example, choosing a provider with comprehensive plans, such as those found here, safeguards you against recurring issues.
In addition, many people don’t realize that applying the correct troubleshooting steps and understanding technical aspects of their appliances can affect warranty claims. Incorrect self-repairs or using unauthorized parts may void your warranty altogether, leading to higher out-of-pocket costs. According to the Consumer Reports study, improperly documented repairs and neglecting proper maintenance are leading causes of warranty exclusions. Therefore, leveraging expert services with experienced technicians is a smarter move.
Ever fallen into this trap? Let me know in the comments! Remember, knowing the *fine print* of your warranties and the best practices for installation and repair can save headaches and money in the long run. For more insights, check out our comprehensive guide on same-day repair expectations.Maintaining your household appliances effectively requires the right tools, consistent methods, and a proactive mindset. I’ve found that investing in quality diagnostic equipment and staying organized can make all the difference when troubleshooting or scheduling repairs. For instance, a digital multimeter allows me to quickly test electrical components like thermostats and switches, saving time and avoiding unnecessary replacements. Additionally, keeping a maintenance log helps me track minor issues before they turn into costly repairs, which aligns with advice from appliance repair experts featured in this comprehensive guide. To truly keep appliances in peak condition, I recommend setting monthly reminders to inspect filters, seals, and vents—small steps that prevent big problems.
For long-term results, integrating software tools like maintenance scheduling apps ensures you never forget essential servicing or overuse. These apps can send alerts when it’s time for a deep clean, part replacement, or professional inspection. In the near future, I predict smart diagnostic devices will become standard, allowing homeowners to perform basic troubleshooting via smartphone and reducing downtime. This trend will make appliance care more accessible and immediate.
How do I maintain my appliances over time? The key lies in combining preventive routine checks with quick access to reliable repair services. For emergency situations, partnering with reputable companies that offer same-day repair options ensures minimal disruption and preserves your appliance’s warranty benefits. If you’re interested in making repairs faster and more precise, I suggest trying a calibrated infrared thermometer to monitor temperature variations, which can reveal underlying issues before they escalate. Proper tool investment and routine maintenance not only extend appliance lifespan but also keep your household running smoothly—giving you peace of mind when it counts most.
Lessons I Learned from the Front Lines of Appliance Maintenance
One of the biggest surprises I encountered was realizing that consistent maintenance often beats reactive repairs. Waiting until an appliance completely fails can mean higher costs and frustration. Regularly inspecting filters, seals, and hoses—something I overlooked early on—saved me from emergency breakdowns. Additionally, I discovered that trusting certified professionals and understanding the nuances of warranty coverage can make future repairs smoother and less costly. Finally, embracing a proactive mindset, like scheduling routine deep cleans and diagnostics, keeps appliances running efficiently and extends their lifespan, allowing me to avoid costly replacements and enjoy peace of mind.
The Tools and Resources That Changed My Approach
Over the years, I’ve found a few tools invaluable: a quality digital multimeter helps me quickly identify electrical issues, while maintenance scheduling apps remind me of routine checkups. For learning more about warranties and repairs, reputable resources like expert guides provide clear, actionable advice. I also trust certified technicians, especially those offering warranty-backed services—these ensure that my appliances are in good hands. Keeping a library of trusted resources has empowered me to troubleshoot minor issues myself before calling in help, saving time and money.
Your Next Step Toward Worry-Free Appliances
Remember, the key to seamless appliance maintenance is blending knowledge with action. Whether you’re scheduling that annual deep clean or choosing the right repair service, embracing this proactive approach will pay dividends in longevity and performance. Don’t wait for a crisis—start implementing these habits today and enjoy appliances that serve you reliably for years to come. Ready to take charge of your appliance care? If you’ve faced specific challenges or have tips to share, drop a comment below—I’d love to hear your stories and help you troubleshoot any lingering issues with confidence.