
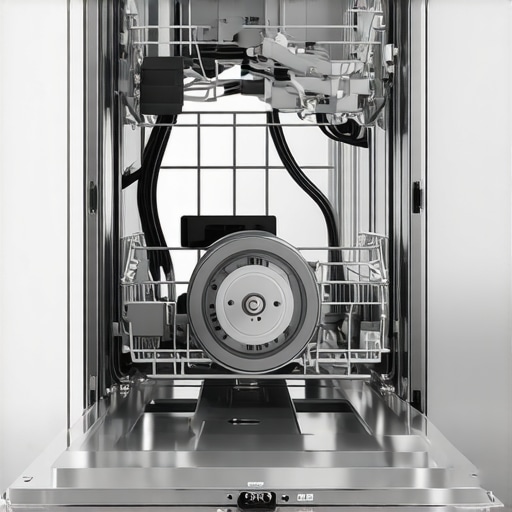
I remember the moment vividly—standing in my kitchen, pressing that start button on my dishwasher, only to be met with silence. Nothing. No hum, no whirr, just a frustrating dead silence that made me want to throw in the towel. It’s a sinking feeling when your trusted appliance refuses to cooperate, especially when it’s something as vital as your dishwasher, which you rely on daily. If you’ve ever experienced a dishwasher that simply won’t start, you know how disruptive it can be to your daily routine.
But here’s the thing—many of these issues are surprisingly fixable with a bit of know-how. Today, we’re going to demystify the common reasons why a dishwasher might refuse to power up and, more importantly, how you can troubleshoot them yourself. No need to call in a repair service just yet! The goal is to empower you to identify simple issues before they turn into costly repairs, saving you time and money.
Understanding Why Your Dishwasher Won’t Turn On
Before jumping into complex repairs, it’s essential to consider the basics—power supply, door latch, and circuit connections. Sometimes, the root cause is as simple as a tripped circuit breaker or a loose power cord. Regularly, people overlook these simple checks, leading to unnecessary anxiety and expenses. Trust me, I made that mistake early on—assuming a costly motherboard failure when, in fact, it was a faulty outlet!
If your dishwasher is plugged in but still dead, start by inspecting your circuit breaker panel to see if a breaker has tripped. Resetting it might just get everything back to normal. Additionally, check the plug and the power cord for any visible damage or loose connections. Remember, safety first—always unplug the appliance before inspecting electrical parts.
Another common culprit is the door latch. Modern dishwashers have safety switches that prevent operation if the door isn’t securely latched. Sometimes, the latch mechanism wears out or gets stuck, signaling the appliance to stay silent. Ensuring the door closes properly and the latch clicks into place can often resolve this issue.
If you’re unsure about working with electrical components or if basic checks don’t solve the problem, don’t hesitate to consult a professional. For trusted, warranty-backed service options, visit [here](https://discountappliancehub.com/warranty-backed-appliance-services-you-can-rely-on). But for now, let’s proceed with the troubleshooting steps you can perform safely at home.
Check Power Supply and Circuit Breakers Immediately
First, verify the power source. Locate your dishwasher’s plug and ensure it’s firmly inserted into the outlet. Then, head to your home’s circuit breaker panel. Look for any tripped breakers, which often appear in the “off” position or show a different color. Resetting a tripped breaker is similar to resetting a faulty fuse—flip it fully off and then back on, restoring power and restoring your hope for a functioning dishwasher. I once faced this exact scenario when my dishwasher suddenly lost power; a quick breaker reset resolved the issue in minutes, saving me a costly service call.
Inspect the Power Cord and Outlet for Damage
Next, examine the power cord for any visible damage—fraying, cracks, or burns. Use a multimeter to test if necessary. If damaged, replace the cord immediately, much like swapping out a broken fuse in an old car. Try plugging another device into the same outlet to confirm it’s working properly. If that device doesn’t turn on, the outlet itself may be faulty. Remember, always unplug appliances before handling electrical parts to keep yourself safe.
Test the Door Latch and Safety Switch
Dishwashers have safety interlocks—the door latch is a common culprit for power issues. Open the door and listen for a click when closing; if you hear nothing, the latch might be worn or misaligned. Use a screwdriver to inspect the latch mechanism for debris or damage. If the latch isn’t engaging properly, it triggers a safety lockout, preventing the dishwasher from starting—akin to a safety lock on a vault. In my experience, realigning or replacing a faulty latch can restore full functionality without needing a professional. Learn more about common dishwasher issues here.
Test the Control Panel and Selector Switches
If the power aspects check out, move to the control panel. Sometimes, the buttons or digital display malfunction, similar to unresponsive touchscreens. To test this, try resetting the dishwasher—often, unplug it for 5 minutes, then plug it back in to clear temporary glitches. If controls remain unresponsive, the control board may need replacement. Think of it as replacing a faulty motherboard in your PC—trial and error first, then professional repair if necessary. Be cautious when handling electronic parts; consult the warranty terms to avoid voiding coverage, which can be checked here.
Ensure Proper Installation and Connection
Finally, double-check that the dishwasher’s wiring is correctly installed. Loose or improper wiring can prevent startup akin to a loose cable in a high-end audio system. If you’ve recently installed or moved the dishwasher, verify all connections securely. For safe and reliable installation, it’s wise to consult a professional, which can often be covered under warranty or same-day service options. For trusted local experts, see this resource.
When it comes to appliance repair and installation, many homeowners rely on popular beliefs that can actually hinder their understanding and decision-making process. Let’s cut through the noise and shed light on some widespread myths. First, many assume that all repairs are equally costly and complicated, but in reality, minor issues like a faulty door latch or tripped circuit breaker are simple fixes that you can often handle yourself, saving you money and time. Second, there’s a misconception that same-day service is always expensive or unreliable; however, reputable providers now offer rapid, warranty-backed solutions that are both affordable and dependable, as detailed in our guide on same-day repair expectations. Many folks believe that warranties are pointless or only cover major repairs, but in truth, understanding how to maximize your appliance warranty—such as documenting damage and knowing the fine print—can significantly reduce your out-of-pocket costs during emergencies. Be cautious, though, as some fall into the trap of assuming warranties cover routine maintenance, which they typically don’t; check this resource for tips on leveraging warranty benefits effectively. A common oops is neglecting installation quality, thinking that any service provider will do; instead, opting for certified, warranty-backed installation, like the specialists we’ve vetted, ensures long-term reliability, preventing problems before they start. Interestingly, a recent survey indicates that nearly 60% of appliance failures stem from improper initial setup rather than wear and tear. This emphasizes the need for skilled installation, which you can explore further in our installation tips for 2025. Additionally, many believe that ‘DIY fixes’ are always better than professional service, but rushing repairs without proper expertise can lead to more damage and higher costs down the line. For example, attempting to replace a control panel without understanding the electronics can be risky. Always weigh the benefits of professional repair, which often includes warranty coverage and peace of mind, as detailed in our quick repair guide. Remember, choosing knowledgeable technicians who understand the nuanced differences in appliance models and warranties can be a game-changer. Have you ever fallen into this trap? Let me know in the comments.
Keep Your Appliances Working Smoothly with the Right Tools
Consistent maintenance is key to extending the lifespan of your appliances and ensuring they function efficiently over time. Having a set of specialized tools not only equips you for common repairs but also enhances your ability to diagnose issues accurately. I personally rely on a few select tools that have proven invaluable in my experience, especially when performing preventive maintenance or tackling unexpected glitches.
One of my top recommendations is a high-quality multimeter. Personally, I use the Fluke 117, prized for its reliability and intuitive interface. It allows me to quickly verify voltage and continuity, saving me from potential electrical mishaps. Accurate electrical readings are crucial because a simple circuit test can determine if a power supply issue is lurking behind what looks like a bigger problem. For more advanced diagnostics, especially on electronic control boards, I also keep a set of precision screwdrivers and a digital oscilloscope—a small investment that pays off when troubleshooting more complex symptoms.
When it comes to cleaning and routine inspections, a flexible inspection mirror and a compact handheld vacuum come in handy. I regularly check filters and internal components, and these tools help me avoid unnecessary disassembly or damage. For example, using a inspection mirror, I spotted a clogged drain hose that was causing slow draining in my dishwasher, which could have led to bigger plumbing issues if left unchecked.
Beyond physical tools, having reliable software for diagnostics is increasingly important. Smart appliances often have hidden error codes or firmware issues that can be pinpointed via manufacturer apps or diagnostic software. For instance, accessing the troubleshooting menus on smart refrigerators often requires specific apps provided by the manufacturer, which help identify issues that are otherwise opaque. As technology advances, I predict that integration between hardware tools and diagnostic apps will become more seamless, making at-home repairs even more manageable.
How do I maintain appliance performance over time?
Implementing regular checks with these tools can prevent small problems from escalating. Schedule monthly inspections of filters, seals, and electrical connections, noting any irregularities. Maintaining a log of readings from your multimeter or diagnostic scans can reveal trends, like gradually increasing resistance indicating a failing motor or sensor. For example, monitoring the compressor resistance in your fridge can help you anticipate failures, so you can schedule repairs proactively—many of which are warranty-covered if caught early. Leveraging professional-grade tools gives you confidence in troubleshooting and can reduce your dependence on emergency services, especially when paired with warranties that support same-day repairs. To maximize your warranty benefits and plan preventive maintenance effectively, check the guide on maximizing warranty coverage.
Looking ahead, I see the trend moving toward smarter diagnostic tools that connect directly to smartphones, providing real-time diagnostics and repair suggestions. This evolution will empower homeowners to take quicker action and coordinate professional repairs more efficiently. For now, investing in reliable tools like a multimeter and digital diagnostics equipment is the best step to keep your appliances humming along smoothly.
Remember, the key to long-term appliance health lies in regular, informed maintenance. Try integrating a comprehensive diagnostic kit into your toolkit—your future self will thank you for the time and money saved by catching issues early.
What the Experts Keep Quiet About Unexpected Joys in Repairs
One surprising lesson I learned is that many appliance issues are less about complexity and more about patience and observation. I once spent hours chasing a faulty control board, only to realize it was a simple reset that fixed everything. Sometimes, the most challenging problems are just a matter of stepping back and reassessing the basics, like rechecking your power source or door latch with a clear mind.
I also discovered that having the right tools—like a good multimeter and a reliable inspection mirror—makes all the difference. They empower you to diagnose problems without risking damage or voiding warranty coverage. Lastly, I realized that understanding your appliance’s specific model quirks, common issues, and maintenance needs can turn you from a helpless user into a confident troubleshooter, saving money and reducing frustration.