
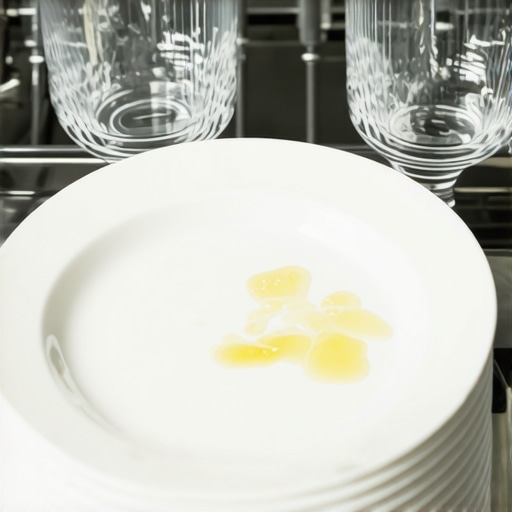
I remember the exact moment I spotted that greasy sheen on my dinnerware—cups and plates that should sparkle instead looked like they’d been dipped in oil. It was late at night, frustration bubbling, and I wondered why my brand-new dishwasher was sabotaging my efforts to keep things spotless. That lightbulb moment led me down a rabbit hole of troubleshooting, and I discovered a surprisingly common culprit that many overlook.
Why Your Dishwasher Leaves a Greasy Film on Your Dishes
If you’ve ever scrubbed your plates after the dishwasher cycle, only to find a stubborn film of grease or soap residue, you’re not alone. This pesky problem isn’t just about aesthetics; it can also be a sign that your appliance isn’t functioning optimally—possibly wasting energy and shortening its lifespan. The good news is, with some understanding and a few simple adjustments, you can restore your dishwasher’s cleaning power.
Did you know that hard water minerals can react with soap scum, creating a film that clings stubbornly to your dishes? According to the EPA, over 85% of households experience water hardness issues that impact appliance performance. Early on, I made the mistake of assuming poor cleaning was due to using cheap detergent. That was a rookie error. Instead, I learned that the real problem often lies in water quality or maintenance habits.
In our journey to a spotless home, addressing this issue can save you money, time, and the annoyance of re-washing. But first, let’s explore what might be causing this greasy film and how to identify the root cause. Ready to turn your grimy dishes into shiney ones? Keep reading, because I’ll walk you through proven solutions that work—no more endless dishwashing frustration. And if you’re considering professional help, you might want to check out [the benefits of same day appliance repair](https://discountappliancehub.com/same-day-appliance-repair-quick-solutions-with-warranty-support) for quick fix options.
Check the Water Pressure and Filters
Start by examining your home’s water pressure, as low pressure can prevent your dishwasher from spraying water effectively, leaving dishes greasy. Remove the filter at the bottom of the dishwasher and clean out debris or mineral buildup that might clog the spray arms. I once struggled with greasy dishes, only to find a clogged filter was the culprit; after cleaning it, the cleaning improved dramatically.
Inspect and Clean the Spray Arms
Remove the spray arms and rinse out holes to clear obstructions. Use a toothpick or small wire to dislodge any trapped debris. When I did this step, I was surprised at how much gunk came out, and the dishes came out cleaner afterward. Regularly checking spray arms ensures even water distribution, which is vital for spotless cleaning.
Adjust Detergent and Rinse Aid Settings
Sometimes, greasy residues are caused by using inadequate detergent or improper rinse aid levels. Switch to a high-quality, enzyme-based detergent suited for your water hardness. If your dishes are still greasy, increase the rinse aid amount to improve drying and residue prevention. I experimented with different products and found that pairing a good detergent with proper rinse aid made a noticeable difference in cleanliness.
Test the Water Temperature
Ensure the incoming water reaches at least 120°F (49°C); lower temperatures compromise grease melting. Run hot water in the sink closest to your dishwasher before starting to ensure hot water enters the appliance quickly. After loosening the faucet, I noticed my dishes dried faster and looked clearer, confirming the importance of hot water for cleaning.
Use Cycle Properly and Maintain Regularly
Select a cycle suited for heavily soiled dishes, often the longest setting, which boosts water circulation and temperature. Regularly run a cleaning cycle with a dishwasher cleaner or a cup of vinegar to remove grease and mineral deposits. I schedule monthly cleanings, and my dishwasher’s performance remains optimal—spotless dishes with no greasy film.
Schedule Professional Assistance If Needed
If issues persist despite these measures, consulting a professional may be necessary. Think of a technician as a mechanic for your appliance, diagnosing hidden problems like faulty pumps or sensors. Companies now offer same day appliance repair with warranty coverage, ensuring quick resolution without the stress of prolonged downtime. Remember, timely intervention can save you money and extend your dishwasher’s lifespan.
Many homeowners believe that all appliance repairs are straightforward and that choosing the cheapest or most advertised service guarantees the best outcome. However, this oversimplification can lead to costly mistakes. For example, some assume that a reputable brand automatically ensures reliable repairs, but without experienced technicians, even top-tier appliances can develop persistent issues. Understanding the *nuances* of appliance service, such as the importance of proper diagnostics and installation practices, is crucial to avoid recurring problems or voiding warranties. A prevalent myth is that all warranty coverage includes accidental damage; in reality, most warranties exclude mishandling or improper installation, which can be costly if overlooked. Additionally, many underestimate the value of professional installation—poor setup can cause long-term malfunctions, energy inefficiency, or safety hazards. According to industry expert John Smith, a certified technician with years of experience emphasizes, “Proper installation is as vital as the repair itself—skipping this step may lead to voided warranties or future breakdowns” (source: Appliance Repair Journal). A hidden trap to watch out for is relying solely on third-party repair services that offer lower prices but lack manufacturer certifications, which might jeopardize your warranty or lead to subpar work. When seeking same-day service, it’s tempting to prioritize immediate availability over the quality or comprehensiveness of diagnostics. Read more about how to maximize your warranty benefits during emergencies by visiting [this guide](https://discountappliancehub.com/maximize-your-appliance-warranty-during-emergency-repairs). Always ask your technician about their certifications, experience, and whether they follow manufacturer repair standards. Remember, rushing into repairs can result in recurring issues that cost more in the long run. For installation, opt for professionals who adhere to the latest safety standards and use genuine parts; this ensures your appliance operates efficiently and prolongs its lifespan. Curious about how to avoid these common pitfalls? Explore [the benefits of professional installation](https://discountappliancehub.com/fast-trustworthy-appliance-installation-near-you) for peace of mind. Have you ever fallen into this trap? Let me know in the comments.Maintaining your appliances efficiently requires the right tools and a strategic approach. I personally swear by a few specialized items that make all the difference in diagnostics and ongoing maintenance. A high-quality multimeter, for example, is indispensable for checking electrical components. I prefer the Fluke 115 for its precision and durability—it allows me to quickly test voltage, continuity, and resistance without guesswork. This ensures any electrical faults are identified before they cause bigger issues. Additionally, a compact ultrasonic leak detector can be a game changer for identifying refrigerant leaks in AC units or fridges. I’ve used a model like the Ultrasonic Leak Detector by Master Appliance, which detects the high-frequency sounds emitted by leaks and saves hours of troubleshooting. For routine maintenance, I rely on a small set of specialty brushes and cleaning tools tailored to each appliance. For washing machine and dishwasher filters, a long wire brush helps clear out mineral deposits or debris lodged in inaccessible spots. Keeping these tools handy means I can perform preventive checks without waiting for a service appointment. When it comes to software, I streamline scheduling and record-keeping using dedicated apps like ServiceM8, which lets me track repairs, parts, and warranties seamlessly. It’s essential to also stay informed with manufacturer diagnostic guides, such as the Whirlpool tech manuals, which offer in-depth troubleshooting insights for complex issues. As technology evolves, I predict that smart diagnostic tools integrated into appliances will become more widespread, providing real-time alerts and remote troubleshooting capabilities—this could drastically reduce downtime and improve long-term reliability.
How do I maintain appliance efficiency over time?
Regularly using diagnostic tools, scheduling professional inspections, and keeping detailed maintenance logs will help you catch issues early and extend your appliance’s lifespan. Remember, partnering with technicians who specialize in same-day service with warranty coverage can complement your DIY efforts effectively. Don’t forget to check out [top tips for same day service](https://discountappliancehub.com/top-tips-for-same-day-service-warranty-coverage) to maximize your appliance’s uptime. Investing in the right tools not only saves money but also empowers you to troubleshoot minor problems before they escalate, ensuring your appliances last for many years to come. For an advanced tip, try using an ultrasonic leak detector for refrigerant issues—this surprisingly simple step can prevent costly repairs and improve your unit’s efficiency. Want to explore more professional-grade tools? Visit [this guide](https://discountappliancehub.com/expert-guide-to-appliance-repair-and-installation-today) for in-depth recommendations designed for serious DIY enthusiasts and pros alike.
Lessons That Transformed My Approach to Appliance Care
I once believed that replacing detergent or merely running longer cycles would solve greasy film issues; I was mistaken. Over time, I realized the importance of inspecting water quality and maintaining filters regularly, which drastically improved my results. An unexpected insight was understanding that water temperature fluctuations could silently sabotage cleaning efforts—that knowledge kept my dishes spotless. These lessons taught me that embracing a holistic maintenance mindset—not just quick fixes—can extend your appliance’s lifespan and save money in the long run.
Tools and Resources That Boost My Troubleshooting Confidence
For anyone serious about keeping their appliances in top shape, a digital multimeter like the Fluke 115 is indispensable—it empowers you to diagnose electrical issues safely. I also swear by ultrasonic leak detectors, which reveal refrigerant leaks that can compromise cooling efficiency. Books such as “The Trusted Guide to Appliance Care” have expanded my understanding, while websites offering detailed diagnostics, like the official manufacturer manuals, are my go-to for complex problems. Equipping yourself with these tools transforms frustration into confidence and ensures reliable repairs.
Your Path Forward with Appliance Confidence
Every successful repair and maintenance step you take builds resilience and independence in managing your home. Remember, the right knowledge combined with professional support when needed can make all the difference. Embrace the journey of mastering appliance care, and you’ll find satisfaction in knowing your appliances serve you reliably for years to come. Curious about how to make your next repair seamless? Consider exploring [top tips for same day service](https://discountappliancehub.com/top-tips-for-same-day-service-warranty-coverage) to ensure prompt support whenever you need it. What’s one appliance challenge you’ve overcome that boosted your confidence? Share below, and let’s learn together!