
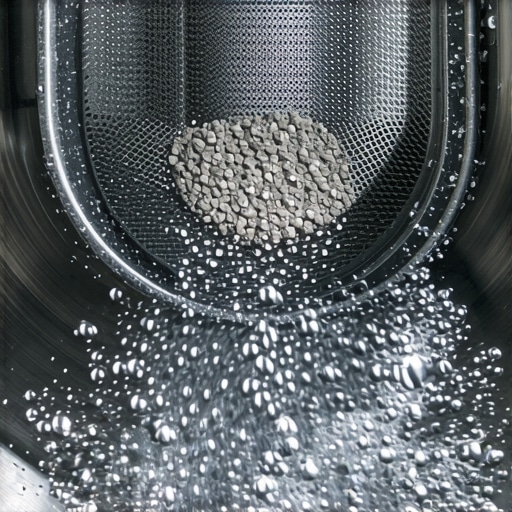
I was standing in my laundry room last Tuesday, staring at the digital timer on my washer while it blinked a mocking ’38 minutes remaining’ for a cycle that should have been done an hour ago. The sound was the real giveaway: instead of the usual vigorous rush of water, there was this pathetic, thin whistle. It sounded more like a tea kettle than a high-end appliance. My first instinct was pure panic. I immediately started looking into scheduling your appliance repair for same day service in 2025 because I just didn’t have the mental energy to deal with a broken machine. But then I took a breath. I remembered a massive mistake I made early in my DIY journey: I once replaced a whole $90 water inlet valve because I assumed the solenoids had fried. It turned out to be a single grain of sand wedged in a mesh screen. I felt like an idiot then, but that embarrassment became my superpower. Today, we are going to fix that exact same issue for you. We’re diving into that tiny screen inside your washer hose that’s likely the only thing standing between you and a clean load of laundry.
This Hidden Filter Is Choking Your Washing Machine
When you hook up a new washer, everything is pristine. But water is rarely ‘just water.’ It’s a soup of minerals, pipe scale, and the occasional bit of grit from a city water main repair. These tiny particles travel through your pipes until they hit the first ‘wall’—the fine mesh filters located right where your hoses screw into the back of the machine. I’ve seen these screens so clogged with orange rust that not a single drop could pass through. It’s a lot like checking the debris trap location in your high efficiency washing machine; if you don’t clear the path, the machine simply can’t do its job. A surprising fact from the USGS Water Science School notes that sediment can travel miles through pressurized lines only to settle in the smallest orifice available, which in your house, is this exact filter. If your washer is struggling, don’t assume the motor is dying. It might just be gasping for a drink.
Is this really worth the effort of moving the machine?
I know the feeling. You look at that heavy, vibrating metal box and the last thing you want to do is shimmy it out from the wall, especially if your laundry room is as cramped as mine. You might be worried about snapping a hose or making a mess. But let’s be real: ignoring the problem is how you end up needing the 15 part that fixes a shaking washing machine because the imbalance caused by low water levels is rattling the drum to pieces. I’ve been the guy who waited too long, and I promise you, a little bit of sweat today beats a massive repair bill tomorrow. If you aren’t sure where to start, looking at an expert guide to appliance repair and installation today can give you the confidence to handle the basics. The process is straightforward, and you don’t need a degree in mechanical engineering to master it. Have you ever noticed your wash cycles getting longer every month, or found yourself restarting the machine just to get the clothes wet? [placeholder_image_1] Restoring your water flow is the first step toward getting your weekend back.
Shut Down the Power and Water Before You Start
Before you even touch a wrench, you have to cut the vitals. Electricity and water don’t play well together, and the last thing you want is a face full of pressurized cold water while your machine is still plugged in. Reach behind the unit and unplug the power cord, then locate the hot and cold water shut-off valves. If you’ve never looked for them, now is the time; finding the emergency water shut off every homeowner needs to locate today is a skill that saves houses from floods. Turn those valves clockwise until they stop. I once skipped this step thinking I could just ‘be quick,’ and I ended up soaking my drywall and spending three hours with a shop vac. It was a humbling lesson in why shortcuts usually take longer.
Clear the Way and Loosen the Hoses
With the water off, you’ll need to shimmy the machine out. Give yourself about two feet of clearance so you aren’t working in a dark, cramped cave. This is also a great time to check if the shipping bolt error that ruins new washing machines was ever corrected if you’ve been dealing with vibrations since day one. Use a pair of channel-lock pliers to gently loosen the hose connections on the back of the washer. Have a small bucket or a thick towel ready because there will be about a cup of ‘residual’ water trapped in the lines that’s going to spill out the moment that seal breaks. Don’t panic; it’s normal.
Extract the Mesh Filters Without Damaging Them
Once the hoses are off, look inside the threaded brass or plastic inlets on the machine. You’ll see those tiny, circular mesh screens. They aren’t meant to be permanent fixtures; they are designed to be removed and cleaned. I suggest using a pair of needle-nose pliers. Grip the small plastic tab in the center of the screen and pull straight back. If it’s stuck, don’t wiggle it too hard or you might crack the plastic housing of the water valve itself. 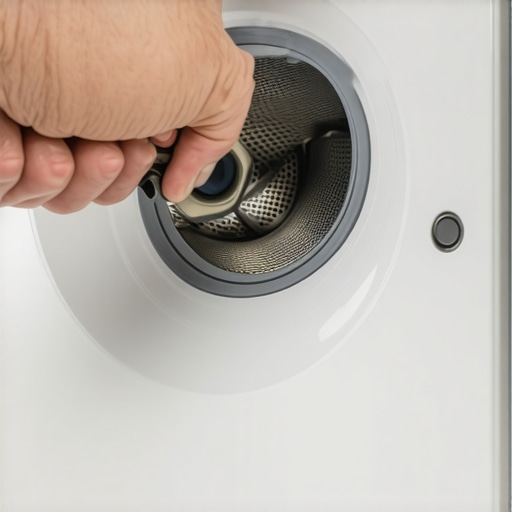 If you find yourself struggling with a stubborn part, remember that having the specific wrench you need to unjam a disposal in seconds or a similar high-quality tool kit makes these DIY tasks significantly less stressful.
Scrub Away the Years of Mineral Build-up
Take those screens to a sink. If they are covered in orange slime or white calcium flakes, you’ve found your culprit. Use an old toothbrush and some plain white vinegar to scrub the mesh until you can see light through every single hole. If the debris is really baked on, let them soak in vinegar for ten minutes. This simple cleaning move is a key part of how to maximize your appliance warranty during emergency repairs because it shows the manufacturer that you aren’t neglecting basic maintenance. I’ve seen people call for scheduling your appliance repair for same day service in 2025 only to have the technician charge them $150 just to do exactly what you’re doing right now with a toothbrush.
Put Everything Back Without the Leaks
When the filters are sparkling, push them back into the inlets. Make sure they sit flush. When you go to reattach the hoses, start the threads by hand. This is the most important part of the whole process. If you use a wrench right away, you risk cross-threading the plastic threads on the valve, which turns a free fix into a $200 part replacement. Tighten them hand-tight, then give them just a quarter-turn with the pliers. This ensures you aren’t crushing the rubber gasket. Keeping a log of when you do this can be the one maintenance record that saves your appliance warranty claim if the machine ever has a more serious internal failure down the road. Turn the water back on slowly and check for drips before you push the machine back into its permanent home.
The Speed Trap Most Homeowners Fall Into
Most people think that the faster a technician arrives, the better the repair will be. I used to believe that too. I’d spend hours looking into scheduling your appliance repair for same day service in 2025 the second a light flickered. But here is the contrarian truth: speed often kills quality. When a service call is rushed to meet a same-day metric, technicians are under immense pressure to ‘close’ the ticket. This leads to what I call ‘part-swapping’—where they replace the most likely culprit without actually diagnosing the root cause. I’ve seen homeowners pay for a new control board when the real issue was a loose wire or a dirty sensor. If you want a fix that lasts, look for top tips for same-day service warranty coverage that prioritize diagnostic thoroughness over a quick stopwatch finish.
Don’t Let Your Warranty Slip Through Your Fingers
The biggest ‘oops’ factor I see in my years of tinkering isn’t the repair itself; it’s the paperwork. People treat their manuals like trash. They toss out the warranty document you must save before discarding the box and then act surprised when the manufacturer denies a claim. There is a common trap here: assuming that the digital registration you did online is enough. In reality, according to a report by the Association of Home Appliance Manufacturers (AHAM), service life is significantly extended by adherence to the manufacturer’s specific maintenance schedule, yet fewer than 20% of homeowners actually keep a log of their work. Without that paper trail, your ‘lifetime warranty’ is just a fancy piece of marketing. 
Does Regular DIY Maintenance Actually Void Your Factory Warranty?
This is the question that keeps people from even touching their machines. The short answer? No, but with a major catch. Under the Magnuson-Moss Warranty Act, a manufacturer cannot legally void your warranty just because you performed basic maintenance like cleaning a filter. However, they can deny a specific claim if they can prove your DIY ‘fix’ caused the failure. This is why learning how to avoid paying the service fee for a denied warranty claim is so critical. You need to know where the ‘maintenance’ ends and where ‘unauthorized repair’ begins. Swapping a lightbulb or cleaning a screen is maintenance; taking a blowtorch to the evaporator coils is a repair. Knowing the difference saves you thousands.
Documentation Is Your Best Defense Against Denied Claims
If you want to win against a stubborn warranty provider, you need evidence. I always tell people that the one maintenance record that saves your appliance warranty claim is a simple folder containing your receipts and a few timestamped photos of your clean filters. It takes five minutes, but it changes the entire dynamic when a technician arrives. Instead of being ‘just another customer,’ you are a documented homeowner who follows the rules. This level of preparation is the ‘advanced’ move that separates the amateurs from the pros. Have you ever fallen into this trap where a simple repair was denied because you lost a receipt? Let me know in the comments.
I used to think that a standard screwdriver and a pair of rusty pliers were enough to manage a household. I was wrong. After stripping the head of a critical pump screw in my old dishwasher, I realized that authority in DIY comes from precision, not force. I now swear by a high-quality multimeter like the Fluke 117; it is the only way to safely test circuits without guessing if a board is fried. If you want to move beyond the basic troubleshooting, you really need an expert guide to appliance repair and installation today to map out the internals of your specific models. I personally keep a specialized go-bag that includes the specific wrench you need to unjam a disposal in seconds and a set of non-marring wrenches for delicate intake valves. These tools are not just for show; they prevent the cosmetic damage and rounded bolts that can lead to a technician denying your claim based on accidental misuse.
Stop Buying Cheap Tools That Strip Your Bolts
When you are ready to scale your maintenance habits, you have to look at the consumables of your machines. This means more than just buying the right detergent; it means checking gaskets, seals, and specialized lubricants. Most people wait for a puddle to form before they look for fast trustworthy appliance installation near you, but the pros act before the rubber starts to crack. If you are handling your own minor repairs, learning to maximize your appliance warranty during emergency repairs is vital because it teaches you to document the exact condition of the parts you replace. I have found that using a digital caliper to check the thickness of a dryer belt can predict a failure months before it happens. This kind of data-driven DIY is how you keep your house running like a machine. #IMAGE_PLACE_HOLDER_D#
How do I maintain my appliances over the long haul?
The secret is a rolling quarterly audit rather than an annual deep clean. I break the house down into manageable chunks: January is for checking gaskets and seals, April is for vacuuming coils and replacing filters, and so on. According to technical documentation from the Association of Home Appliance Manufacturers (AHAM), specifically their RASA standards for consumer maintenance, failure to clean condenser coils or water filters at the prescribed intervals can increase energy consumption by up to 15% and significantly shorten the life of a compressor. This is precisely why your extended warranty company keeps asking for service logs every time you call for help. They know that a well-maintained machine rarely fails prematurely. If you do not have the time to track every bolt, look for the maintenance contract clause that saves you on labor costs when you buy new units.
Predictive Sensors are the Future of Home Repairs
I predict that by 2030, the DIY part of home repair will be guided entirely by built-in diagnostic sensors that communicate directly with your phone. We are already seeing this with high-end washers that can detect a clogged drain pump before the water overflows. This technology will make same day appliance repair quick solutions with warranty support the standard rather than a lucky exception, as parts will be ordered by the machine itself before you even notice a drop in performance. For now, your best defense is a proactive stance. I want you to try one thing today: go to your refrigerator and pull it out just far enough to vacuum the coils at the bottom. It is a ten-minute job that could add three years to your fridge’s life and save you from a warm freezer next summer.
The Expensive Mistake I Made While Chasing Speed
In my early days of homeownership, I fell into the trap of thinking that the fastest technician was the best one. I once rushed into scheduling your appliance repair for same day service in 2025 without asking a single diagnostic question. The result? A technician who swapped out a perfectly good control board just to get to his next job, when the real culprit was a $10 sensor. My lightbulb moment was realizing that quality diagnosis is the only real shortcut. When you look for top tips for same-day service warranty coverage, prioritize the companies that ask you for error codes or symptoms before they even pull into your driveway. A technician who comes prepared with the right part is worth ten who show up in twenty minutes empty-handed.
My Personal Toolkit for Appliance Longevity
I don’t believe in buying every gadget at the hardware store, but three things stay in my ’emergency bucket’ at all times. #IMAGE_PLACEHOLDER_FINAL# First, a reliable multimeter is non-negotiable; it tells you the truth about a circuit when your eyes can’t. Second, I always keep the specific wrench you need to unjam a disposal in seconds tucked behind the cleaning supplies—it’s saved my sink more times than I can count. Finally, I rely on a digital folder of my manuals and receipts. If you’re feeling overwhelmed, reading through an expert guide to appliance repair and installation today can help you identify which specialized tools are actually worth the investment for your specific brand of machines.
Reclaim the Power Over Your Own Home
Taking that first step to clean a filter or tighten a bolt isn’t just about saving a few bucks—it’s about the confidence that comes from knowing how your world works. You don’t have to be a master plumber to maximize your appliance warranty during emergency repairs; you just have to be observant and proactive. Don’t wait for the ’38 minutes remaining’ screen to mock you. Start with one small task this weekend, whether it’s vacuuming a coil or checking a hose. Have you ever found a strange object blocking your washer’s water flow or causing a weird noise? Let me know your weirdest discovery in the comments below!