
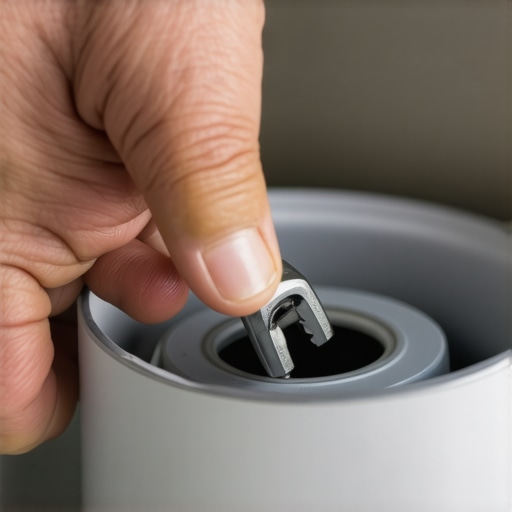
I’ll never forget the smell of rotting leftovers mixed with the panic of a clogged sink during a Sunday dinner party. There I was, elbow-deep in murky water, frantically poking a wooden spoon down the drain because I thought I could just nudge the jam loose. It was a classic rookie mistake. Not only did I fail to fix it, but I nearly burned out the motor in the process. I didn’t realize back then that my disposal had a secret access point, and I certainly didn’t know that a five-cent piece of metal was the only thing standing between me and a massive plumber’s bill. Most homeowners assume that a humming sink requires fast and trustworthy appliance installation of a brand-new unit, but usually, you just need a bit of leverage and the right tool. Today, I’m going to show you exactly how to find that tool and use it to get your kitchen back to normal in less than a minute.
Grab This One Tool Before You Call for Help
If your disposal is making a low humming sound but the blades aren’t moving, stop turning the switch on and off immediately. You are just heating up the motor. I learned this the hard way when I ended up needing affordable same-day appliance fixes after smelling smoke coming from under my sink. What you actually need is a 1/4-inch hex wrench, commonly known as an Allen key. According to technical documentation from InSinkErator, the world’s leading disposal manufacturer, this tool is designed to fit into a socket at the very bottom of the unit to manually rotate the flywheel. This bypasses the electrical components and lets you break the jam with pure mechanical force. If you’ve lost the one that came with your sink, don’t panic. A standard set from any hardware store will have the size you need. Before you start, always make sure you’ve checked the safety switch that shuts down your garbage disposal to ensure no power is flowing while you work.
Is this little hex key actually enough to save the day?
It seems too simple to be true, right? I used to be the biggest skeptic, thinking I needed heavy-duty power tools or a specialized expert guide to appliance repair to handle a seized motor. But the mechanics are straightforward. By using the wrench at the base, you are applying torque directly to the drive shaft, which is far more effective than trying to move the blades from the top with a broom handle. I once watched a neighbor spend three hours trying to ‘fish’ out a jam when this wrench trick would have solved it in ten seconds. Have you ever been stuck with a sink full of water and no idea how to clear it? Drop a comment and tell me if you’ve ever tried the ‘wooden spoon’ method like I did. Before we get into the step-by-step, remember that knowing this trick can even help you avoid the deductible trap in most third-party appliance protection plans by resolving the issue yourself.
Kill the Power Before You Do Anything Else
Safety isn’t just a buzzword; it’s the difference between a quick fix and a trip to the ER. Before you even think about putting a tool near that disposal, unplug the unit from the wall outlet under your sink. If it’s hardwired, head to your breaker box and flip the switch. I once saw a friend try to skip this step, and when the jam suddenly cleared, the motor kicked on while his hand was still nearby. It was a heart-stopping moment that nearly resulted in needing same-day appliance repair quick solutions with warranty support. Ensuring the unit is dead-silent and powerless is your first priority. If you’re unsure about the electrical setup, check out how to properly ground a new garbage disposal install to understand how these systems are wired.
How to Use That Hex Key Like a Pro
Crawl under the sink with your 1/4-inch hex wrench and a flashlight. Look at the very center of the bottom of the disposal. You’ll see a small, circular hole with a hexagonal indentation inside. This is the heart of the manual override. Insert your wrench firmly. It should feel like a key fitting into a lock. 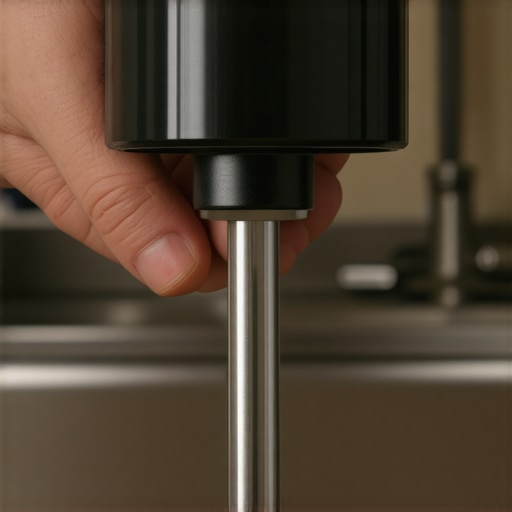 Now, here is the trick: you need to use back-and-forth motions. Don’t just try to crank it in one direction. Think of it like rocking a car out of a snowbank. You want to wiggle the flywheel until it regains its full range of motion.
Don’t Force the Wrench Too Hard
If you hit a wall and the wrench won’t budge, don’t put your entire body weight into it. You run the risk of stripping the socket or damaging the internal seals. When I dealt with a stubborn beef bone jam last Thanksgiving, I had to be patient, applying steady pressure until I heard a faint crunch. That sound is your best friend—it means the obstruction is breaking apart. If the wrench turns freely in a full 360-degree circle, you’ve cleared the primary jam. This mechanical victory is much more satisfying than paying for what to expect from same-day appliance repair experts for a five-minute job.
Clearing the Debris Without Losing a Finger
Once the flywheel moves freely, the trash is still inside the chamber. Grab a pair of long-handled pliers or tongs—never use your hands, even with the power off. Shine your light down through the sink drain and fish out whatever was causing the trouble. Usually, it’s something that shouldn’t have been there in the first place, like a bottle cap or a handful of fibrous celery stalks. I’ve found that even if you have warranty-backed appliance services you can rely on, most won’t cover damage caused by foreign objects like jewelry or glass.
Hit the Reset Button and Listen for the Click
After the chamber is clear, you aren’t quite done. Your disposal has a built-in circuit breaker to prevent the motor from burning out. Look for a small red button on the bottom of the unit, usually near the hex socket. If it’s popped out, push it back in. You should feel a distinct click. This re-arms the unit. If the button won’t stay in, wait five minutes for the motor to cool down and try again. This simple reset is a core part of any expert guide to appliance repair and is the final step before testing your handiwork. If you skip this, you might think you need fast and trustworthy appliance installation when all you really needed was to press a button.While that satisfying click of the reset button feels like a victory, here is where most homeowners fall into a dangerous trap. There’s a common belief that if the motor starts spinning again, the job is done. But I’m here to tell you that treating the reset button like a ‘magic fix’ is the fastest way to fry your unit’s internal wiring. If you find yourself hitting that button more than once a month, you aren’t fixing a jam—you’re ignoring a failing capacitor or a motor that’s drawing too much amperage. In my experience, repeated tripping is a signal that you need affordable same-day appliance fixes with warranty benefits before the unit becomes a fire hazard.
Does DIY repair actually void your manufacturer warranty?
This is the question that keeps people up at night. Most people assume that if they open the unit or use a hex key, they’ve signed away their protection. The truth is more nuanced. According to the Association of Home Appliance Manufacturers (AHAM), simple maintenance and clearing external jams usually won’t void a warranty, but the second you start dismantling the motor housing or replacing internal seals, you’ve crossed the line. This is where the hidden costs of DIY repairs on warranty covered items really start to bite. If you can’t clear it with the wrench trick, stop. Forcing it further often results in damage that an inspector will spot immediately, leading to a rejected claim. 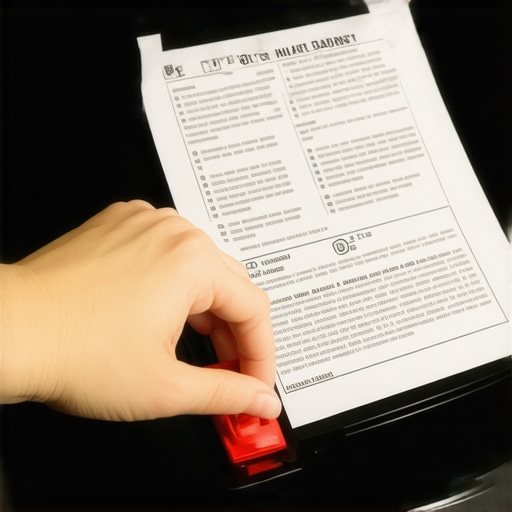
The Knockout Plug Nightmare You Must Avoid
If you are replacing your unit or doing a fresh install, there is one ‘oops’ factor that even seasoned DIYers miss: the dishwasher knockout plug. If your disposal is new and your dishwasher isn’t draining, you likely forgot to knock out the plastic plug inside the disposal’s inlet nipple. I once spent two hours helping a cousin troubleshoot a ‘broken’ dishwasher only to find this 50-cent piece of plastic still intact. If you want to avoid this headache, follow an expert guide to appliance repair and installation today to ensure every step is checked off. Failing to do this doesn’t just cause a mess; it puts back-pressure on your dishwasher pump, which can lead to needing fast and trustworthy appliance installation for an entirely different machine.
Keep Your Paperwork or Pay the Price
Here is a contrarian take: your toolbox is less important than your filing cabinet. Most people lose their warranty the moment they throw away the box. To stay protected, you must know how to prove periodic maintenance to keep your warranty valid. Manufacturers often require proof that the unit wasn’t abused by ‘non-food items.’ I always recommend taking a photo of whatever you pulled out of the drain with your pliers. That photo of a stray peach pit is your evidence that you weren’t trying to grind up gravel. Also, be wary of the deductible trap in most third-party appliance protection plans, which can sometimes cost more than the repair itself. Have you ever fallen into this trap or had a warranty claim denied for a silly reason? Let me know in the comments below, and let’s keep each other from making the same mistakes twice.
I used to think that as long as the blades were spinning, my disposal was healthy. I was wrong. The real secret to avoiding those emergency calls for same-day appliance repair quick solutions with warranty support isn’t just knowing how to unjam the unit—it’s knowing how to maintain the mechanical integrity of the seals and the motor’s torque. One of the most overlooked maintenance steps involves the temperature of the water you use. According to Kohler’s official installation and care guidelines, you should always use a high volume of cold water when grinding food. Why? Cold water keeps fats and grease in a solid state so they can be chopped up and flushed through the pipes. Hot water melts them, allowing grease to coat the internal components and eventually lead to a seized motor that requires fast and trustworthy appliance installation for a replacement.
The Tools That Saved My Sanity Under the Sink
If you want to move beyond the basic hex wrench, there are two specific tools I swear by. First is a telescopic inspection mirror. This is non-negotiable for spotting the slow drips that lead to mold or checking the critical drain hose loop you’re missing in your dishwasher setup. Without it, you’re basically working blind. Second is a flexible magnetic pick-up tool. I can’t count how many times a wedding ring or a stray screw from a nearby cabinet has fallen into the hopper. Trying to fish those out with tongs is a nightmare, but a magnet makes it a five-second task. Keeping these on hand is the best way to handle top tips for same-day service and warranty coverage because you can resolve minor obstructions before they cause permanent damage.

How do I keep my disposal running for a decade?
Maintenance isn’t about deep cleaning once a year; it’s about a monthly routine that clears the ‘biofilm’ and sharpens the impellers. I personally use a mix of ice cubes and a quarter cup of Borax. The ice acts as a mechanical abrasive to knock off slime, while the Borax acts as a natural deodorizer and mild disinfectant. If you’re noticing a persistent odor despite this, you might be dealing with the P-trap mistake that causes your dishwasher to smell like sewage. This routine ensures you won’t need affordable same-day appliance fixes with warranty benefits for a long time. Also, take a moment to inspect your sink flange; a loose seal here is the primary cause of motor-killing leaks.
Smart Tech Is Coming for Your Kitchen Sink
Looking ahead, I predict we are about to see a massive shift in how these appliances function. By ensuring reliable appliance installation in 2025, you’ll likely be dealing with units equipped with AI-driven torque sensors. These sensors will be able to detect the difference between a carrot and a spoon instantly, cutting power before a jam even occurs. This will drastically reduce the need for what to expect from same-day appliance repair experts, as the machines will essentially protect themselves from human error. Until then, the best defense is your own eyes and ears. Listen for changes in the motor’s pitch. A high-pitched whine often means the bearings are starting to dry out, a sign that you should consult an expert guide to appliance repair and installation today. I challenge you to go under your sink tonight with a flashlight—check that red reset button and the hex socket for any signs of corrosion. Catching a small rust spot now could save you three hundred dollars next month.
I’ll never forget the smell of rotting leftovers mixed with the panic of a clogged sink during a Sunday dinner party. There I was, elbow-deep in murky water, frantically poking a wooden spoon down the drain because I thought I could just nudge the jam loose. It was a classic rookie mistake. Not only did I fail to fix it, but I nearly burned out the motor in the process. I didn’t realize back then that my disposal had a secret access point, and I certainly didn’t know that a five-cent piece of metal was the only thing standing between me and a massive plumber’s bill. Most homeowners assume that a humming sink requires fast and trustworthy appliance installation of a brand-new unit, but usually, you just need a bit of leverage and the right tool. Today, I’m going to show you exactly how to find that tool and use it to get your kitchen back to normal in less than a minute.
Grab This One Tool Before You Call for Help
If your disposal is making a low humming sound but the blades aren’t moving, stop turning the switch on and off immediately. You are just heating up the motor. I learned this the hard way when I ended up needing affordable same-day appliance fixes after smelling smoke coming from under my sink. What you actually need is a 1/4-inch hex wrench, commonly known as an Allen key. According to technical documentation from InSinkErator, the world’s leading disposal manufacturer, this tool is designed to fit into a socket at the very bottom of the unit to manually rotate the flywheel. This bypasses the electrical components and lets you break the jam with pure mechanical force. If you’ve lost the one that came with your sink, don’t panic. A standard set from any hardware store will have the size you need. Before you start, always make sure you’ve checked the safety switch that shuts down your garbage disposal to ensure no power is flowing while you work.
Is this little hex key actually enough to save the day?
It seems too simple to be true, right? I used to be the biggest skeptic, thinking I needed heavy-duty power tools or a specialized expert guide to appliance repair to handle a seized motor. But the mechanics are straightforward. By using the wrench at the base, you are applying torque directly to the drive shaft, which is far more effective than trying to move the blades from the top with a broom handle. I once watched a neighbor spend three hours trying to ‘fish’ out a jam when this wrench trick would have solved it in ten seconds. Have you ever been stuck with a sink full of water and no idea how to clear it? Drop a comment and tell me if you’ve ever tried the ‘wooden spoon’ method like I did. Before we get into the step-by-step, remember that knowing this trick can even help you avoid the deductible trap in most third-party appliance protection plans by resolving the issue yourself.
Kill the Power Before You Do Anything Else
Safety isn’t just a buzzword; it’s the difference between a quick fix and a trip to the ER. Before you even think about putting a tool near that disposal, unplug the unit from the wall outlet under your sink. If it’s hardwired, head to your breaker box and flip the switch. I once saw a friend try to skip this step, and when the jam suddenly cleared, the motor kicked on while his hand was still nearby. It was a heart-stopping moment that nearly resulted in needing same-day appliance repair quick solutions with warranty support. Ensuring the unit is dead-silent and powerless is your first priority. If you’re unsure about the electrical setup, check out how to properly ground a new garbage disposal install to understand how these systems are wired.
How to Use That Hex Key Like a Pro
Crawl under the sink with your 1/4-inch hex wrench and a flashlight. Look at the very center of the bottom of the disposal. You’ll see a small, circular hole with a hexagonal indentation inside. This is the heart of the manual override. Insert your wrench firmly. It should feel like a key fitting into a lock. #IMAGE_PLACE_HOLDER_B# Now, here is the trick: you need to use back-and-forth motions. Don’t just try to crank it in one direction. Think of it like rocking a car out of a snowbank. You want to wiggle the flywheel until it regains its full range of motion.
Don’t Force the Wrench Too Hard
If you hit a wall and the wrench won’t budge, don’t put your entire body weight into it. You run the risk of stripping the socket or damaging the internal seals. When I dealt with a stubborn beef bone jam last Thanksgiving, I had to be patient, applying steady pressure until I heard a faint crunch. That sound is your best friend—it means the obstruction is breaking apart. If the wrench turns freely in a full 360-degree circle, you’ve cleared the primary jam. This mechanical victory is much more satisfying than paying for what to expect from same-day appliance repair experts for a five-minute job.
Clearing the Debris Without Losing a Finger
Once the flywheel moves freely, the trash is still inside the chamber. Grab a pair of long-handled pliers or tongs—never use your hands, even with the power off. Shine your light down through the sink drain and fish out whatever was causing the trouble. Usually, it’s something that shouldn’t have been there in the first place, like a bottle cap or a handful of fibrous celery stalks. I’ve found that even if you have warranty-backed appliance services you can rely on, most won’t cover damage caused by foreign objects like jewelry or glass.
Hit the Reset Button and Listen for the Click
After the chamber is clear, you aren’t quite done. Your disposal has a built-in circuit breaker to prevent the motor from burning out. Look for a small red button on the bottom of the unit, usually near the hex socket. If it’s popped out, push it back in. You should feel a distinct click. This re-arms the unit. If the button won’t stay in, wait five minutes for the motor to cool down and try again. This simple reset is a core part of any expert guide to appliance repair and is the final step before testing your handiwork. If you skip this, you might think you need fast and trustworthy appliance installation when all you really needed was to press a button.While that satisfying click of the reset button feels like a victory, here is where most homeowners fall into a dangerous trap. There’s a common belief that if the motor starts spinning again, the job is done. But I’m here to tell you that treating the reset button like a ‘magic fix’ is the fastest way to fry your unit’s internal wiring. If you find yourself hitting that button more than once a month, you aren’t fixing a jam—you’re ignoring a failing capacitor or a motor that’s drawing too much amperage. In my experience, repeated tripping is a signal that you need affordable same-day appliance fixes with warranty benefits before the unit becomes a fire hazard.
Does DIY repair actually void your manufacturer warranty?
This is the question that keeps people up at night. Most people assume that if they open the unit or use a hex key, they’ve signed away their protection. The truth is more nuanced. According to the Association of Home Appliance Manufacturers (AHAM), simple maintenance and clearing external jams usually won’t void a warranty, but the second you start dismantling the motor housing or replacing internal seals, you’ve crossed the line. This is where the hidden costs of DIY repairs on warranty covered items really start to bite. If you can’t clear it with the wrench trick, stop. Forcing it further often results in damage that an inspector will spot immediately, leading to a rejected claim. #IMAGE_PLACE_HOLDER_C#
The Knockout Plug Nightmare You Must Avoid
If you are replacing your unit or doing a fresh install, there is one ‘oops’ factor that even seasoned DIYers miss: the dishwasher knockout plug. If your disposal is new and your dishwasher isn’t draining, you likely forgot to knock out the plastic plug inside the disposal’s inlet nipple. I once spent two hours helping a cousin troubleshoot a ‘broken’ dishwasher only to find this 50-cent piece of plastic still intact. If you want to avoid this headache, follow an expert guide to appliance repair and installation today to ensure every step is checked off. Failing to do this doesn’t just cause a mess; it puts back-pressure on your dishwasher pump, which can lead to needing fast and trustworthy appliance installation for an entirely different machine.
Keep Your Paperwork or Pay the Price
Here is a contrarian take: your toolbox is less important than your filing cabinet. Most people lose their warranty the moment they throw away the box. To stay protected, you must know how to prove periodic maintenance to keep your warranty valid. Manufacturers often require proof that the unit wasn’t abused by ‘non-food items.’ I always recommend taking a photo of whatever you pulled out of the drain with your pliers. That photo of a stray peach pit is your evidence that you weren’t trying to grind up gravel. Also, be wary of the deductible trap in most third-party appliance protection plans, which can sometimes cost more than the repair itself. Have you ever fallen into this trap or had a warranty claim denied for a silly reason? Let me know in the comments below, and let’s keep each other from making the same mistakes twice.
I used to think that as long as the blades were spinning, my disposal was healthy. I was wrong. The real secret to avoiding those emergency calls for same-day appliance repair quick solutions with warranty support isn’t just knowing how to unjam the unit—it’s knowing how to maintain the mechanical integrity of the seals and the motor’s torque. One of the most overlooked maintenance steps involves the temperature of the water you use. According to Kohler’s official installation and care guidelines, you should always use a high volume of cold water when grinding food. Why? Cold water keeps fats and grease in a solid state so they can be chopped up and flushed through the pipes. Hot water melts them, allowing grease to coat the internal components and eventually lead to a seized motor that requires fast and trustworthy appliance installation for a replacement.
The Tools That Saved My Sanity Under the Sink
If you want to move beyond the basic hex wrench, there are two specific tools I swear by. First is a telescopic inspection mirror. This is non-negotiable for spotting the slow drips that lead to mold or checking the critical drain hose loop you’re missing in your dishwasher setup. Without it, you’re basically working blind. Second is a flexible magnetic pick-up tool. I can’t count how many times a wedding ring or a stray screw from a nearby cabinet has fallen into the hopper. Trying to fish those out with tongs is a nightmare, but a magnet makes it a five-second task. Keeping these on hand is the best way to handle top tips for same-day service and warranty coverage because you can resolve minor obstructions before they cause permanent damage.
#IMAGE_PLACE_HOLDER_D#
How do I keep my disposal running for a decade?
Maintenance isn’t about deep cleaning once a year; it’s about a monthly routine that clears the ‘biofilm’ and sharpens the impellers. I personally use a mix of ice cubes and a quarter cup of Borax. The ice acts as a mechanical abrasive to knock off slime, while the Borax acts as a natural deodorizer and mild disinfectant. If you’re noticing a persistent odor despite this, you might be dealing with the P-trap mistake that causes your dishwasher to smell like sewage. This routine ensures you won’t need affordable same-day appliance fixes with warranty benefits for a long time. Also, take a moment to inspect your sink flange; a loose seal here is the primary cause of motor-killing leaks.
Smart Tech Is Coming for Your Kitchen Sink
Looking ahead, I predict we are about to see a massive shift in how these appliances function. By ensuring reliable appliance installation in 2025, you’ll likely be dealing with units equipped with AI-driven torque sensors. These sensors will be able to detect the difference between a carrot and a spoon instantly, cutting power before a jam even occurs. This will drastically reduce the need for what to expect from same-day appliance repair experts, as the machines will essentially protect themselves from human error. Until then, the best defense is your own eyes and ears. Listen for changes in the motor’s pitch. A high-pitched whine often means the bearings are starting to dry out, a sign that you should consult an expert guide to appliance repair and installation today. I challenge you to go under your sink tonight with a flashlight—check that red reset button and the hex socket for any signs of corrosion. Catching a small rust spot now could save you three hundred dollars next month.
Three Hard Lessons from a Former Spoon-Poker
Reflecting on my early DIY disasters, the biggest takeaway wasn’t just how to fix a clog, but how to respect the machine’s limits. First, never assume a clear drain means a healthy motor. If you find yourself needing to reset the breaker constantly, you should look for the maintenance contract clause that saves you on labor costs because that motor is likely drawing too much amperage and nearing its end. Second, documentation is your best tool. Keeping the one maintenance record that saves your appliance warranty claim in a simple kitchen folder is the only way to avoid paying full price for a factory defect. Finally, mechanical force should always be your first choice over electrical persistence—if the hex wrench doesn’t turn, a professional is a much cheaper option than a fire restoration crew.
The Simple Gear Every Homeowner Should Keep Handy
Beyond the basics, I recommend a specialized Sink Kit. This isn’t just about wrenches; it’s about insurance. Always keep the warranty document you must save before discarding the box in a waterproof sleeve under the sink. I also suggest bookmarking a guide that explains the difference between a manufacturer warranty and a service contract so you aren’t confused when the technician arrives. #IMAGE_PLACE_HOLDER_E# Having these resources and a reliable flashlight on hand transforms you from a panicked bystander into a capable homeowner who knows exactly when to DIY and when to call for support.
Your New Role as the Home Maintenance Pro
You now have the knowledge to save your kitchen from the next Sunday dinner disaster. By using that 1/4-inch hex key instead of a wooden spoon, you’re extending the life of your appliance and keeping your budget intact. These small actions allow you to maximize your appliance warranty during emergency repairs because you can demonstrate that you’ve performed standard maintenance without damaging the unit. Don’t wait for the next hum to check your gear; grab your flashlight tonight and locate that hex socket. What is the weirdest object you have ever fished out of your garbage disposal? Let me know in the comments below!