
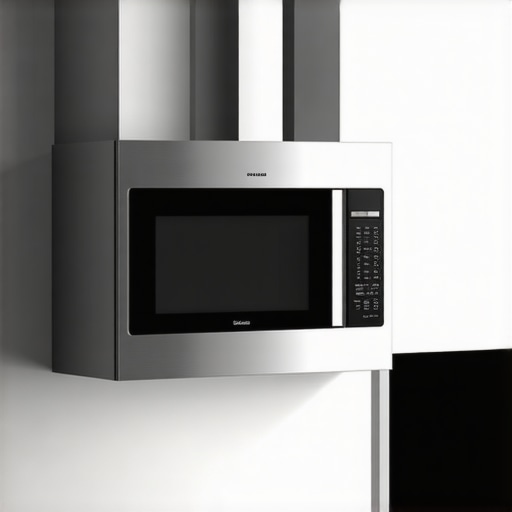
I remember standing in my kitchen two years ago, balancing a 65-pound stainless steel beast on a stack of old textbooks and a prayer. I thought the three screws I’d haphazardly driven into the cabinet bottom were enough. I was wrong. A week later, I heard a sickening creak every time I closed the microwave door. The unit wasn’t just heavy; it was a cantilevered disaster waiting to happen. If you have ever felt that cold sweat while watching your expensive new appliance pull away from the wall, you know exactly why we need to talk about doing this right the first time. We aren’t just putting a box in a hole; we are engineering a secure workstation that won’t end up on your stovetop—or your toes. Today, I am going to walk you through the structural secrets that separate a sagging DIY mess from a rock-solid installation.
Your Walls Are Not as Strong as You Think
The biggest mistake I made early on was assuming my drywall and a few thin cabinet boards could handle the constant torque of a microwave door being yanked open and shut. It’s a lot of force. Most people treat this like hanging a picture frame, but it is actually closer to mounting a small engine. To avoid a disaster, you need to understand the proper way to secure your over-the-range microwave by finding the actual studs, not just the ‘hollow’ spots. According to the National Kitchen & Bath Association (NKBA), improper mounting is a primary cause of accidental kitchen damage during home renovations. If you miss that wall stud by even half an inch, the toggle bolts are doing all the heavy lifting, and eventually, they will lose that fight. You also have to consider the environment; while you are focused on the weight, don’t forget the critical airflow distance your built-in microwave requires so you don’t overheat the very unit you just spent an hour mounting. Whether you are doing this yourself or looking for fast trustworthy appliance installation near you, the physics remain the same: weight distribution is everything.
Is that thin metal mounting plate actually worth the hassle?
I used to think that the mounting bracket was just a suggestion. I actually tried to ‘custom’ mount a unit once using L-brackets from the hardware store. It was a vibrating, noisy nightmare. That specific mounting plate is designed to distribute the weight across the wall studs while the top bolts pull the unit upward into the cabinet. It’s a two-point system of tension and support. If you skip the bracket or misalign it, you’re putting 100% of the stress on the cabinet floor, which was never designed to be a load-bearing structure. Think of it like an anti-tip bracket every range installation needs; it’s a small piece of metal that prevents a massive catastrophe. Have you ever noticed your microwave vibrating or seen a gap forming between the top of the unit and your cabinets? I’d love to hear about your installation ‘close calls’ in the comments below. We’ve all been there, and your story might just save a neighbor’s kitchen! Before we pick up the drill, let’s make sure we have the right strategy for the long haul.
Find the Wood or Face the Consequences
Finding your wall studs is the non-negotiable first step of the process. I once tried to solo-mount a heavy Whirlpool unit using a hydraulic car jack and a stack of 2x4s because I was too impatient to wait for help. The jack slipped, the microwave tilted like a sinking ship, and I spent the next three hours patching a massive hole in the drywall. It was a painful lesson: gravity never takes a day off. You need a high-quality stud finder to locate the center of at least two studs. If your kitchen layout forces you to use toggle bolts for one side, make sure the other side is anchored deep into solid lumber. This isn’t just about the microwave staying up; it’s about how to ensure reliable appliance installation in 2025 by preventing the wall itself from crumbling under the stress. Similar to the proper way to secure your wall-mounted oven, the bracket must be level to the millimeter. A slanted bracket means the internal cooling fans will wear out prematurely and the door won’t seal correctly. 
The Template is Your Blueprint for Success
Most DIYers toss the paper templates aside, thinking they can ‘eyeball’ the drill holes. Don’t be that person. Tape the top-cabinet template to the underside of your cabinet and use a center punch to mark your drill points. This prevents the drill bit from ‘walking’ across the wood, which would leave you with a crooked unit. If you’ve ever followed an expert guide to appliance repair and installation today, you know that precision at this stage saves hours of frustration later. Check for any hidden wiring or plumbing inside the cabinet before you pull the trigger. I once nicked a lighting wire because I didn’t peek behind the cabinet floor, turning a simple install into a full electrical repair.
Master the Heavy Lift Without Breaking Your Back
The ‘Hook and Pivot’ is the professional move that makes the actual mounting possible. You aren’t just pushing the microwave against the wall; you are angling the bottom rear edge onto the metal tabs of the mounting bracket. This acts as a hinge. Once those tabs are locked in, you pivot the front of the unit upward toward the cabinet. This is where most people struggle because the power cord has to be threaded through the hole in the cabinet at the same time. If the cord gets pinched between the microwave and the cabinet, you risk a fire hazard or a dead unit. Keep the tension even as you tighten the top bolts. Just like the one screwdriver turn that levels a rattling washer, these top bolts should be snug but not so tight that they crack the cabinet wood. You are looking for a ‘sandwich’ effect where the microwave is pulled firmly against the bottom of the cabinet, distributing the weight across the entire structure rather than just the wall bracket.Now that we have tackled the physical engineering of the mount, we need to address the invisible web of paperwork and professional nuances that catch even the most experienced DIYers off guard. Most people assume that hiring a professional or securing ‘same-day’ help is a total safety net. In my experience, that is exactly when the most expensive mistakes happen. Everyone hunts for immediate help, but the same-day service myth can actually cost you more in the long run. If a company promises to be there in two hours without asking for your specific model number and error codes, they are likely just coming to collect a service fee. You need to know what to expect from same-day appliance repair experts before you let them through the door. A true expert should be vetting your problem over the phone to ensure they actually have the parts in the van. Otherwise, you are just paying for a glorified delivery person who tells you what you already know.
Stop Trusting the Professional Label Blindly
The ‘Oops’ factor in professional installations is staggering. I’ve witnessed ‘pros’ forget to remove the shipping bolts on high-end washers, which essentially turns a new machine into a pile of scrap metal during its first spin. This is the shipping bolt error that ruins new washing machines, and it happens more often than you’d think. Before an installer leaves your house, you must verify that every temporary transit brace is gone. Also, never let a technician start work until you have photographed the appliance from every angle. If they scratch your hardwood floor or dent the stainless steel, those photos are your only leverage. You need to know how to spot a shady appliance repair quote that glosses over these liabilities. 
Why Do Manufacturers Reject Claims for Environmental Factors?
This is the advanced nuance that kills warranty claims for thousands of homeowners every year. You might have a valid ‘defect in materials,’ but if the manufacturer can prove your kitchen environment was the catalyst, they will walk away. According to the Service Council’s 2023 Field Service Report, nearly 20% of warranty claims are denied because of ‘improper installation environment.’ For example, if you don’t maintain the proper clearance needed to prevent oven overheating, they will argue the control board failure was your fault, not a manufacturing flaw. You must proactively learn how to challenge a warranty claim rejection for your fridge or stove by documenting that your installation meets every specific clearance and voltage requirement listed in the manual.
The Maintenance Paper Trail is Your Best Defense
Many people believe that a warranty is an unconditional promise. It isn’t. It is a contract with requirements. I’ve seen claims for high-end dishwashers denied simply because the owner couldn’t prove they ever cleaned the filter. In the eyes of the manufacturer, that’s neglect, not a defect. Saving the one maintenance record that saves your appliance warranty claim—even just a dated photo of a clean filter or a receipt for a descaling agent—can be the difference between a free repair and a $600 bill. For the most reliable results, always look for warranty-backed appliance services you can rely on who will document the service properly on your behalf. Have you ever had a warranty claim denied for something as simple as a missing receipt or a ‘dirty’ sensor? I’d love to hear about your experience in the comments; sharing these stories is the only way we can keep these manufacturers honest!That honesty starts with your own toolkit. I didn’t start with a professional-grade setup; my first real ‘repair’ was an attempt to fix a dryer with a butter knife and a pair of pliers I found in a kitchen junk drawer. It was dangerous, ineffective, and nearly cost me a thumb. If you are serious about protecting your home, you need a digital multimeter. I personally swear by the Klein Tools MM400 because it’s rugged enough to survive being dropped off a step-ladder onto tile. The most vital feature isn’t the voltage—it’s the continuity setting. That tiny ‘beep’ tells you if a fuse is blown or a circuit is broken without you having to decode a single number. I’ve used mine to perform the refrigerator thermostat test every DIYer should know more times than I can count. It effectively turns a frustrating guessing game into a precise, scientific diagnosis, saving you hundreds on unnecessary part swaps. 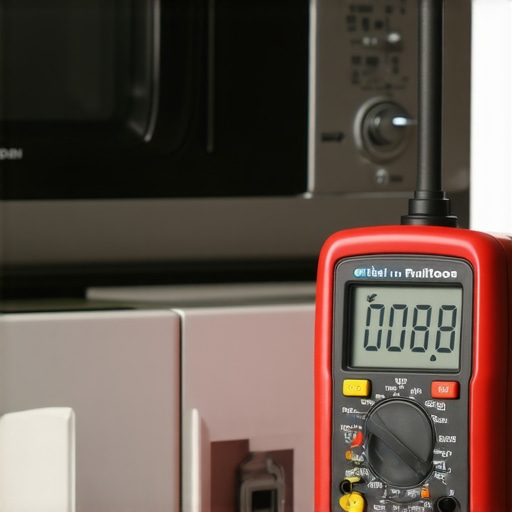
How do I keep my gear running for a decade?
Maintaining expensive appliances isn’t about luck; it’s about a boring, digital paper trail. I keep a simple spreadsheet that logs every filter change and coil cleaning. You absolutely must learn how to prove periodic maintenance to keep your warranty valid if you want to win against a corporate claims adjuster. According to the Association of Home Appliance Manufacturers (AHAM) 2024 Consumer Trends Report, homeowners who follow a strict maintenance schedule extend the life of their units by nearly four years compared to those who don’t. For instance, knowing how to clean the hidden filter in your range hood prevents grease from vaporizing and coating the sensitive electronics in your control board. This log is the one maintenance record that saves your appliance warranty claim when an inspector tries to blame ‘premature wear’ on user neglect. It’s your best shield against a denied claim.
Smart Diagnostics will Soon Predict the Breakdowns
Looking toward the future, the DIY landscape is shifting toward ‘predictive health monitoring.’ We are already seeing high-end washers equipped with micro-vibration sensors that can detect a failing tub bearing months before it actually starts to rattle. This evolution will completely change scheduling your appliance repair for same-day service in 2025, as the technician will eventually arrive with the exact part already in their hand, diagnosed remotely by the machine itself. Even now, you can secure affordable same-day appliance fixes with warranty benefits simply by providing the digital error codes over the phone. My advanced tip for the tech-savvy homeowner: buy a thermal imaging attachment for your smartphone. It’s the ultimate diagnostic tool for finding leaking refrigerator gaskets or overheating circuit breakers before they fail. Take ten minutes this weekend to scan your fridge seals; finding a ‘cold leak’ now could save you $50 a month on your electric bill and prevent your compressor from burning out early.
What the Instruction Manual Doesn’t Tell You
Looking back at my trail of stripped screws and sagging cabinets, the most vital lesson isn’t about the drill—it’s about the paper. I’ve seen homeowners lose thousands because they didn’t know how to document a dead-on-arrival appliance for a full refund the moment they unboxed it. Another lightbulb moment came when I realized that speed is the enemy of safety; don’t rush the bracket. Even if you are in a hurry, top tips for same-day service warranty coverage suggest that a 10-minute double-check of your stud alignment saves you from a three-week insurance nightmare later. Finally, always trust your ears—if it hums differently than it did on day one, check the airflow before the motor burns out.
Three Resources That Saved My Sanity
If you are building your DIY arsenal, I cannot recommend a high-quality digital multimeter enough; it turns guesswork into science. For those focused on precision, remember that even a minor adjustment like the one screwdriver turn that levels a rattling washer can be applied to almost any vibrating appliance to extend its lifespan. I also suggest keeping the AHAM Consumer Trends reports bookmarked; they offer a reality check on which appliances are actually built to last. For the moments when you are truly stuck, look for same-day appliance repair quick solutions with warranty support from providers who prioritize your long-term coverage over a quick service fee.
Your Next Move Toward a Safer Kitchen
You’ve navigated the engineering, the paperwork, and the professional pitfalls that usually trip up most homeowners. Taking ownership of your appliance repair, warranty, installation, and same-day service needs isn’t just about saving money; it’s about the peace of mind that comes from knowing the job was done right. Before you call it a day, make sure to maximize your appliance warranty during emergency repairs by having the technician sign off on your maintenance logs. Did you find a hidden template in your box, or were you forced to wing the drill holes on your last install? I want to hear your success stories or your biggest ‘almost dropped it’ moments in the comments below!
#IMAGE_PLACE_HOLDER_E#