
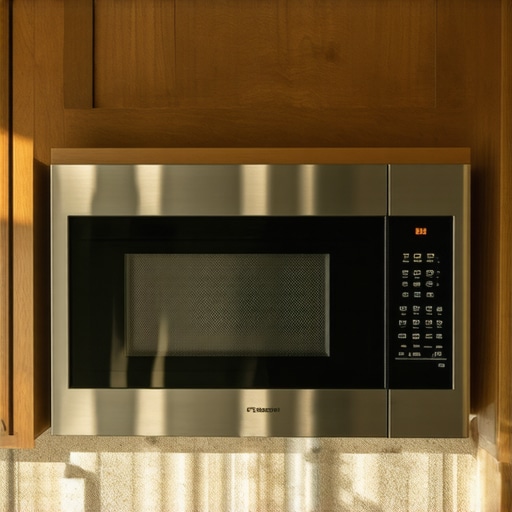
I still remember the smell. It wasn’t the popcorn. It was the acrid, metallic tang of an expensive control board melting into oblivion just three months after my ‘perfect’ kitchen remodel. I had spent thousands on custom cabinetry, meticulously measuring every millimeter to ensure my microwave looked perfectly integrated. It looked gorgeous, but it was a ticking time bomb. One evening, right in the middle of reheating coffee, the display flickered, a faint wisp of smoke drifted from the cabinet seam, and that was it. Total silence. I had committed the cardinal sin of appliance ownership: I ignored the air.
Stop Suffocating Your Kitchen Appliances
People often think microwaves just ‘work,’ but they are actually miniature heat factories. If that heat has nowhere to escape, it stays inside the cabinet, cooking the very electronics meant to run the machine. When I finally called for expert appliance repair and installation today, the technician just shook his head. He’d seen this exact scenario a dozen times. My mistake was thinking ‘flush mount’ meant ‘zero clearance.’ In reality, the wrong way to install a built-in microwave is usually the one that looks the cleanest to the naked eye. Today, I’m going to break down the exact clearance numbers you need to keep your home safe and ensure you are using warranty-backed appliance services you can rely on instead of paying for a replacement out of pocket.
Is a Little Extra Air Really Worth the Ugly Gap?
I get it. You want that sleek, seamless look that you see in high-end design magazines. You might even be thinking that the manufacturer is just being overly cautious to avoid lawsuits. But here’s the cold, hard truth: those internal cooling fans aren’t magic. They need a constant supply of cool air to function. If you choke that flow, the magnetron will overheat and fail prematurely. According to the International Association of Certified Home Inspectors, stagnant air trapped in a tight enclosure can quickly exceed 140 degrees Fahrenheit, which is enough to degrade delicate circuit solder over time. Have you ever noticed your cabinet doors feeling oddly warm after running a long cook cycle? If so, you are likely cutting it too close. By following the proper spacing for built-in microwave ventilation, you aren’t just following rules—you’re protecting your investment. Let’s dive into the specific measurements that will save your microwave’s life.
Give Your Microwave Room to Breathe
Think of your microwave like a marathon runner. If you wrap a plastic bag around their face, they won’t finish the race. The sides of your microwave are its lungs. Most manufacturers demand a minimum of one inch on each side, but I always aim for two. When I rebuilt my kitchen after the ‘great melting incident,’ I used a tape measure like a surgeon’s scalpel. I realized that the critical clearance gap for a refrigerator in a nook follows the same logic—heat needs a path of least resistance. If you are fitting a unit into a custom shelf, ensure there is a clear channel for air to move from the front to the back and then upward. This simple gap is the difference between a ten-year lifespan and a two-year disappointment. 
Don’t Let Rear Vents Hit a Dead End
The back of the microwave is where the real heavy lifting happens. This is usually where the cooling fan kicks the hot air out. In my first failed DIY attempt, I pushed the microwave so far back it was practically touching the drywall. There was no ‘chimney effect.’ The heat just sat there, baking the the signs of a failing range control board until the solder points literally gave up. If you’re doing this yourself, check where your specific model vents. Some vent out the top, others out the back. If it’s a rear-venting model, you need at least three inches of dead space behind the unit. This allows the air to circulate rather than reflecting heat back onto the magnetron. Without this pocket of air, the internal temperature of the cabinet can climb faster than a preheating oven.
Stop Cramming the Top Shelf
Heat rises. It’s the most basic law of physics, yet we ignore it when we stack cookbooks or decorative plates directly above the microwave cutout. You need a ‘thermal buffer zone.’ For a truly safe setup, learning how to ensure reliable appliance installation in 2025 involves leaving at least 12 inches of clearance if the microwave is sitting on a counter under a cabinet, or 2-3 inches of internal height if it’s built-in. I once saw a neighbor try to ‘seal’ the top gap with trim because it looked better. Three weeks later, he was calling for fast-trustworthy appliance installation near you because his touch panel stopped responding. The electronics are located at the top and front; if heat pools there, the sensors will malfunction and eventually fail.
Ground Your Unit or Risk a Fried Board
Ventilation isn’t the only silent killer; dirty power is a close second. Microwaves pull a massive amount of amperage the second you hit ‘start.’ If your outlet isn’t properly grounded, that surge has nowhere to go but into the sensitive microprocessors. Much like how to properly ground your new induction cooktop 2, your microwave needs a dedicated circuit. Plugging it into the same outlet as your toaster or fridge is asking for a tripped breaker—or worse, a slow-burn electrical fire. I remember the first time I tested my new setup; the lights in the kitchen didn’t dim when the microwave started. That’s how I knew I’d finally done it right. If you’re struggling with hardware issues already, knowing how to fix a broken microwave door latch yourself is helpful, but preventing the board from frying in the first place is the real victory. Ensure your outlet is a 3-prong, grounded receptacle and that you aren’t using an extension cord—ever.
The Hidden Cost of Waiting for a Fix
Most homeowners believe that waiting a few days for a repair is a smart way to save on ’emergency’ fees, but that logic is often flawed. In my experience, the longer an appliance operates under stress—like a microwave with poor ventilation or a fridge with a failing compressor—the more secondary components begin to fail. Many people are surprised by what to expect from same-day appliance repair experts, assuming it’s just a premium for speed. In reality, same-day service is a preventative measure. A study by the Association of Home Appliance Manufacturers (AHAM) indicates that professional intervention within the first 48 hours of a malfunction can reduce total repair costs by up to 25% by preventing cascading electrical failures. When you delay, you aren’t just paying for the original part; you are paying for the damage that part did to the rest of the system while it struggled to stay alive.
Can You Actually Force a Manufacturer to Honor a Denied Claim?
The most frustrating part of appliance ownership is the dreaded ‘claim denied’ letter. Most people think their warranty is an ironclad safety net, but it is actually a legal minefield. One common myth is that having a protection plan means every repair is free. This is where is a manufacturer extended plan actually worth the monthly cost becomes a vital question. To win a dispute, you need a paper trail. The biggest ‘oops’ factor I see is owners throwing away their installation receipts or failing to keep the maintenance receipt you must save for future claims. If a technician finds that your microwave failed due to ‘improper installation’ because you didn’t leave that two-inch gap I mentioned earlier, the manufacturer will walk away from the bill. 
Don’t Say the ‘M’ Word to Your Warranty Agent
Here is a pro tip that most people get wrong: never use the word ‘modified’ or ‘custom’ when talking to a warranty representative. Even if you just added a small piece of trim for aesthetics, they can use that as evidence that you altered the airflow. This is the reason your warranty claim was denied more often than not. Instead, focus on the functional failure. If you are in the middle of a crisis, you need to know how to maximize your appliance warranty during emergency repairs by providing the exact error code and proof of professional installation. If you didn’t have it professionally installed, you’re already at a disadvantage. That’s why I always recommend fast-trustworthy appliance installation near you for high-end units; the labor receipt itself is your best insurance policy.
Avoid the Shady Quote Trap
Before you sign off on a repair, you have to be able to how to spot a shady appliance repair quote. If a technician doesn’t ask about the ventilation or the dedicated circuit, they aren’t looking for the root cause—they’re just swapping parts. A truly expert service will look at the environment, not just the machine. I’ve seen people use the warranty loophole that could save you hundreds on parts simply by having a technician document that the failure was a known factory defect rather than ‘wear and tear.’ Have you ever fallen into this trap where a simple repair turned into a denied claim because of a technicality? Let me know in the comments. By focusing on how to ensure reliable appliance installation in 2025, you can avoid these headaches before they even start.After my first microwave burnout, I didn’t just buy a replacement unit; I bought a professional toolkit. I realized that keeping a modern kitchen running is about more than just surface cleaning. I personally started using a FLIR thermal camera—a pocket-sized device that shows me exactly where heat is pooling behind my cabinetry. If I see a bright red signature on the interior wall of the microwave nook, I know my ventilation path is obstructed before the electronics even have a chance to complain. Using these kinds of specific tools is the key to moving beyond basic DIY and into a professional mindset. If you’re seeing odd behavior now, scheduling your appliance repair for same-day service in 2025 is the fastest way to get a pro with even better sensors to diagnose the issue.
The Fluke 117 and the UL 923 Safety Standard
If your microwave is acting erratic, I highly recommend getting a Fluke 117 Multimeter. This isn’t just for electricians; it’s for anyone who wants to stop guessing. According to the Underwriters Laboratories (UL) 923 standards for microwave cooking appliances, the door interlock system is the primary safety shield. Over time, steam and grease can gum up these micro-switches. I use my multimeter to check for continuity in these switches whenever a unit fails to start. This simple check has saved me from being talked into a $300 control board replacement when the real culprit was a $10 plastic switch. If you are hearing a fixing the microwave hum that wakes up the entire house, it’s often an indication that the high-voltage transformer or the magnetron is under high stress, and a multimeter can tell you which one is failing before it sparks.
How Do I Keep My Microwave Running Like New?
The secret is in the waveguard cover—that small, rectangular sheet of mica that looks like a piece of cardboard on the inside wall. If food spatters on this and you don’t clean it, the microwave energy will eventually cause it to arc and burn a hole through the metal. I make it a habit to replace this every two years as a preventative measure. It’s a five-dollar part that prevents a five-hundred-dollar fire. If you’ve neglected this and your microwave buttons arent responding to your touch, the internal sensors might already be coated in a layer of conductive grease. In these cases, you need affordable same-day appliance fixes with warranty benefits to clean or replace the interface safely. 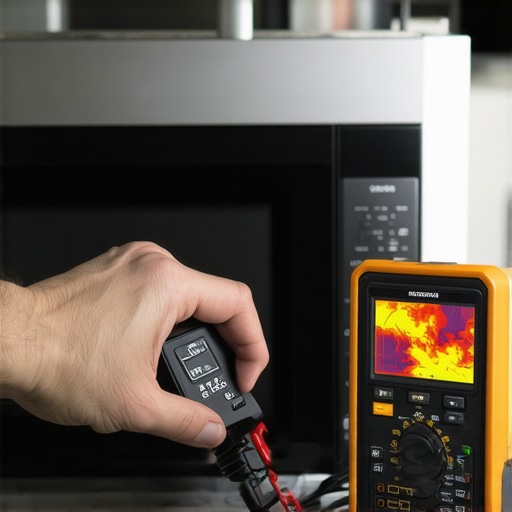
Smart Sensors and the Future of Kitchen Maintenance
Looking ahead, I suspect we are moving toward a ‘predictive maintenance’ era. Within the next few years, high-end microwaves will likely come with internal vibration and heat sensors that alert your phone before a component fails. Until then, we have to be the sensors. Don’t ignore a new rattle or a fan that sounds slightly slower than usual. These are early warning signs that you should look into same-day appliance repair quick solutions with warranty support. My advanced tip for today: Go to your kitchen right now and check your waveguard cover. If there is even one tiny brown spot of grease, wipe it off with a damp cloth immediately to prevent arcing. By keeping a clean environment and using the right diagnostic tools, you transition from a frustrated owner to a master of your home’s technology. If you ever feel in over your head, remember that an expert guide to appliance repair and installation today is always your best resource for keeping your warranty intact while getting the job done right.
The Hard Truths That Saved My Second Microwave
I learned the hard way that aesthetics are secondary to airflow. Here are the three things that changed my perspective forever. First, a professional installation is an investment, not an expense. When you use fast-trustworthy appliance installation near you, you aren’t just paying for labor; you’re buying a safety net. Second, always document your work. I now keep the maintenance receipt you must save for future claims in a dedicated folder. Finally, never assume the manufacturer is being over-cautious—those clearance rules are written in the blood of dead control boards.
The Gear That Transformed My Repair Game
If you’re serious about your home, you need more than a screwdriver. I rely on my Fluke 117 for electrical stability and my thermal camera to spot hotspots behind the cabinetry. For everything else, I consult the expert guide to appliance repair and installation today to stay ahead of the curve. If things go south, knowing what to expect from same-day appliance repair experts helps me stay calm and informed during the process. #IMAGE_PLACEHOLDER_E#
Your Kitchen Deserves More Than Just Survival
You have the knowledge now to prevent the ‘acrid smell’ I experienced years ago. Don’t let a small clearance issue turn into a massive headache that voids your protection plan. By choosing warranty-backed appliance services you can rely on, you ensure your kitchen remains the heart of your home, not a source of frustration. Have you ever discovered a hidden clearance issue after it was too late? Let me know in the comments below.