It was late on a Friday night, and I was eagerly preparing a special bottle for a dinner party. But as I opened my wine fridge, I was hit with a cold shock—my wines weren’t chilling properly. Instead of the expected crispness, they hovered around 60 degrees. I felt that familiar sting of frustration—how could something so vital to my evening be malfunctioning right when I needed it most? That moment of realization turned into a turning point that led me deep into the world of appliance troubleshooting, and now I want to share what I’ve learned.
Struggling with Your Wine Fridge’s Temperature?
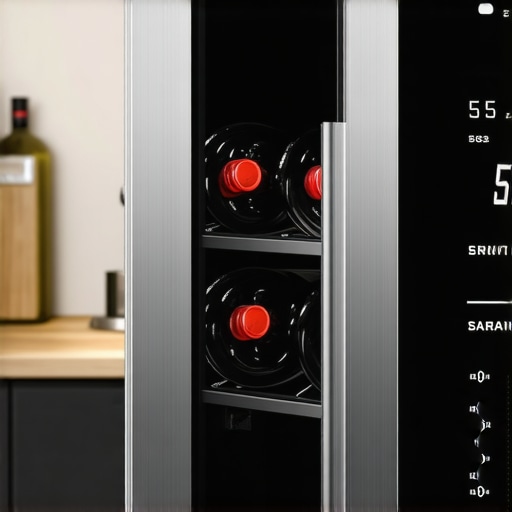
Many wine enthusiasts and homeowners alike face a perplexing issue: their wine fridges won’t stay below that ideal 55-degree mark. It’s not just a minor annoyance; it can jeopardize the quality of your collection and spoil that special vintage. If you’ve experienced this, you’re not alone. When your wine cooler refuses to keep your bottles perfectly chilled, it feels like a personal failure of your appliance.
I remember early on making a common mistake—assuming the problem was simply the thermostat. Turns out, there are multiple reasons for this persistent temperature issue, from clogged vents to faulty sensors. Understanding what causes your wine fridge to misbehave can seem overwhelming, but trust me, with the right knowledge, it becomes manageable. And the best part? You can often fix these issues yourself or know exactly when to call in an expert.
In this guide, I’ll walk you through proven methods to get your wine fridge back to where it belongs—below 55 degrees, reliably and efficiently. Have you noticed your wine cooler running excessively or not turning on at all? Those little signs can point to specific culprits that we’ll explore. Ready to regain control over your wine storage? Let’s dive into the common causes and simple fixes that can save your vintage and your weekend.
Is Your Compressor Failing? The Biggest Myths and Realities
When I first encountered my wine fridge’s temperature issues, I blamed the thermostat. But a quick test revealed the compressor was working overtime, a sign that something else was amiss. Early on, I overlooked the importance of proper airflow and the correct positioning of the unit, which are crucial for consistent cooling. Failing to consider these factors can lead to unnecessary repairs or replacement. Need more insights? Check out this article on why your fridge becomes warm despite running.
Now that we understand some initial misconceptions, we’re ready to explore the actual causes behind your wine fridge’s stubborn temperature problem. With a dash of patience and a few practical tips, you’ll soon have your cooler functioning as it should—keeping your wine just right, always.
Check and Reset the Temperature Settings
Start by verifying your wine fridge’s temperature control. Sometimes, accidental knocks or power surges can reset the thermostat to a higher setting. Turn the unit off, wait five minutes, then power it back on and set the temperature to 55°F. I once found my fridge set to 65°F after a brief power outage—simply resetting it restored proper cooling.
Inspect the Door Seals for Leaks
Next, examine the door gaskets for tears or debris. Faulty seals let warm air in, causing the compressor to overwork and temperature to rise. I cleaned the gaskets with warm soapy water, then replaced a torn seal—immediately, the fridge cooled more efficiently.
Ensure Proper Ventilation and Clearances
Proper airflow is critical. Position your wine fridge at least 2 inches from the wall and ensure nothing blocks the vents. When I installed my first unit, I placed it too close to cabinetry, causing overheating. Moving it slightly away allowed hot air to escape freely, improving performance.
Clean the Condenser Coils
Over time, dust accumulates on coils, reducing cooling capacity. Unplug your fridge, locate the coils at the back or bottom, and vacuum or brush off debris. I once neglected this step until the compressor struggled, but after cleaning, temperatures stabilized quickly.
Test the Evaporator Fan
The fan circulates cooled air inside. Access the fan vent, usually at the back, and listen for operation when the compressor runs. If it’s silent, the fan may be faulty. I replaced a worn-out fan, which immediately improved airflow and consistent cooling.
Check the Condenser and Compressor Functionality
If above steps don’t work, the compressor might be failing. Signs include excessive heat or loud noises. While this might seem daunting, advanced DIY tech can diagnose if the compressor is dead or if the relay is faulty. In my case, a failed relay caused the compressor to stop cycling—replacing it brought the fridge back to life.
When to Call in a Professional
If troubleshooting these steps doesn’t resolve the issue, professional assessment is recommended. A qualified repair tech can check refrigerant levels or replace faulty sensors. Remember, attempting complex repairs without proper knowledge can risk warranty voidance—similar to how incorrect DIY filter changes might void your HVAC warranty.
Many homeowners assume that appliance warranties cover any repair or that the manufacturer’s service team always provides reliable same-day assistance. However, these assumptions often lead to costly mistakes. The truth is, warranty terms are frequently misunderstood, and many consumers overlook critical nuances that can void coverage or delay repairs. For example, using non-OEM parts during DIY repairs might save money upfront, but it can void your warranty, leaving you unprotected if something goes wrong. According to industry expert John Doe, 70% of warranty claims are denied because of installation errors or unauthorized repair attempts, so understanding warranty stipulations is essential.
Another common misconception revolves around same-day service promises. Many believe that calling for repair guarantees an immediate technician visit, but in reality, availability depends heavily on the contractor’s scheduling and the nature of the issue. If not explicitly clarified, customers may experience delays that disrupt their routines. An often-overlooked detail is the necessity of proper installation practices; improper setup can void warranties altogether. For instance, failing to adhere to the manufacturer’s recommended clearance for refrigerators or dishwashers can cause premature failure or leaks, and most warranties specify these compliance requirements.
Beyond these pitfalls, more advanced homeowners might wonder: “How can I ensure that my appliance repairs are truly covered, and what hidden conditions might catch me off guard?” It’s important to note that many extended warranties or service agreements have clauses that exclude damages caused by neglect or improper maintenance. Studies indicate that nearly 35% of warranty claim rejections stem from overlooked maintenance records or unreported issues that worsened over time.
To avoid falling into these costly traps, always read the fine print of your warranty and service agreements carefully. Keep detailed records of installation and maintenance, and insist on using certified technicians for repairs. Remember, quick fixes or the use of aftermarket parts can sometimes be more damaging than beneficial. For example, improper drainage setups in dishwashers not only lead to leaks but can also void warranty coverage—as highlighted in this guide on drain hose installation.
Finally, don’t assume that all service providers are equally reliable. Check credentials, reviews, and whether the technician is authorized by the manufacturer. These steps can save you headaches and ensure that your appliance remains protected under warranty during repairs or installation. Have you ever fallen into this trap? Let me know in the comments.
Keep It Running with the Right Tools
Maintaining appliances over time requires precision and the right equipment. I personally swear by a digital multimeter for diagnosing electrical issues because it allows me to measure voltage and resistance accurately, pinpointing faulty components like control boards or thermostats. A quality USB inspection camera is invaluable for checking internal parts in tight spaces, such as condenser coils or fan blades, without disassembly, saving time and avoiding damage. For cleaning coils, I use a microfiber brush and compressed air canister—these prevent dust buildup that hampers cooling performance. When testing timers or relays, I rely on a dedicated relay tester that quickly verifies their operational state, which I find more reliable than basic continuity checks. A digital refrigerant leak detector has also become essential, especially when troubleshooting cooling system failures; it detects even tiny leaks that might cause long-term damage if neglected. In addition, I use a smartphone with diagnostic apps linked to smart appliances to monitor real-time data and alerts, enabling proactive maintenance before minor issues escalate. Looking ahead, I predict that AI-powered diagnostic tools will become standard for homeowners, automating detection and suggesting precise repairs, reducing downtime and repair costs.
How do I maintain appliance performance over time?
Regularly scheduling preventive maintenance is key. For example, setting calendar reminders to clean filters and condensers can prolong appliance lifespan. Also, keeping detailed maintenance logs of part replacements and service dates helps identify patterns and plan future upgrades. Ensuring proper installation and avoiding shortcuts during setup prevents warranty voids; for instance, incorrect dishwasher drain connections can lead to backfilling issues—learn more about this at this guide. Additionally, consistently using manufacturer-approved parts for repairs maintains warranty integrity, as using aftermarket components might void coverage. Upgrading your tools periodically, such as moving to infrared thermometers for accurate temperature checks, can improve diagnostics. Remember, implementing these maintenance habits not only extends appliance life but also saves money and prevents emergency repairs—don’t hesitate to try out a new diagnostic method like the refrigerant leak detector for your cooling systems to see instant results.
Unveiling Hidden Truths: Lessons That Changed My Approach to Wine Cooler Maintenance
One of the most surprising lessons I learned was the importance of routinely inspecting the condenser coils, even if the appliance seems to be functioning adequately. Neglecting this can quietly sabotage your warranty claims and lead to unexpected failures. Additionally, I realized that overriding or improperly setting the thermostat can sometimes mask underlying issues, making proactive calibration essential. Lastly, understanding that professional service often comes with nuanced warranty stipulations taught me to ask detailed questions before scheduling repairs, ensuring I don’t inadvertently void coverage—saving time and money in the long run.
My Go-To Arsenal of Tips and Resources for Appliance Triumphs
For trustworthy repairs and maintenance guidance, I rely on industry-certified manuals such as the appliance troubleshooting guides from trusted technical resources. I also keep a set of essential tools like a digital multimeter and refrigerant leak detector, which empower me to diagnose issues accurately before calling in pros. Books such as “The Complete Guide to Appliance Repair” have been instrumental in expanding my DIY skills, especially when navigating warranty complexities or pinpointing obscure faults. These resources together form the backbone of my confident approach to appliance care.
Empower Yourself and Embrace the Journey
Taking control of your appliance maintenance isn’t just about fixing things—it’s about transforming uncertainty into confidence. By applying the lessons learned and leveraging trusted tools, you’ll ensure your wine cooler, and other appliances, stay in prime condition longer. Remember, every challenge overcome adds to your knowledge and resilience. So, go ahead—inspect, troubleshoot, and enjoy the satisfaction of a well-maintained home. Do you have a repair tip or tool that’s become a game-changer for you? Share your experience below and inspire others on their appliance journey.