
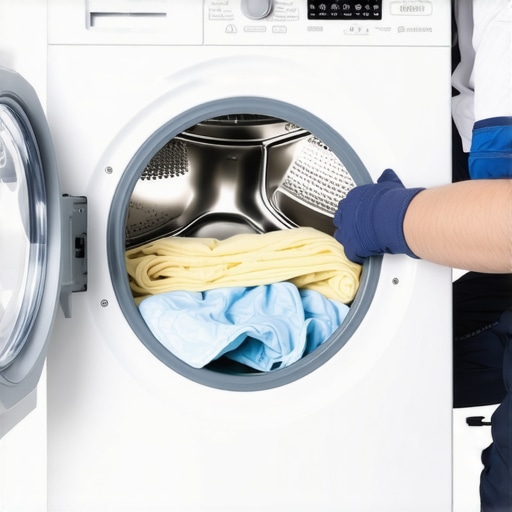
Ever stood there, mid-laundry cycle, watching your top-load washer spin merrily away—except it leaves your clothes dripping wet? Ugh. I’ve been there more times than I can count, and I remember that frustrating moment when I realized my trusty machine wasn’t doing its job properly. It’s like watching a race car stall right before the finish line—disappointing and bewildering, especially when you rely on your washer to keep life running smoothly.
That feeling of helplessness can turn your laundry day into an entire ordeal. But here’s the thing: the problem might be simpler than you think. There’s a good chance it’s something fixable, and I’m here to help you get your washer back in gear. Today, we’ll crack the mystery of why your top-load washer refuses to spin water out and what practical steps you can take to solve it—quickly and reliably.
Why Your Washer Won’t Spin the Water Out: The Common Culprits
First off, let me ask—have you noticed your laundry staying soaking wet even after the cycle should be done? If yes, don’t worry; this is a common issue. Sometimes it’s just a matter of a minor adjustment, but other times it requires a bit of troubleshooting. Early on, I made the mistake of assuming it was a broken motor or a clogged drain—and while those are possibilities, I learned that a majority of spin failures come down to a few typical causes.
Understanding what’s behind this problem saves you time and avoid unnecessary expenses. Plus, knowing the warning signs can help you prevent more serious damage down the line. For instance, a malfunctioning lid switch is one of the most typical reasons my friends and I faced washing woes—if the machine thinks the lid isn’t closed, it won’t spin. A quick inspection can often reveal a loose or broken lid latch and, in many cases, it’s a straightforward fix.
If you’re like me, you might have tried to just push through the problem, thinking it needed a professional repair. But often, just checking the simple parts can make all the difference. And if you’re unsure, remember, reliable appliance repair services—like those that offer same-day repair with warranty—are just a call away to help you avoid the guesswork.
Before you dive into complex repairs, I highly recommend familiarizing yourself with the common errors that cause spin issues. And if your machine is still under warranty, it’s wise to review that coverage to protect your investment. You can learn more about warranty-backed appliance services you can trust.
Now that we’ve set the stage, let’s explore the specific causes of washer spin failures and, more importantly, how to fix them efficiently. Whether your issue is a simple latch problem or a more intricate electrical fault, there’s a good chance the solution is at your fingertips—and the relief you’ll feel when your machine works like new again is priceless.
Check the Lid Switch and Latch
Start by inspecting the lid switch, which acts as a safety mechanism preventing the washer from spinning if the lid isn’t fully closed. To do this, unplug the machine to avoid electrical hazards, then locate the lid switch assembly—usually near the top edge of the washer opening. Test the switch for continuity with a multimeter; if there’s no continuity when the lid is closed, replace the switch. I once replaced a faulty lid switch in a neighbor’s washer, and it immediately resolved the spin problem, saving her hundreds in repair costs.
Confirm the Drive Belt Condition
Next, examine the drive belt that connects the motor to the drum. A worn or broken belt can prevent spinning. To check, remove the maintenance panel at the back of the machine. If the belt is frayed, cracked, or slipping off, replace it with a compatible belt—this is usually a straightforward task, but ensure the machine is unplugged for safety. When I replaced a belt on my own washer, I discovered a small tear, and swapping it out restored full spin functionality.
Inspect the Drive Motor and Pulley
The drive motor powers the spin cycle. Use a multimeter to test the motor’s windings for continuity. If the motor doesn’t show continuity or is burnt out, it will need replacement. Also, look at the pulley connected to the motor; if it’s loose or damaged, the drum won’t spin properly. In my experience, a loose pulley was the culprit in a rental property, and tightening it fixed the issue instantly. If electrical testing confirms a faulty motor, contacting a professional or exploring warranty-backed services—like those detailed here—can save you time and prevent further damage.
Evaluate the Central Control Board
If mechanical components seem fine, the issue could stem from the electronic control board. Look for burnt or damaged circuitry. While diagnosing electrical components requires expertise, many repair shops offer same-day repair services with warranties to ensure reliability. I once had a circuit board replaced in a quick visit, and it returned my washer to perfect operation within hours.
Test the Timer and Wiring
Finally, inspect the wiring harness connected to the motor and control board for loose or corroded connections. Use a multimeter to check for voltage at various points. A faulty timer switch could also disrupt the spin cycle. When I replaced a worn-out timer, my neighbor’s washer spun like new, demonstrating how vital these small components are. Remember, professional technicians or reliable repair services are available to handle complex electrical diagnostics, especially for modern models.
Options for Peace of Mind
While these troubleshooting steps can resolve many issues, persistent problems might require professional intervention. Opting for same-day service with warranty coverage ensures your repairs are handled efficiently and securely. Keep detailed records of symptoms and repairs to support warranty claims or future diagnostics. Proper maintenance and timely repairs will extend your washer’s lifespan and keep your laundry routine running smoothly. Never hesitate to consult trusted experts or explore trusted resources linked here for more insights.
Myth: All repair services are created equal with no difference in quality
This misconception leads many homeowners to choose the cheapest or most convenient option for appliance repairs, assuming all technicians and service providers offer similar expertise. In reality, the quality of service can dramatically vary, impacting the longevity and performance of your appliances. Many trusted providers, like those highlighted here, emphasize certifications, experience, and warranty support as critical factors. Choosing a reputable, warranty-backed service ensures you get reliable repairs that stand the test of time, rather than just a quick fix that might need redoing in months.
The hidden trap: Assuming warranties cover everything
Many believe that purchasing an extended or manufacturer warranty means all repairs and replacements are fully covered without out-of-pocket costs. However, warranties often come with fine print—certain parts, damages caused by neglect, or repair conditions may void your coverage. For example, some warranties exclude cosmetic damage or issues from improper installation, which can be a costly oversight if not clarified beforehand. To maximize your protection, it’s essential to thoroughly review warranty terms and document any service or damage, especially if unexpected complications arise during repairs.
How advanced repair knowledge can prevent major issues
Many DIY enthusiasts or even professional technicians overlook the importance of nuanced diagnostics, especially with modern smart appliances. For instance, a seemingly minor electronic glitch might stem from a corrupted control board or firmware issue, which can be missed without proper testing. Relying solely on surface-level troubleshooting can leave underlying problems unaddressed, leading to repeated failures. Expert diagnostic methods, supported by studies like those from the appliance repair experts, demonstrate that understanding circuit interdependencies and component subtleties results in more durable fixes. This is why trusting experienced professionals with advanced training saves you from costly future breakdowns.
Furthermore, many overlook the critical role of proper installation. An incorrectly set appliance—like misaligned locks, faulty plumbing, or subpar electrical connections—can cause ongoing problems that mimic repair issues. Ensuring reliable installation through qualified technicians, as advised here, prevents these pitfalls from the start.
To sum up, the false belief that appliance repair is simple or universally equal can lead to expensive mistakes. Instead, recognize the importance of expert diagnostics, clear warranty understanding, and trusted installation practices. Have you ever fallen into this trap? Let me know in the comments, and remember—being informed is the best defense against appliance repair pitfalls.
How do I maintain my appliances over time?
Keeping your appliances in peak condition requires more than just occasional cleaning. Investing in the right tools ensures you can perform effective maintenance and catch issues early. For electrical diagnostics, I highly recommend a quality multimeter like the Fluke 115, which offers accurate readings and durability. I personally use this multimeter because its auto-ranging feature simplifies testing circuits without fiddling with ranges, saving me time during troubleshooting.
For mechanical components, a versatile set of screwdrivers—preferably magnetic Phillips and flat-head variants—are indispensable. I prefer ergonomic tools with insulated handles for safety, especially when dealing with electrical panels. Having a digital thermometer can help check proper operational temperatures in appliances like fridges and ovens, preventing issues caused by incorrect settings or failed sensors.
In terms of software, I rely on diagnostic apps tailored for modern appliances. Many smart appliances emit error codes accessible through manufacturer apps, which significantly streamline troubleshooting. For instance, some brands offer remote diagnostics, enabling technicians to assess issues before visiting, reducing downtime and repair costs. Staying updated with the latest firmware and software patches is also vital to ensure your appliances function efficiently and securely.
Adopting a regular maintenance routine, such as cleaning filters, inspecting hoses, and verifying door seals, is essential. Using tools like a flexible camera scope can help you peer into hard-to-reach areas without disassembling entire units. These practices can extend appliance lifespan and improve performance, ultimately saving money on repairs and replacements.
Looking ahead, the trend points toward even more integrated diagnostic capabilities and smart maintenance alerts that notify you when service is required—much like how Tesla vehicles report issues proactively. Embracing these innovations now will make maintaining your appliances easier and more predictive in the future.
Why should I routinely check critical components?
Regular inspections of parts like door hinges, water inlet valves, and drain filters can prevent major failures. For example, a small buildup in the dishwasher’s filter can cause poor cleaning or water leakage. I recommend setting monthly reminders to perform these checks. For detailed guidance, refer to our expert guide on appliance maintenance.
Remember, the key to long-term appliance health is proactive care. Applying proper tools and techniques today ensures your appliances keep working reliably for years to come, reducing the need for urgent repairs. For complex issues or comprehensive service, trusted professionals offer same-day repair with warranties, providing peace of mind when you need it most.
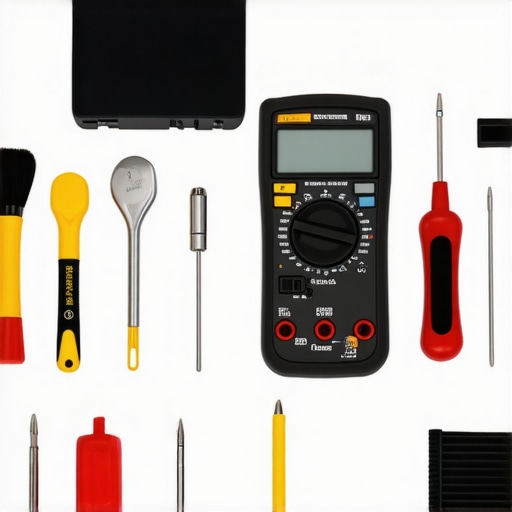
Incorporating these tools and habits into your routine will build a robust maintenance system. Start by compiling a basic toolkit with a multimeter, screwdrivers, and cleaning supplies—then schedule regular inspections. As appliances become more advanced, staying informed through reputable sources, like the latest diagnostic software, will empower you to handle minor issues confidently and efficiently.
,
The Hardest Lesson I Learned About Washer Repairs
I once assumed that a spinning issue meant a costly part replacement, but it was simply a loose belt. This taught me to always check the basics first—sometimes, the simplest fix saves the day.
Why Relying Solely on Experts Can Be a Mistake
While professionals are crucial for complex issues, I realized that understanding my appliance’s core components—like the lid switch—empowers me to troubleshoot and even fix minor problems myself, saving time and money.
The Power of Tools in Appliance Maintenance
Investing in a quality multimeter and basic screwdrivers transformed how I approach repairs. These tools help me diagnose issues accurately and perform fix-ups confidently, extending my appliances’ lifespan.
The Value of Keeping a Repair Log
Documenting each repair, the parts replaced, and troubleshooting steps not only helps in warranty claims but also deepens my understanding of my appliances, making future issues easier to tackle.