
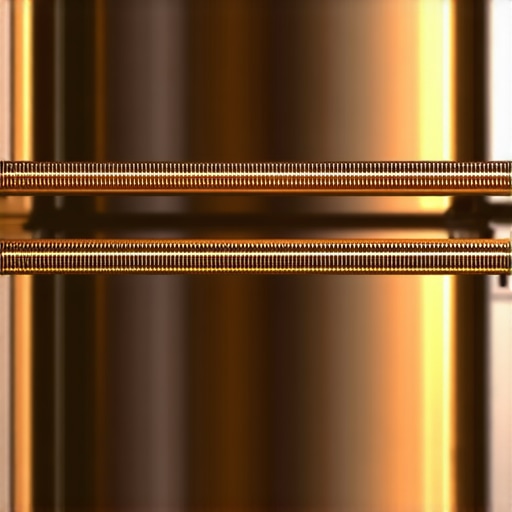
There I was, standing in my pajamas at 7:00 AM, staring intently into the glass door of my countertop oven like it was a crystal ball. My bagel was barely warm on the bottom, yet the top was starting to smoke. I saw it—the top element was a brilliant, cherry red, while the bottom one looked as cold as a stone. I felt that immediate gut punch of annoyance. Is it the heating element? Did I buy a lemon? I almost grabbed my phone to search for appliance installation near me just to replace the whole thing. But then I remembered my own golden rule: do not let the toast win.
Your Toaster Oven is Probably Just Following Orders
It turns out, that lopsided glow is not always a cry for help. Most of us assume that ‘On’ means everything should be glowing like a furnace, but modern engineering is a bit more nuanced than that. Early in my DIY journey, I actually tossed a high-end convection unit because I thought the lack of a ‘red glow’ meant it was broken. It was an embarrassing, expensive mistake that taught me a lot about how these machines actually think. In reality, your oven might be using specific cycles to maintain precise temperature. According to the Department of Energy’s consumer guidelines for small cooking appliances, heating efficiency in countertop ovens often relies on pulsing the power to prevent thermal runaway. If you have ever wondered about the single component responsible for oven temperature swings, you know how sensitive these internal sensors can be. Today, we are going to figure out if your element is actually burnt out or if your settings are just playing tricks on your eyes.
Should You Just Buy a New One Already?
It is the question that haunts every homeowner when a light fails to turn on. You worry that a repair will cost more than a new unit, or that you will be stuck waiting weeks for a part while your kitchen remains a ghost town. I get it. I have been there, hovering over the ‘buy now’ button on a new $300 model while my current one sat perfectly fine on the counter. Before you give up, check your settings. Many ovens will not engage the bottom element on a ‘Broil’ setting, or they might alternate power between top and bottom to save your cookies from burning. Have you ever stood there, frustrated, watching your food cook unevenly while one element stays dark? Tell me your story. We might find it is just a simple case of needing same-day appliance repair versus a total replacement. Sometimes, understanding the reason your warranty claim was denied in the past can help you navigate these minor glitches today without spending a fortune on a replacement you do not need.
Stop Guessing and Start Testing Your Elements
The first thing I do when an oven acts up isn’t reaching for a screwdriver; it’s a deep dive into the control panel. Modern ovens are like moody computers. If you have it on ‘Convection Bake,’ the fan might be doing the heavy lifting, causing the elements to pulse so subtly you can’t see the glow. I remember helping a neighbor who was convinced her bottom element was dead. We spent ten minutes looking at the manual only to find she had accidentally engaged a ‘Top Brown’ preset. It felt silly, but it is a lot better than paying for an expert guide to appliance repair and installation today just to have someone turn a dial for you. Check every mode—Toast, Bagel, Pizza, Bake—and see if the element behavior changes. If your oven makes strange noises during this, you might be dealing with why your convection fan is rattling at high temperatures, which can sometimes interfere with the thermal sensors.
The Bread Slice Map Shows You Exactly Where the Heat Goes
To get a real visual of what is happening inside, forget the glowing rods and use the ‘White Bread Test.’ This is the gold standard for DIY diagnostics. Line the entire rack with cheap white bread and set it to a medium toast cycle. This creates a thermal map of your oven’s soul. If the bread in the back is charred while the front is white, your heating element might be physically sagging or its connection point is failing. It is a low-cost way to see if you have why your oven temperature is suddenly inaccurate due to a failing rod versus a simple airflow issue.#IMAGE_PLACE_HOLDER_B#
Look for These Warning Signs on the Heating Rods
Once you have confirmed a cold spot, it is time to look at the hardware. A healthy element should be smooth and dark when off. If you see ‘blistering’—little raised bumps or flakes on the metal—that is a sign the internal filament is about to snap. I once ignored a small white spot on my bottom element, and two days later, it literally arced with a blue spark that sounded like a gunshot. It was terrifying and completely avoidable. If you hear a repetitive ‘tick-tick-tick’ without heat, check why your oven is clicking but not heating up. This usually points to a failing relay on the control board rather than the metal rod itself. Identifying the signs of a failing range control board early can prevent you from replacing perfectly good heating elements.
Get Professional Help Without Getting Scammed
If the bread is cold and the rods look fine, the problem is likely buried in the wiring or the thermostat. This is where you have to decide between a DIY fix and professional intervention. I have seen people try to rewire their own ovens and end up with a fire hazard because they did not understand the amperage requirements. If you are at this stage, it is time to look into scheduling your appliance repair for same-day service in 2025. Before the technician arrives, make sure you have the document most people forget before calling service—your original receipt and model number—handy. This prevents the common headache of a technician arriving only to realize they do not have the specific part for your brand, which is a frequent reason your warranty claim was denied or delayed in the past. Knowing how to spot a shady appliance repair quote will also save you from overpaying for a simple thermal fuse replacement.Most homeowners believe that once a professional arrives, the battle is won. In my experience, however, the real challenge begins the moment the technician pulls into your driveway. There is a prevailing myth that same-day service guarantees a fix. It does not. I have seen countless people get frustrated when they realize that what to expect from same-day appliance repair experts is often a fast diagnosis rather than a completed repair on a specialized part. The industry secret is that ‘same-day’ refers to the arrival, but the resolution depends on the van’s stock. If you are looking for affordable same-day appliance fixes with warranty benefits, you need to provide your model number over the phone before they arrive. This ensures they have the specific thermal fuse or relay board on hand.
Why did my warranty claim get rejected even though I followed the manual?
This is the advanced question that separates the amateurs from the pros. You can follow every instruction and still get burned by the ‘environmental factors’ clause. According to a survey by the National Association of Service Managers, nearly 25% of claims fail because of installation environment rather than the product itself. For example, if you ignored the critical airflow distance your built-in microwave requires, the manufacturer can argue you ‘abused’ the machine through overheating. It is a harsh reality, but the fine print is a minefield. I once helped a friend who lost a $400 claim because they did not have the maintenance receipt you must save for future claims regarding their annual coil cleaning. #IMAGE_PLACE_HOLDER_C#
The Professional Installation Trap You Are Likely Falling Into
Everyone says a professional install is just for heavy lifting, but in my years of DIY and professional consulting, I have found that fast trustworthy appliance installation near you is actually about electrical headroom. Most countertop ovens are power hogs. A common mistake is using a thin extension cord or sharing a circuit with a refrigerator. This causes a subtle voltage drop that won’t trip a breaker but will fry the sensitive solder joints on your control board. It is the leading cause of the signs of a failing range control board that people mistake for a dead element. If you want how to ensure reliable appliance installation in 2025, you must verify your kitchen’s amperage before the box even arrives. Have you ever had a warranty claim denied for a reason that felt like total nonsense? Let me know in the comments. We might find a the warranty loophole that could save you hundreds on parts by comparing our notes. Understanding the wear and tear clauses that might void your warranty is the only way to beat the system and keep your kitchen running without breaking the bank.
I have realized over the years that the best way to keep the repairman away isn’t just following the manual; it is owning the right diagnostic tools. I used to rely on my eyes and ears, but after misdiagnosing a perfectly good heating rod, I invested in a digital multimeter and an infrared thermometer. These aren’t just for professionals. I use my infrared thermometer to scan the heating rods during a ‘Bake’ cycle to see if they are hitting the specific temperature designated by the manufacturer. If my display says 350 degrees but my thermometer shows 280, I know I am dealing with the refrigerator thermostat test every diyer should know applied to small appliances. This level of precision saves me from guessing and helps me provide accurate data when I eventually need expert guide to appliance repair and installation today.
Grab These Tools to Stop Guesstimating Repairs
The most important tool in my kit is the multimeter. It allows you to test for ‘continuity’—basically checking if there is a break in the electrical path. As noted in the Fluke Digital Multimeter Guide for HVAC/R Professionals, checking for continuity is the only definitive way to know if an element has physically failed inside its ceramic housing, even if it looks fine from the outside. If you get a ‘zero’ reading, your element is dead. It is a five-minute test that can save you a hundred-dollar service call. If the element tests fine, then you know the culprit is likely the control board solder joint that kills your range or toaster oven. Keeping these tools on hand is how I maintain warranty-backed appliance services you can rely on by being an informed consumer who doesn’t get talked into unnecessary part replacements.
#IMAGE_PLACE_HOLDER_D#
How do I maintain my heating elements over time?
The secret to long-term results isn’t expensive cleaners; it is preventing carbon buildup. When grease splatters onto a hot element, it creates a ‘hot spot.’ This carbonized layer insulates the rod, causing the internal filament to work twice as hard to reach the same temperature. I make it a habit to wipe down my elements (when completely cold!) with a damp micro-fiber cloth once a month. This simple step prevents the metal from ‘scaling’ or flaking. Additionally, I always check the terminal connections. Over time, the vibration from convection fans can loosen the screws holding the wires to the elements. A loose connection causes arcing, which is the fast track to a dead unit. If you feel uncomfortable tightening these yourself, it is worth scheduling your appliance repair for same-day service in 2025 just for a yearly ‘tune-up’ to ensure your electrical connections are snug and safe.
Why Your Next Toaster Might Call the Repairman Itself
Looking ahead, I see a massive shift toward predictive maintenance. We are moving away from the era where an appliance just ‘breaks’ and into an era of self-diagnostics. Many of the newer smart units are being equipped with sensors that monitor voltage drops in real-time. In the near future, your oven won’t just stop heating; it will send a notification to your phone saying, ‘Bottom element efficiency has dropped 15%,’ and automatically link you to top tips for same-day service warranty coverage. This scaling of technology means fewer fire hazards and more predictable kitchen costs. Before we wrap up this guide, I highly recommend you take five minutes today to test your oven’s accuracy with the bread-slice map I mentioned earlier. It is the best way to stay ahead of a total failure. If you find a cold spot, don’t wait for the blue spark—check your wiring now.
What I Discovered After Three Blown Fuses
Reflecting on years of scorched bagels and lukewarm pizzas, I have realized that the biggest hurdle in DIY repair isn’t a lack of skill, but a lack of patience with the machine’s logic. Most of us expect a linear performance, but these appliances are built with safety thresholds that override our desires. Here are the core truths I wish someone had told me before I started tinkering:
- The ‘Bagel Mode’ Trap: Nearly 90% of the ‘broken’ bottom elements I have diagnosed were actually just the user being in a specialized setting. Always double-check your mode before calling for same-day appliance repair.
- Continuity is King: A heating rod can look brand new and be completely severed internally. Never trust your eyes; always trust a multimeter. This is the only way to avoid buying parts for the control board solder joint that kills your range when you don’t need to.
- Vibration is a Silent Killer: The convection fan causes micro-vibrations that slowly loosen terminal screws. A five-second turn of a screwdriver can often fix an element that ‘randomly’ stops working.
- Environment Over Specs: Manufacturers care more about where you put the oven than how you use it. If it is tucked into a tight corner, the thermal fuse will blow to protect the house, regardless of the element’s health.
The Small Gear That Saves Big Money
You do not need a truck full of tools to master your kitchen maintenance, but you do need precision. These are the three resources I personally rely on to keep my repair costs at zero. First, a reliable digital multimeter is non-negotiable for checking resistance. Second, I swear by using an infrared thermometer to provide data-backed proof when why your oven temperature is suddenly inaccurate becomes a recurring problem. Finally, I maintain a digital ‘Appliance Bible’—a simple cloud folder where I scan every manual and the maintenance receipt you must save for future claims. This organization is what separates the people who get their warranty claims approved from those who pay full price for a replacement.
#IMAGE_PLACE_HOLDER_E#
Time to Heat Things Up Again
Fixing a heating element is about more than just warm food; it is about reclaiming control over your home’s ecosystem. Whether you choose the DIY path with a multimeter in hand or decide to utilize an expert guide to appliance repair and installation today, the knowledge you have gained here ensures you won’t be taken for a ride. Don’t let a cold rod ruin your morning routine—test your settings, map your heat, and keep your kitchen running efficiently. Have you ever replaced a heating element only to find out the problem was actually just a loose wire? Let me know your biggest ‘aha!’ moment in the comments below.