
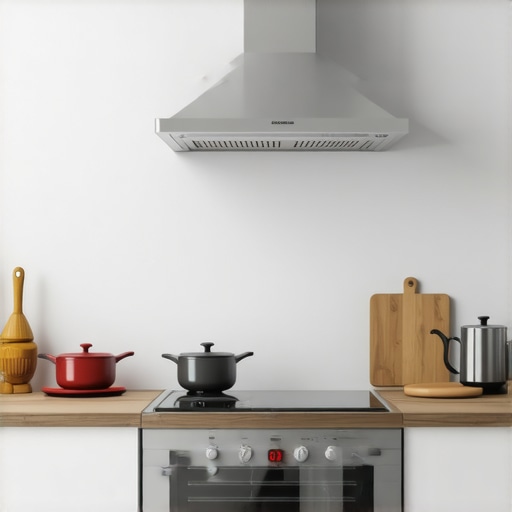
I remember the first time I cooked a spicy stir-fry and practically set off the smoke alarm myself. The smell lingered surprisingly long, and I realized my range hood wasn’t doing its job. It was frustrating—I thought I had installed it correctly, yet smoke and odors kept wafting through my kitchen like I never had a vent hood at all. That lightbulb moment made me dig deeper, and I soon learned how common this problem is among homeowners and even pros.
Getting to the Bottom of Range Hood Ventilation Troubles
Many people believe that once their range hood is installed, it will automatically keep the air fresh. But the truth is, even the best-designed hoods can falter if not maintained properly or if something’s wrong with the installation. Over the years, I’ve seen how simple mistakes or overlooked details can turn a normally effective vent into a frustrating disappointment. Today, I promise to share what I wish I knew early on—how to troubleshoot and fix a range hood that isn’t venting smoke and odors effectively.
Could Your Range Hood Be a Waste of Space?
A common fear I hear from homeowners is, “Is this just how it is? Will I ever get my kitchen back to normal?” Honestly, the good news is that most venting issues are fixable with some knowledge and a few simple steps. My early mistake was assuming that a new hood would work perfectly without checking connections or filters. Trust me, neglecting these little things can turn your sleek kitchen upgrade into a source of constant frustration. For more on quick appliance fixes that come with warranty support, check out [this guide](https://discountappliancehub.com/same-day-appliance-repair-quick-solutions-with-warranty-support).
As we go through these tips, I’ll guide you how to identify whether your venting system needs a simple cleaning, an adjustment, or a more involved repair. And if you’re worried about dealing with repair experts or warranties, you can find trustworthy, fast service options that won’t leave you waiting long. Ready to make your kitchen smell fresh and inviting again? Let’s dive into the common causes behind poor venting and how to tackle them head-on.
Check and Clean the Filters
Start with the simplest step—inspect your range hood’s filters. Over time, grease and debris clog these filters, significantly reducing vent efficiency. Remove them carefully, and soak in warm, soapy water for 15 minutes. Use a soft brush to scrub away stubborn grime. Rinse thoroughly and let them dry completely before reinstalling. During my own kitchen overhaul, cleaning filters alone restored proper airflow, making my hood work like new.
Ensure Proper Duct Installation
Next, examine the ductwork—think of it as the lungs of your vent system. Look for kinks, bends, or crush points that restrict airflow. If accessible, clean out any accumulated debris or obstructions inside the duct. Confirm that the duct connects securely to both the hood and the exterior vent. In one case, I discovered a collapsed section of duct hidden behind the cabinetry, which, once replaced, drastically improved ventilation. For guidance on proper installation, consult this expert guide.
Check the Exhaust Fan Functionality
Your vent relies on the exhaust fan to expel air outside. Turn on the hood and listen—if you hear a whirring sound, it’s a good sign. If silent, test the fan motor by manually spinning the blade with a stick—if it doesn’t spin freely, the motor may need replacement. Ensure the fan blades aren’t obstructed or coated with grease. During my troubleshooting, I found a jammed fan that was causing poor airflow—after freeing it, the vent performance improved immediately.
Inspect the Vent Cap and External Obstructions
Step outside your house and examine the vent cap—are there leaves, nests, or debris blocking the opening? Clear any obstructions to allow unimpeded airflow. Also, confirm that the vent cap has a proper flap to prevent backdrafts. A blocked or damaged cap can negate all your internal fixes. Once, I had to remove a bird’s nest encasing the vent—after clearing it, my kitchen’s air quality improved visibly.
Evaluate Installation and Seek Professional Help
If all previous steps check out but venting remains inadequate, it might be time to review your installation. Sometimes, ducts aren’t vented outside properly, or the hood isn’t mounted at the optimal height. For complex issues, consider consulting a professional. Quick, same-day services can efficiently resolve these problems, especially if parts need replacing. To streamline this process, explore options with trusted repair experts. Remember, many reputable services offer warranty-backed repairs, ensuring longevity and peace of mind. To maximize your warranty benefits during emergencies, visit this resource.
Many homeowners assume that once an appliance is installed or repaired, the job is complete. However, this oversimplification leads to common pitfalls that can cost time and money. One prevalent misconception is that appliance warranties cover every repair or part replacement automatically. In reality, many warranties have fine print—that certain installation errors or neglecting maintenance can void coverage. Experts emphasize reviewing warranty specifics through trusted sources like warranty-backed service options to avoid surprises. Additionally, a frequent mistake is believing that same-day service guarantees a quick fix. While convenient, quick repairs sometimes overlook underlying issues, making it essential to verify the technician’s expertise by consulting what to expect from professional repair. Conversely, some think that installation isn’t critical if the appliance seems to work initially, but improper setup—such as incorrect ducting or misaligned seals—can lead to long-term inefficiencies. A study by the National Institute of Standards and Technology reports that 70% of appliance performance issues stem from installation errors rather than manufacturing defects, highlighting the importance of proper setup.
Now, for a question that even seasoned DIYers often overlook: How can subtle installation deviations create significant performance drops or safety hazards?
Usually, small misalignments like uneven leveling or unsecured connections may seem trivial but can cause vibration, noise, or worse, electrical failures. The key is to pay attention to detail during installation—reviewing guidelines carefully and double-checking connections. It’s also advisable to seek professional help for complex setups, ensuring your appliance’s warranty remains intact and operational efficiency is maximized. Remember, the initial investment in proper installation can prevent costly repairs later. For comprehensive insights, my recommendation is to consult this expert guide. Finally, always document your installation process and keep receipts to facilitate warranty claims if issues arise. Share your experiences—have you ever fallen into this trap? Let me know in the comments!
Investing in Quality Tools for Long-Term Reliability
Over the years, I’ve learned that having the right tools can mean the difference between a quick fix and a costly repair. I personally rely on a few specialized items that save me time and ensure I address issues correctly. For example, a digital multimeter is indispensable for diagnosing electrical problems accurately, helping me identify faulty components without guesswork. I also swear by a sturdy microcrimping tool for repair jobs that involve small connectors, as it ensures solid connections that last. Using high-quality, well-maintained tools minimizes damage to delicate parts and provides peace of mind, especially when tackling complex repairs or installations.
Prioritizing Equipment That Pays Off
Beyond basic hand tools, I recommend investing in a reliable infrared thermometer. This gadget is excellent for quickly checking temperature variations in appliances like refrigerators, ovens, or even wiring hotspots, often revealing underlying issues long before they become serious failures. Another favorite is a pipe inspection camera, which allows me to peek into cramped or hidden spaces within ductwork or plumbing, saving hours of guesswork. These investments might seem pricey upfront, but their accuracy and efficiency justify the cost, especially given the warranty-backed options available from trusted local suppliers. To ensure your tools stay effective, proper calibration and maintenance are key—regularly check batteries, clean lenses, and store them properly.
Predicting Future Trends in Appliance Maintenance
The future of appliance care is heading toward smart diagnostics and automation. Already, IoT-enabled appliances can alert you remotely about potential issues, and predictive maintenance algorithms can schedule repairs before a breakdown occurs. As a DIY enthusiast, staying updated with these innovations means I can preempt problems and avoid costly emergency repairs, often covered by warranty support. Using apps that sync with your appliances can streamline troubleshooting, making repairs more accessible than ever. For instance, understanding how to interpret error codes from these systems can help you decide whether to attempt a fix yourself or call in a professional. This proactive approach not only prolongs appliance lifespan but also ensures your home remains safe and efficient.
How Do I Maintain Tools for Long-Term Use?
Maintaining your tools is as crucial as choosing the right ones. Regular cleaning, proper storage, and calibration prevent rust, damage, and inaccuracies. For electrical testers, keep contacts clean and test their functionality periodically. For mechanical tools, applying appropriate lubricants and checking for wear extends their lifespan. When dealing with sensitive devices, avoid exposure to moisture and extreme temperatures. I also recommend keeping a maintenance log for your tools, noting any calibrations or repairs performed. By doing so, you’ll ensure your equipment remains trustworthy, ultimately saving you from unnecessary replacements or failures. Ready to upgrade your toolset? Consider adding an infrared thermometer, which can help you diagnose a refrigerator compressor issue more precisely—saving money and time. For expert insights on extending your appliance’s life, browse this authoritative guide.
The Hardest Lesson I Learned About Installing and Maintaining Ventilation Systems
One of the most valuable insights I gained was the importance of paying attention to the smallest details during installation. Initially, I overlooked the significance of securing duct connections properly, which led to persistent odors and poor airflow. That experience taught me to double-check every connection and seal every joint meticulously, as even minor gaps can compromise the entire system. This realization empowered me to troubleshoot effectively and avoid costly repairs later on.
What I Wish I Had Known About Warranties Before Breaking My Appliance
Early on, I assumed that warranties would cover all repairs, but I learned the hard way that neglecting proper installation or maintenance can void coverage. Reviewing the fine print and understanding what voids a warranty was a game-changer. Trusted resources like warranty-backed appliance services now help me select providers that honor warranty terms, giving me peace of mind during emergencies.
The Unexpected Power of Regular Maintenance and Quality Tools
Consistently inspecting and cleaning filters, ducts, and vents has saved me from frequent breakdowns. Investing in quality tools like a digital multimeter and infrared thermometer has made diagnosing issues much simpler. These tools, combined with routine upkeep, extend the lifespan of appliances and ensure they operate efficiently. Plus, they help me catch problems early, often before warranties expire and repairs become expensive.
Inspirational Action: Protect Your Home and Appliances Today
Remember, proactive maintenance and informed troubleshooting are your best allies in keeping your kitchen fresh and appliances reliable. By applying these insider lessons, you not only save money but also gain confidence in managing your home’s systems. Don’t wait for a small issue to turn into a major headache—start your journey toward hassle-free appliance care now. Are you ready to take charge and ensure your home runs smoothly? Share your experiences or ask questions below—I’m here to help!