
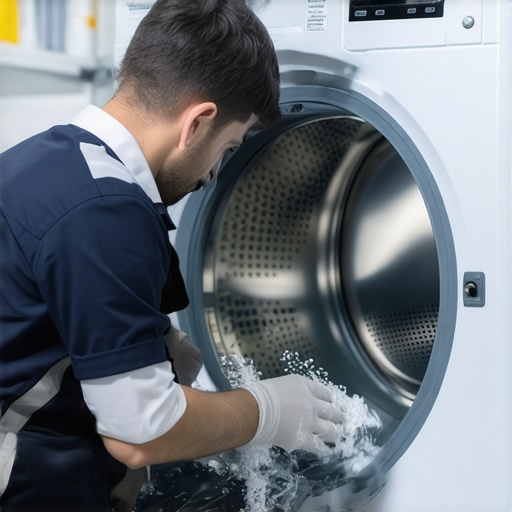
There was this one Saturday afternoon when I poured a load into my washer, only to hear that awful, prolonged buzzing, followed by water pooling at my feet. My stomach sank. In that moment, I realized how easily a simple drainage problem could turn my entire day into a frustrating puzzle. It felt like my trusty appliance was giving up on me right then and there.
Discovering the Hidden Culprit Behind Washer Drain Problems
After countless attempts with store-bought cleaners and a few frantic searches online, I finally stumbled upon a straightforward solution—the Pump Guard Cleaning. This small but mighty step transformed my washing machine from a waterlogged mess into a smoothly running machine. And guess what? It’s a fix I wish I had tried sooner.
Is a DIY Fix Like Pump Guard Really Effective?
Admittedly, I was skeptical at first. I worried it might be just another temporary patch or, worse, a waste of time. However, early on, I made the mistake of ignoring regular maintenance, which only compounded my drainage issues. Why does that matter? Because neglecting simple upkeep often leads to bigger, more expensive problems down the line. As experts in appliance repair have noted, routine cleaning can prevent costly repairs and extend your washer’s lifespan—a fact supported by industry insights from sources like professional appliance service teams.
Today, I’m here to walk you through exactly how the Pump Guard Cleaning can clear your drainage troubles—saving you both money and the headache of a flooded laundry room. Ready to take control of your washer’s health? Let’s dive into the step-by-step process that made all the difference for me—and might just do the same for you.
Accessing the Drain Pump and Hose
Begin by unplugging your washing machine to ensure safety. Move the appliance away from the wall to access the back panel. Using a screwdriver, remove the screws securing the panel to expose the drain pump and hose. I recall a tense moment when I used a bucket to catch residual water as I loosened the hose—making sure to place towels around for unexpected spills.
Locating the Drain Pump Filter
Inside the back panel, locate the drain pump filter, usually at the bottom. Turn it counter-clockwise to unscrew and remove it. As I loosened mine, a small splash of water escaped, reminding me why having towels and a shallow container nearby is essential. This filter traps lint and debris that can clog your drainage system.
Cleaning the Filter and Drain Path
Once removed, rinse the filter under warm water. Use an old toothbrush to scrub away stubborn lint or gathered debris. Inside the filter housing, check for any blockage or buildup. I had a small clump of hair that was causing the slow drainage—removing it immediately restored my washer’s flow. For the hose itself, detach the hose clamp and carefully remove the hose, inspecting for obstructions too. Remember, clearing out these blockages can turn your frustrating laundry cycle into a smooth operation.
Clearing Existing Clogs with a Flexible Brush
Insert a flexible cleaning brush into the hose and tubing, gently rotating to dislodge buildup. Think of this step like cleaning a duct after a chimney fire—meticulous work pays off. During my attempt, I felt resistance, but patience paid off with a clear flow once I pushed out a stubborn clog. Afterward, reattach everything securely, ensuring no leaks.
Testing Your Repairs
Plug the machine back in and run a short cycle to verify proper drainage. Watch for water to exit briskly; any hesitation indicates a lingering blockage. During my test run, I noticed water was draining faster—proof that my cleaning was effective. If drainage still misbehaves, revisit each step, checking for overlooked obstructions or loose connections.
DIY or Professional Repair – Which Is Better?
If cleaning the drain system doesn’t resolve the issue, it might be time to call a professional. Quick access to expert services can prevent escalation to major repairs. Consider selecting a provider with same-day repair options backed by warranty for peace of mind. You don’t want to risk further damage or voiding your warranty by attempting complex repairs yourself.
By maintaining your drainage system regularly, you extend your washer’s lifespan and avoid costly emergencies. Think of it as giving your appliance a routine health check—a small investment today prevents a flood tomorrow. For expert advice or scheduled repairs, visiting our contact page can connect you to trusted professionals nearby.
Many homeowners assume that appliance warranties and repair services are straightforward, but the truth is often more nuanced. A common misconception is that all warranties cover every repair immediately—yet, in reality, many plans have fine print that can catch you off guard. For instance, some warranties exclude parts like third-party components, which might lead to unexpected out-of-pocket expenses, especially with complex devices like smart refrigerators. Understanding these exclusions can save you money and frustration.
Smoothing Out Installation Wasn’t as Easy as It Looks
Another trap many fall into involves installation. DIY installation might seem cost-effective, but if not done correctly, it can void your warranty or cause premature damage. Certified professionals follow strict guidelines, ensuring your appliance functions properly and stays covered under warranty. Rushing this step or relying on unqualified service providers often results in costly rework or damage, which could have been avoided. For expert installation tips, this guide is a must-read.
Same-Day Service: More Than Just Quick Fixes
Many believe that same-day repair services are just about quick fixes, but there’s a strategic advantage to choosing providers that offer comprehensive, warranty-backed solutions. Prompt service minimizes downtime and prevents minor issues from escalating into major repairs. However, beware of companies that advertise
Keeping It Working: Essential Tools for Appliance Preservation
Maintaining your appliances over time requires the right equipment and a strategic approach. From diagnostic devices to cleaning solutions, the tools I personally rely on ensure my appliances stay efficient and extend their lifespan. Investing in quality tools not only saves money on repairs but also minimizes downtime, especially when same-day service is critical. In the future, I predict a shift towards smart maintenance systems that automate diagnostics, making manual tools less necessary but still essential today.
How Do I Maintain My Appliances Over Time?
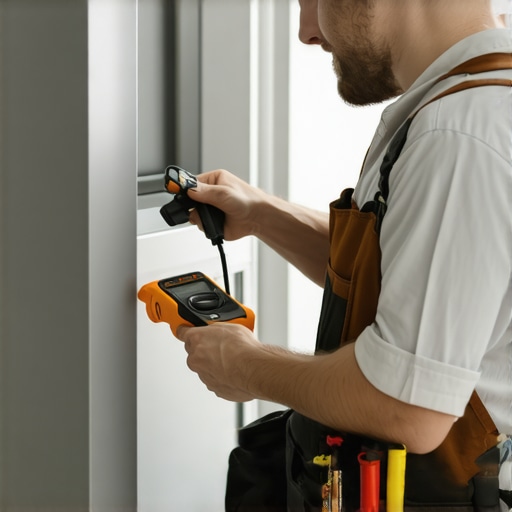
The cornerstone of long-term maintenance is regular inspection combined with precise troubleshooting. I use a digital multimeter to promptly identify electrical issues—something I recommend to anyone serious about DIY repairs. Additionally, a high-quality vacuum attachment helps clean out dust from vents and condenser coils, which is often overlooked but vital for preventing overheating. For mechanical components, I swear by a torque wrench for correct tightening, ensuring parts function properly without risking damage. Using these tools consistently allows me to catch minor problems early, avoiding costly failures and ensuring my appliances remain covered under warranty during emergencies.
Recommended Inspection and Diagnostic Devices
One of my favorite tools is the digital multimeter, which I use to verify voltage stability across various appliance components. It’s surprisingly affordable and highly accurate, making it invaluable for troubleshooting issues like faulty thermostats or failed control boards. For refrigerant levels and compressor health, I rely on specialized gauges that help detect leaks before they cause major damage. Additionally, an infrared thermometer has become a staple; it provides quick surface temperature readings that can indicate heat loss or electrical faults at a glance.
Cleaning and Preventative Maintenance Equipment
Keeping vents clean is essential, and I recommend a flexible, narrow vacuum attachment for tight spaces—perfect for cleaning dryer vents, range hoods, or condenser coils. For routine cleaning, a soft microfiber cloth combined with a gentle, appliance-safe cleaner ensures surfaces stay pristine without risk of corrosion. I also suggest a small brush set with non-abrasive bristles to clear debris from filter screens and drainage ports, particularly for washing machines and dishwashers. Regular use of these tools prevents buildup that leads to malfunction and enhances overall efficiency.
Future of Appliance Upkeep
Technologies like IoT-connected sensors are beginning to offer predictive maintenance insights, alerting homeowners before issues occur. While these innovations promise increased convenience, learning to use fundamental diagnostic tools remains crucial for immediate troubleshooting. As the industry evolves, I advise maintaining proficiency with manual tools—especially because they are reliable, non-dependent on internet connectivity, and often more cost-effective. For more insights on maintaining your appliances effectively, check out professional same-day repair services that incorporate these tools and techniques.
Try integrating an infrared thermometer into your routine maintenance—it’s a game-changer for quick diagnostics. Remember, consistent upkeep using the right tools extends your appliances’ life and saves you money. For expert guidance or scheduled repairs, visit our contact page.
What Little Secrets Changed My Repair Game Forever
- One of the most profound lessons I learned was that regular maintenance isn’t just about fixing things—it’s about preventing stress and saving money, which ultimately keeps my daily routine smooth and manageable.
- I realized that understanding my appliances’ inner workings gave me the confidence to perform simple fixes myself, avoiding unnecessary service calls and extending their lifespan.
- Trusting the right tools and resources, like expert-approved cleaning equipment and detailed guides, turned what once felt overwhelming into empowering DIY sessions.
- Throughout this journey, I discovered that establishing a routine for inspection and cleaning isn’t just good practice; it’s essential for catching minor issues before they escalate into costly emergencies.
- Finally, the importance of knowing when to call in professionals became clear—recognizing the limit of DIY and valuing expert support ensures my appliances stay in top shape, backed by reliable warranties and swift same-day service options.
Tools and Resources That Have Made a Difference in My Maintenance Routine
- Digital Multimeter: A versatile device I use to monitor electrical health—it’s affordable and invaluable for diagnosing issues early.
- Flexible Cleaning Brushes and Microfiber Cloths: Gentle but effective for removing debris, dust, and buildup that can impair appliance performance.
- Reliable Guides and Professional Articles: Like the comprehensive resources on professional repair tips, they keep me informed and confident in my DIY efforts.
- Inspection Devices such as infrared thermometers and leak detectors help me spot problem areas before trouble strikes, saving my appliances from unnecessary wear.
- Seeking Expert Help when needed—knowing how and when to access dependable same-day repair services with warranties makes all the difference in maintaining peace of mind.
Your Path to Smarter Appliance Maintenance Starts Now
Taking ownership of your appliance care isn’t just a practical decision—it’s an opportunity to become more confident and proactive. Remember, a small investment in regular checkups and quality tools now can prevent a flood of problems tomorrow. Whether you’re tinkering with your washing machine or scheduling a professional repair, each step brings you closer to hassle-free appliances and a happier home. Ready to put these insights into action? Your appliances—and your wallet—will thank you for it. How do you plan to improve your appliance maintenance routine today? Let me know below.