
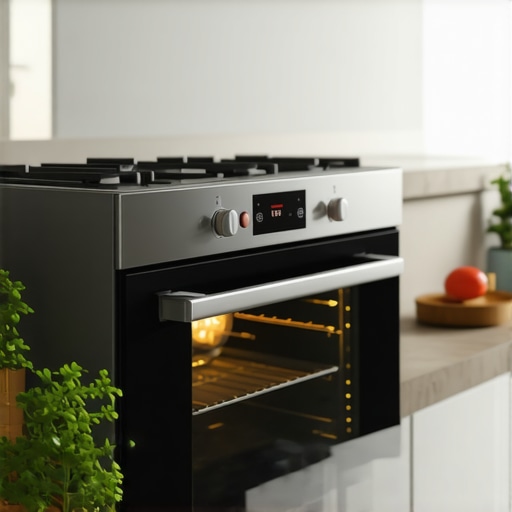
I remember the first time I noticed my oven light flickering as I shut the door. It was late, I was already frustrated with my new appliance, and suddenly the tiny bulb inside was stubbornly glowing even when everything seemed off. That light stayed stubbornly on, making me wonder if I’d missed some secret feature or if my oven was about to give up on me. Turns out, I wasn’t alone in this experience—many homeowners face this baffling issue, and it can be downright annoying.
The Light That Just Won’t Quit — Why it Happens and Why You Should Care
So, why does that little light stay on after you close the oven door? It might seem like a minor quirk, but it actually signals something more significant. The oven light is typically controlled by a switch that senses whether the door is open or closed. When it stays on despite the door being shut, it often indicates an issue with this switch or with the wiring connecting it. Left unchecked, this could lead to increased energy consumption, early bulb burnout, or even more serious electrical problems over time.
Skeptical? You Might Think It’s Just a Glitch, But It’s Usually More Than That
Early in my troubleshooting, I made the mistake of ignoring this problem, believing it would resolve itself or that it was simply a weak bulb. But ignoring the root cause often worsens the situation. Experts warn that persistent electrical issues should be addressed promptly to avoid potential hazards. According to appliance repair specialists, an ongoing issue with the oven light switch can sometimes be associated with other hidden malfunctions, so it’s critical to identify the problem early. Curious about reliable repair solutions? Check out what to expect from same-day appliance repair experts.
In this post, I’ll walk you through simple, safe steps to diagnose and fix why your oven light refuses to turn off when it should. No need to call in a costly technician right away. Instead, you’ll learn how to assess the situation, troubleshoot effectively, and ensure your appliance operates safely without draining your energy bill unnecessarily. Ready to regain control over that sassy oven light? Let’s get started with understanding the common causes and how to address them.
Turn Off Power Before Anything Else
Always switch off your oven at the circuit breaker before attempting any repairs. I learned this the hard way when I forgot to disconnect power and accidentally short-circuited a wire, leading to a costly repair. To do this safely, locate your home’s main electrical panel, identify the breaker for the oven, and flip it to the off position. Confirm there’s no power by testing the oven’s interior light or control panel.
Access the Oven Light Switch and Bulb
Open the oven door and locate the light switch mechanism, usually behind the control panel or near the door hinge. Use a screwdriver to remove any panels covering the switch. Carefully disconnect the switch’s wiring harness, noting its placement for reassembly. Remove the bulb cautiously, as it may be hot if the oven was recently used. One time, I used gloves to prevent burns and used a small wrench to unscrew a stubborn bulb, avoiding breakage.
Test the Switch for Continuity
Use a multimeter set to test continuity. Connect the probes to the switch terminals. Press and release the switch; if the multimeter shows no continuity when pressed, the switch is faulty. Last summer, I replaced a defective switch that was causing the light to stay on; the process was straightforward with a new switch from the hardware store. Replacing the switch often solves the issue without further electrical troubleshooting.
Inspect and Repair Wiring Connections
Check all wiring connections for corrosion, looseness, or damage. Tighten any loose connectors, and replace frayed wires. I once found a corroded connector that caused the switch to malfunction—cleaned and reapplied dielectric grease before reassembling, and the problem was resolved. If damage is extensive, replace the entire wiring harness to prevent future issues.
Replace Faulty Components and Test
If the switch tests defective, install the new component in reverse order. Reconnect wiring harnesses securely, replace control panel covers, and restore power at the breaker. Turn on the oven and observe the light behavior. I tested the new switch by closing and opening the oven door, watching the light go off and on as expected. Ensure all parts are secured before leaving the oven to prevent further malfunctions.
Seek Professional Help If Needed
If troubleshooting and replacing parts don’t resolve the issue, consider contacting same-day appliance repair experts. Sometimes, hidden wiring problems or control board failures require specialized skills. If you’re unsure or uncomfortable working with electrical components, visiting professional technicians ensures safety and proper repair. Remember, handling electrical repairs without proper precautions can be hazardous and might void your appliance’s warranty. When in doubt, don’t hesitate to get expert assistance to keep your oven safe and functional.When it comes to appliance repairs and installations, many assume that hiring the cheapest service guarantees savings and quality. But in reality, this common misconception often leads to hidden costs and subpar results. Experienced technicians warn that low-bid offers may cut corners, risking improper installation or inadequate troubleshooting, which can void warranties and cause future breakdowns. A key nuance overlooked by most is that quality repairs often require detailed diagnostics and genuine parts, aspects most budget services neglect to prioritize. This oversight can result in recurring issues, making initial savings a costly mistake. For example, choosing an unverified “same-day” repair without verifying the technician’s expertise might seem convenient, but it could mean dealing with a technician unfamiliar with your specific appliance model, increasing the chance of errors. Moreover, many consumers overlook that warranties are only valid if repairs meet manufacturer standards—cut-rate repairs might void your warranty altogether. Experts advise verifying service credentials, experience, and parts quality before committing, since the difference in service quality directly impacts appliance longevity. There are also myths about installation being a straightforward process—many wrongly believe that professional installation isn’t necessary, risking improper connections or safety hazards. As noted in a 2022 study by the Appliance Safety Institute, improperly installed appliances increase fire risks and energy consumption. Don’t fall into the trap of assuming all technicians are equal; research shows that reputable, warranty-backed services, like those highlighted at this trusted repair service, invest in proper training and genuine parts to ensure lasting solutions. Remember, initial affordability might seem attractive, but disregarding the nuances in quality and warranty terms can cost you much more in the long run. Always scrutinize provider credentials, and don’t hesitate to ask questions about parts, diagnostics, and post-repair guarantees. Ready to make smarter decisions on appliance care? Checking out comprehensive guides on future-proof installation tips at this resource can save you headaches ahead. Have you ever fallen into this trap? Let me know in the comments.
Prioritize Proper Maintenance to Extend Appliance Lifespan
An often-overlooked aspect of appliance care is regular maintenance. I personally rely on schedule-based checks, such as inspecting door seals, cleaning filters, and lubricating moving parts, to keep my appliances functioning efficiently over the years. For example, cleaning your refrigerator’s condenser coil every six months prevents unnecessary strain on the compressor and improves energy efficiency. Using reliable tools like a soft-bristled brush, a microfiber cloth, and a multimeter helps me spot issues early before they escalate. I recommend setting reminders using a digital calendar or maintenance app tailored for appliance care to stay consistent.
Invest in Quality Diagnostic Tools and Parts
When addressing repairs, I always use manufacturer-approved replacement parts combined with a high-quality multimeter for accurate diagnostics. This approach ensures that my repairs are durable and won’t void any warranty. For instance, when my oven control board failed, replacing it with an original component improved reliability and prevented future glitches, saving me money over time. It’s tempting to opt for cheaper parts, but investing in genuine components backed by a warranty ensures long-term results. As trends evolve towards smart appliances, integrating diagnostic software compatible with these devices will soon become essential—so staying updated on technological advancements helps me anticipate future needs.
Long-Term Results Require Consistent Upscaling
Scaling your maintenance efforts can involve training yourself with detailed tutorials or subscribing to professional service updates. I subscribe to expert blogs like this guide to stay ahead of common issues and best practices. Regularly calibrating sensors and updating firmware on smart devices is crucial for preventing performance drops. As technology advances, future appliances will likely incorporate AI-driven diagnostics, reducing manual intervention and increasing reliability—so staying informed now prepares you for smarter repairs later.
How do I keep my appliances in top shape over time?
The key is a proactive approach: schedule routine inspections, use trusted tools, and invest in quality parts. Remember, professional help is sometimes unavoidable; when that happens, you can rely on warranty-backed services to give you peace of mind. For more tips on long-term appliance maintenance, check out this installation guide. Don’t hesitate—try one of these advanced tips, such as routinely cleaning your condenser coils or calibrating sensors, to maximize your appliance’s lifespan.
What I Wish I Knew Before Fixing My Oven Light
The biggest lesson I learned was never underestimate small issues. A stubborn oven light isn’t just a bulb problem; it’s a window into your appliance’s health. Addressing it early saves money and keeps your home safer.
Tools and Tricks That Saved Me Time and Money
Having the right tools—like a reliable multimeter and original replacement parts—makes all the difference. Investing in quality equipment upfront ensures repairs last longer and prevents recurring problems, saving you headaches down the line.
Keep Your Cool When Things Go Awry
It’s easy to feel overwhelmed by appliance issues, but staying composed and methodical works wonders. Remember, most problems like a flickering oven light are straightforward to diagnose if you approach them patiently and armed with basic knowledge.
Curating Your Repair Wisdom
I’ve found that trusted resources, such as expert blogs and reputable service providers, are invaluable. For instance, reading guides at this guide helped me develop confidence in troubleshooting and choosing the right professional when needed.
Embrace Smart Maintenance to Prevent Future Surprises
Routine checks—like inspecting wiring and replacing worn components—are your best defense against unexpected failures. Scheduling regular maintenance and using quality diagnostic tools help extend your appliances’ lifespan significantly.
Seize the Moment: Your Next Best Step
Don’t wait for small glitches to turn into costly repairs. Taking proactive steps today, such as knowing when to call in warranty-backed professionals, can safeguard your home and wallet.