
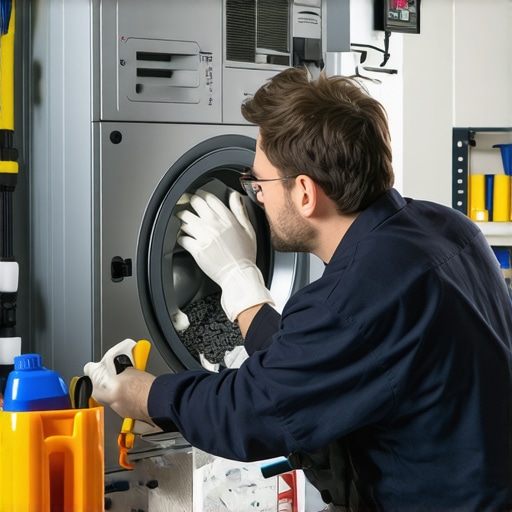
It happened to me one chilly winter morning. I was getting ready for work when I noticed my dryer wasn’t drying quite right. A quick peek at the lint screen showed it was clean, so I shrugged it off, thinking maybe the vent was clogged or something. Little did I know, that seemingly minor issue was a ticking time bomb for a house fire. This was my awakening to a simple but critical maintenance task that many overlook — inspecting and cleaning the dryer vent.
Why Your Dryer Vent Needs Your Attention More Than You Think
Every year, thousands of household fires are linked to dryer vent problems. The culprit? Lint buildup, which is incredibly flammable. When lint accumulates in the vent, it restricts airflow, forcing your dryer to work harder and overheat. Over time, this overheating can ignite the lint, leading to a devastating house fire. Regular inspections and cleanings are your best defense.
According to the U.S. Fire Administration, failure to clean dryer vents is a leading cause of residential fires, accounting for nearly 15% of home fire incidents involving laundry appliances. That’s a staggering number for something many dismiss as routine maintenance. Knowing this, I started paying more attention to my dryer vent, realizing it’s a simple task that can save your home—and your life.
Have you ever faced a dryer that takes twice as long to dry clothes, or worse, smelled like burnt rubber after using it? These are signs you might be ignoring a building danger. The good news? It takes just a few minutes to check, clean, and ensure your dryer vent is safe. In the next sections, I’ll walk you through exactly how to do this, and why it’s worth your time.
If you’re unsure where to start or want professional help, trusted services offer warranty-backed appliance maintenance you can rely on, like those found at [this trusted resource](https://discountappliancehub.com/warranty-backed-appliance-services-you-can-rely-on). Don’t wait until it’s too late—let’s dive into the how-to.
Disconnect Your Dryer Before Starting
Safety first: unplug the dryer from the power outlet to prevent accidental activation. Move the dryer away from the wall if possible, to access the vent fully. Remember, working with electrical appliances always involves a risk, so ensure your hands are dry and the area is safe.
Locate and Remove the Vent Cover
Find the external vent cover outside your house—usually at the back or side. Unscrew or unclip the cover using a screwdriver or your hands. Once removed, you’ll see the duct connecting to your dryer. This is your access point for cleaning.
Use a Vacuum to Loosen Debris
Attach a long nozzle or hose to your vacuum cleaner. Carefully insert it into the duct to suck out lint, dust, and debris. Think of this step as giving your duct a thorough breath of fresh air after years of buildup. If the vacuum isn’t reaching deep enough, don’t force it; proceed to manual cleaning techniques.
Push Through the Lint with a Brush or Wand
Use a specialized dryer vent brush, available at hardware stores, or a flexible microfiber wand. Gently loosen stubborn lint by pushing and twisting the brush through the duct. This is like cleaning a straw—roll it around to dislodge the built-up lint inside. Remember, avoid using anything sharp that could puncture the duct.
Check and Clean the Vent Cap
Inspect the exterior vent cap for blockages like leaves, nests, or lint. Use a brush or your hand to remove obstructions. If the cap is secured with screws, tighten or replace them as needed. Clear vents allow proper airflow, reducing fire risk and improving dryer efficiency.
Reassemble and Test the System
Once cleaned, reattach the vent cover securely. Plug your dryer back in and run a short drying cycle without clothes. Check outside to see if the vent air flows freely, indicating clear airflow. This mirrors my recent experience when I discovered how clogged my vent was—reenabling my dryer to run efficiently and safely.
Schedule Regular Maintenance to Prevent Risks
Make cleaning your dryer vent a routine, perhaps every 1-2 years, depending on usage. Regular maintenance is like giving your home a health check; it prevents dangerous buildup and ensures appliances operate optimally. For more detailed strategies, you can explore trusted guidance at this resource.
Many homeowners believe that choosing the cheapest or quickest option for appliance installation and repair will save money and hassle in the long run, but this is a dangerous misconception. In my experience, one of the most overlooked nuances is the importance of understanding the true quality of parts and service providers. For example, opting for third-party or generic replacement parts might save a few dollars initially, but studies show they often lack the durability and safety standards of original manufacturer parts, potentially voiding warranties and leading to costly repairs later. Additionally, a common myth is that same-day service is always the most reliable; however, without proper vetting, rushed repairs can overlook subtle issues, leading to recurring problems. As an expert, I advise clients to prioritize warranty-backed services and verify certifications, as detailed at this resource. One critical trap to avoid is neglecting the fine print in warranties, which often exclude certain repair parts or labor from coverage, especially if non-approved technicians perform quick fixes. For an advanced insight, consider how incompatible components can interfere with appliance sensors, causing premature failure—an issue often dismissed by amateurs. An example of this nuance is ensuring that installation adheres strictly to factory specifications, such as correct leveling and electrical connections, as covered in this guide. Failing to recognize these details can lead to increased downtime and, ultimately, higher costs. Don’t forget that many warranties require documentation of professional installation and regular maintenance; neglecting this can invalidate your coverage when emergencies strike. My advice? Always opt for trusted, warranty-backed services and stay informed about what your coverage entails, through resources like this article. In closing, the hidden nuance is that appliance reliability hinges not just on the initial fix but on understanding the specifications, warranties, and service quality behind every repair or installation. Have you ever fallen into this trap? Let me know in the comments.
Mastering Maintenance with the Right Tools
Maintaining appliances over time requires precision and the right equipment. I swear by a high-quality multimeter for electrical troubleshooting; it helps me quickly identify faulty wiring or blown fuses without guesswork. A digital torque wrench is invaluable when tightening connections—preventing over-tightening that can damage delicate components. For cleaning, I always recommend a flexible dryer vent brush, which reaches deep into ducts to dislodge stubborn lint buildup, ensuring optimal airflow and safety. Investing in a cordless, rechargeable ultrasonic cleaner also streamlines delicate part cleaning, like thermostat sensors or small valves, avoiding chemical damage.
Advanced Tips to Prolong Appliance Life
One strategy I recommend is scheduling routine calibration checks for your appliances, such as oven temperature sensors or washing machine load sensors, according to manufacturer specifications. Using manufacturer-approved diagnostic software when available can diagnose issues early, avoiding costly repairs. For example, some modern dishwashers integrate proprietary apps allowing remote diagnostics—saving time and money. Prediction of future trends suggests IoT-enabled appliances will increasingly offer self-maintenance alerts, minimizing downtime. Embracing these technologies now positions you ahead.
How do I maintain my appliances over time?
The key lies in regular, targeted maintenance—think beyond simple cleaning. Incorporate periodic inspections of seals, hoses, and electrical connections, using tools like a digital multimeter to catch issues before they cause breakdowns. Also, document your maintenance routines and repairs; this can help maximize warranty benefits. Many appliance experts advise using warranty-backed services for repairs to ensure genuine parts and professional installation, which you can learn more about at this resource. For instance, professional technicians can detect subtle sensor misalignments or electrical inconsistencies that DIY methods might miss. Remember, proactive maintenance saves money and preserves appliance longevity.
What I Wish I Knew When I Started Repairing Appliances
One of the toughest lessons I learned was that not all parts are created equal. Investing in genuine, warranty-backed components saved me countless headaches, as cheap alternatives often lead to recurring issues and warranty voids. Also, always reading the fine print in service warranties revealed that many cover only specific repairs, reminding me to stay informed and check coverage before rushing into fixes.
Another insight came from understanding that a well-maintained appliance isn’t just about fixing what’s broken but proactively preventing future failures. Regular calibration and routine inspections, guided by manufacturer recommendations, extend appliance life significantly and save money over time. These lessons emphasize that a cautious, well-informed approach yields the best results in appliance care.
Finally, I realized that great service isn’t just about quick fixes—it’s about building trust. Choosing warranty-backed professionals over cheap, hurried solutions not only guarantees quality and safety but also peace of mind that your appliance—and home—are protected. These hard-earned lessons continue to shape my approach to appliance maintenance and repair, underscoring the value of preparedness and quality.
Tools and Resources I Rely On for Better Appliance Care
- Professional-grade multimeters: They help me quickly identify electrical issues, ensuring repairs are precise and safe.
- High-quality dryer vent brushes: Reaching deep into ducts to dislodge lint buildup, crucial for safety and efficiency.
- Trustworthy online guides: Resources like this expert guide keep me updated on best practices and latest technologies.
- Warranty-backed service providers: Ensuring genuine parts and professional installation, directly impacting the longevity of appliances, as detailed at this trusted resource.
Your Next Move to Master Appliance Maintenance
Taking proactive steps today can save you from costly repairs tomorrow. Regular inspections, using the right tools, and trusting reputable professionals make all the difference. Remember, your appliances are investments in your home’s comfort and safety—treat them accordingly, and they’ll serve you well for years to come. Don’t hesitate to begin implementing these tips now, and see how managing your appliances becomes a rewarding, empowering experience. How do you plan to improve your appliance care routine starting today? Share your thoughts below—we’d love to hear your plans!