

I still remember the smell of my first ‘failed’ holiday turkey. It was bad. Really bad. The top was glistening and golden, but when I carved into it, the bottom was a blackened, dry mess that even a gallon of gravy couldn’t save. I felt like a total amateur in my own kitchen. It turns out, I made a classic mistake: I assumed that if the oven turned on, it was working correctly. I spent weeks blaming my bakeware before I realized the culprit was much closer to home. We’ve all been there—staring at a tray of burnt-bottom cookies while the tops look raw. It makes you want to give up on baking entirely. You put in the work, you follow the recipe, and the appliance betrays you. But don’t throw in the towel just yet. Today, I’m going to walk you through the real reasons your oven is acting like a blowtorch on the lower level and how you can reclaim your kitchen confidence.
Stop Fighting Your Oven and Start Cooking Again
It is incredibly frustrating when you follow a recipe to the letter and still end up with a burnt mess. After years of tinkering and even a few professional repair calls, I realized the problem wasn’t my cooking; it was the way heat was moving—or not moving—inside that metal box. Most people assume they need to call for emergency same-day repair the second their muffins burn, but often the fix is right under your nose. Early in my journey, I actually went out and bought an expensive set of insulated pans because I thought my old ones were too thin. Total waste of money. The issue was actually that I didn’t understand the importance of proper airflow. If you’ve noticed that one side of your tray is darker than the other, it’s a massive clue that your heating element or your racks aren’t doing their jobs. According to the experts at Consumer Reports, many modern ovens can deviate by as much as 25 to 50 degrees from their internal settings if the thermostat isn’t calibrated. That’s the difference between a perfect pastry and a kitchen full of smoke.
Is your oven actually broken or just confused?
I get it—you’re worried that a repair bill is going to cost more than a new stove. But before you start shopping, have you checked if your temperature sensor needs a quick adjustment? It’s a common hiccup that even the most expensive models face. Have you ever experienced that sinking feeling when you realize your ‘reliable’ oven has betrayed you? Drop us a line or reach out via our contact page to share your worst kitchen disaster. It’s more common than you think, and usually, it’s a problem we can solve with a little know-how. Let’s dive into the physics of why that bottom rack is so much more aggressive than the rest and what you can do to fix it before dinner tonight.
Adjust Your Temperature Sensor So It Stops Lying to You
The most common reason for a scorched pizza crust while the cheese is barely melted is a sensor that has drifted out of calibration. Think of your oven’s temperature sensor like a thermometer that’s also the boss of the thermostat; if it thinks the air is 300 degrees when it’s actually 400, it’s going to keep pumping heat until your dinner is charcoal. I remember a Saturday night when I was convinced my oven was possessed because it scorched a tray of lasagna in twenty minutes. I finally pulled out the manual and realized your temperature sensor needs a quick adjustment to keep the heat in check. You can often test this yourself with a simple multimeter. If the resistance doesn’t match the manufacturer’s specs, you’ve found your ghost. Replacing it is a ten-minute job that saves you from a hundred-dollar grocery loss.
Stop Choking Your Airflow with Foil and Large Pans
We’ve all done it—lined the bottom rack with aluminum foil to catch drips. It seems smart until you realize you’ve essentially turned the bottom of your oven into a heat shield that reflects every bit of energy right back into your bakeware. Air in an oven needs to circulate like a gentle breeze in a canyon, not get trapped in a corner. I once used a massive commercial-grade baking sheet that was nearly as wide as the oven itself. The result? The edges of my cookies were raw, but the centers were black. I was ignoring the importance of proper airflow and basically suffocating the heat distribution. Always leave at least an inch of space on all sides of your pans. 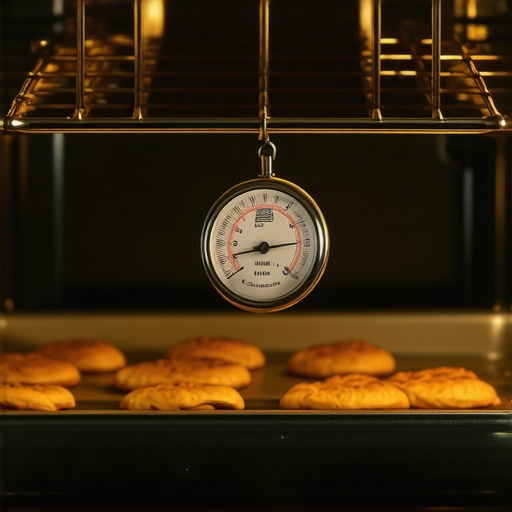
Check for Hot Spots in the Heating Element
If you have an electric oven, take a look at the bottom heating element while it’s on. It should be a uniform, bright orange. If you see any spots that are bubbling, pitted, or glowing significantly brighter than the rest, you’re looking at a localized blowtorch. These ‘hot spots’ occur when the internal filament starts to fail, concentrating too much energy in one square inch. This is exactly why your electric oven bakes one side faster than the other and ruins half your batch. Dealing with electrical components can be intimidating, but catching this early prevents the element from snapping entirely and potentially shorting out your control board.
When DIY Becomes Dangerous for Your Warranty
I’m all for rolling up my sleeves, but there’s a line you shouldn’t cross if your stove is still under its first or second year. Most people don’t realize that cracking open the back panel to rewire a sensor can instantly void your protection. I’ve seen homeowners try to save fifty bucks on a DIY fix only to find out they’ve triggered the hidden costs of DIY repairs on warranty items. If your appliance is a newer model, it’s often smarter to rely on professional repair and installation services. They have the specific tools to recalibrate digital boards that we just don’t have in our junk drawers. Plus, choosing warranty-backed appliance services ensures that if the fix doesn’t stick, you aren’t paying for it twice. Sometimes the most ‘actionable’ step you can take is knowing when to put the screwdriver down and let a tech handle the high-voltage stuff.Most people think ‘same-day service’ is just a marketing gimmick for the impatient or a luxury for those who can’t wait 24 hours to wash their socks. In my experience, that is a dangerous misunderstanding of how modern appliances actually fail. When a high-end refrigerator starts struggling, it isn’t just ‘getting a little warm’; it’s often a symptom of a compressor working at 110% capacity to compensate for a failing relay. Waiting even two days for a technician can turn a $150 minor fix into a $900 total system failure. This is why same-day appliance repair quick solutions with warranty support are actually a technical necessity for machine longevity. I’ve seen dozens of homeowners wait out a ‘minor’ noise only to find their entire control board fried by the time the tech arrived.
Why ‘Same-Day’ Is Actually a Technical Necessity
It’s not just about your convenience; it’s about heat and friction. A study by the Association of Home Appliance Manufacturers (AHAM) suggests that early intervention in mechanical failures can extend an appliance’s lifespan by up to 30%. If you ignore the warning signs, you aren’t just delaying the bill—you are increasing it. When you look for fast trustworthy appliance installation near you, you are paying for an expert to ensure that the initial setup doesn’t create these cascading issues later. 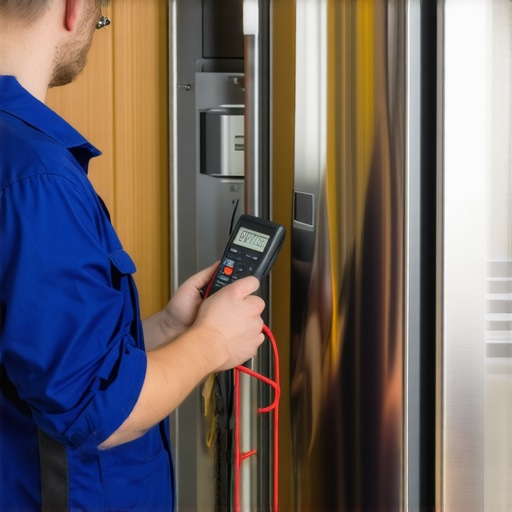
Don’t Let Your Paperwork Ruin Your Coverage
Here is the ultimate ‘oops’ factor that catches almost everyone: the ‘maintenance gap.’ Most homeowners treat a manufacturer’s warranty like a ‘get out of jail free’ card, but it is actually a legal contract that requires you to perform specific upkeep. If you haven’t kept the one maintenance record that saves your appliance warranty claim, the manufacturer has a legal loophole to deny your request based on ‘owner negligence.’ I once had a client with a $3,000 range whose claim was denied because she couldn’t prove the gas lines had been inspected within the first twelve months. You must know how to prove periodic maintenance to keep your warranty valid or you are essentially throwing that protection in the trash. Have you ever fallen into this trap? Let me know in the comments.
Can a simple power cord really cancel your $2,000 fridge warranty?
It sounds absurd, but it happens every single day. This is the sophisticated nuance that separates a DIYer from an expert. If you use a power cord that isn’t rated for the specific amperage of your unit, or if you committed the power cord error that voids your fridge warranty by using a standard extension cord to reach a far-away outlet, you’ve given the manufacturer an easy out. High-end digital sensors are incredibly sensitive to voltage drops caused by improper wiring. If the board fries and they see a non-standard cord, you’re paying for that repair out of pocket. This is why I always recommend getting an expert guide to appliance repair and installation today before you even unbox the unit. The hidden costs of getting it ‘almost right’ are far higher than the cost of doing it by the book.I keep a small, silver 1/4-inch hex wrench taped to the side of my garbage disposal casing. It is not just an aesthetic choice; it is a sanity saver because I know the specific wrench you need to unjam a disposal in seconds is always within reach. Most people wait until the sink is backed up and the motor is humming its last breath before they go hunting through the garage. By then, the internal thermal overload has likely tripped, and you are looking at a much longer repair window. When it comes to professional-grade maintenance, I always advocate for using a dedicated multimeter for diagnostics. According to the Whirlpool Technical Service Guide (W10322424), a standard oven sensor should read approximately 1080 ohms at 70°F. If you are seeing anything outside of that range, you are not just ‘cooking hot’; you are actively damaging the control board. Using high-precision tools is not about being a gearhead—it is about getting the data that keeps your home safe.
Grab This One Wrench Before Your Sink Floods
In my years of troubleshooting, I have found that the best maintenance tools are often the simplest ones. It isn’t just about disposals, though. Think about your laundry room. I have seen too many people use flexible foil ducts that sag and collect lint because they were cheaper at the hardware store. If you want your dryer to actually reach its 10-year birthday, you need to understand why your dryer vent needs rigid metal pipe instead of foil to maintain proper static pressure. It is a technical detail that prevents the heating element from cycling too frequently and burning out prematurely. 
Ditch the Foil to Save Your Dryer
Looking ahead, the future of appliance care is shifting toward predictive AI. We are seeing the rise of smart modules that can listen to the frequency of a pump and alert you to a bearing failure weeks before it happens. Until then, you are the smart sensor. You need to keep track of every service call and repair. I cannot stress enough how much leverage you gain when you can point to the maintenance contract clause that saves you on labor costs because you have stayed ahead of the curve.
How do I maintain my high-end appliances over time?
The secret is not just cleaning filters; it is about consistency and documentation. For those who want to ensure their setup is bulletproof from day one, following an expert guide to appliance repair and installation today is non-negotiable. It helps you avoid the ‘cascading failure’ where one bad install ruins a decade of performance. If you do run into a snag, look for affordable same-day appliance fixes with warranty benefits so you do not lose your investment to a week-long delay. Here is my advanced tip for you today: Use a simple handheld manometer to check the back pressure on your dryer vent. If it is above 0.6 inches of water column, your dryer is working twice as hard as it should, and you are essentially burning money through energy costs and wear.
The Hardest Lessons My Burnt Biscuits Taught Me
Over the years, I’ve realized that most appliance failures aren’t sudden—they are whispers we choose to ignore until they become screams. One of the most important habits I developed was scheduling your appliance repair for same-day service in 2025 the moment a temperature fluctuates, rather than waiting for a total breakdown. I also learned that physical clutter around an oven’s vents is just as dangerous as electrical faults. Most importantly, I stopped throwing away boxes until I found the warranty document you must save before discarding the box, which has saved me hundreds in labor costs. These small shifts in mindset turn a frustrated cook into a confident home manager.
Tools That Will Save Your Dinner and Your Wallet
If you want to move beyond guesswork, you need a few reliable items in your toolkit. I never bake without a standalone analog oven thermometer; it’s the only way to verify if your sensor is actually lying to you. For the laundry room, I always recommend a rigid vent cleaning brush to prevent the airflow issues we discussed earlier. Before you even plug in a new unit, reading an expert guide to reliable appliance installation is the best investment of time you can make. Finally, keep the number of a technician who provides affordable same-day appliance fixes with warranty benefits on your fridge—having a pro you trust takes the panic out of any kitchen disaster.
#IMAGE_PLACEHOLDER_E#
Your Path to Stress-Free Cooking Starts Today
You don’t have to be a professional chef or a master electrician to have a kitchen that works for you. By paying attention to airflow, keeping your sensors calibrated, and respecting the technical limits of your machines, you can stop fighting your equipment and start enjoying the process again. Quality appliance repair is about more than just fixing a broken part; it’s about preserving the heart of your home. Don’t let a burnt crust or a weird noise ruin your weekend—take control of your appliances today. What was the one ‘hidden’ appliance feature or maintenance trick that completely changed how you use your kitchen? Let me know in the comments below!