
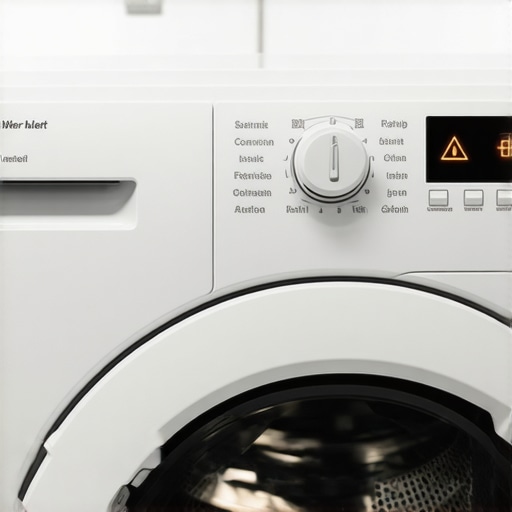
I remember the exact moment I heard that incessant beeping coming from my brand-new washing machine. I’d just finished a hectic day, finally got around to laundry, and as I pressed start, the thing started flashing and beeping—loudly. My first thought was, “Did I forget to fill it?” Turns out, I wasn’t alone—many homeowners face a similar baffling issue with their new washers. The frustrating part? It’s often an understandable, fixable problem, but one that can feel like a major headache when you’re in a hurry.
Understanding the No-Fill Error and Its Impact
This pesky no-fill error isn’t just an annoyance; it can stop your laundry in its tracks, leading to delays and—in worst cases—damage to the appliance. It’s startling how common this issue is, especially with recent model upgrades that rely on complex sensors and controls. If I’d known sooner that modern washers are sensitive to water pressure problems or sensor glitches, I could have avoided the confusion and hurriedly called for costly repairs.
Is Your Washer’s no-Fill Error Actually Worth Worrying About?
Early on, I made the mistake of assuming I had a faulty unit that needed replacement. But after some research and a few simple troubleshooting steps, I realized many of these errors are caused by minor issues like clogged inlet screens or low water pressure. It’s reassuring to know that with the right knowledge, you might fix the problem yourself, saving time and money. For quick, reliable solutions, I recommend consulting trusted repair guides or professional services—like those found on same-day appliance repair resources. Have you ever faced this frustrating no-fill warning? If so, you’re not alone—let’s look at what might be causing it and how to fix it.
Start with a Visual Inspection of Your Water Supply
Turn off your washer and disconnect it from power to ensure safety. Check the water inlet hoses for kinks, clogs, or leaks, and tighten connections if needed. If you notice any debris at the inlet screens, remove and clean them thoroughly using a small brush or pin. I once had a washer that constantly flagged the no-fill error because of mineral build-up clogging the screens—simple cleaning solved the problem immediately.
Test Water Pressure and Correct It If Necessary
Ensure that your home’s water pressure is adequate—ideally between 20-80 psi. If pressure is low, consider increasing it or installing a pressure booster. Low pressure can prevent your washer from sensing water flow properly, triggering the error. I used a pressure gauge on my kitchen sink and found my pressure was below optimal. Installing a pressure regulator made a big difference, preventing false errors on my washer.
Examine the Water-Level Sensor and Wiring
Access the sensor, usually located inside the drum or attached to the control panel. Look for loose wires, corrosion, or damage. Disconnect and reconnect wiring harnesses firmly, and replace damaged sensors if necessary. I had a technician replace my water level sensor after noticing frayed wires and corrosion, which restored proper function. For complex diagnostics, consult the expert guide.
Reset the Washer and Run a Test Cycle
After completing the prior steps, reset your washer by unplugging it for 1-2 minutes, then plug it back in. Run a short cycle to observe whether it fills correctly. Watching the process helps identify if the error persists. During my own troubleshooting, I once forgot to reconnect a sensor wire—once I fixed that, the error cleared. If issues continue, professional same-day repair services are available to expedite diagnostics.
Verify Water Flow During Operation
Finally, monitor the washer during the fill cycle. Ensure water flows freely and the machine detects it promptly. If not, further investigation of internal valves or control boards may be necessary. In my case, replacing a faulty inlet valve resolved the no-fill error permanently. Always consider professional assistance if internal components seem problematic or the error persists beyond basic troubleshooting. Reliable repair options are just a contact page away.
Many homeowners operate under assumptions about appliance warranties and same-day services that can actually hinder their experience and lead to unnecessary costs. One common myth is that warranties always cover any repair needed, but in reality, these plans often come with fine print excluding certain parts or issues—something many forget until a breakdown occurs. A deeper understanding reveals that some warranties require specific maintenance or registration, which if overlooked, voids coverage.
Why Do Some Customers Think All Repairs Are Covered?
This misconception stems from aggressive marketing and the term “warranty” itself, implying complete peace of mind. However, expert sources note that many warranties are limited to specific components, and accidental damages or misuse aren’t covered. To truly maximize your warranty benefits, it’s essential to read the fine print and follow recommended usage tips—like those outlined in this comprehensive guide.
Overestimating Same-Day Service: A Common Pitfall
Many believe that requesting same-day repair guarantees instant fix, but that’s not always the case. Service providers often prioritize tasks based on urgency and parts availability, which can lead to delays, especially during peak seasons. Rushing into a quick fix without verifying the credentials of the technician can also be risky; unlicensed or untrained technicians might prolong the problem or cause further damage. For peace of mind, I recommend checking what to expect from reputable repair services and ensuring they are licensed and insured.
Installation Is More Than Just Plugging In
An often-overlooked nuance is that proper appliance installation requires precise steps beyond mere connection. Incorrect leveling, inadequate water supply, or neglecting code compliance can lead to early failures or safety hazards. For high-end appliances, consulting professional installers who follow industry standards—like those highlighted in trustworthy installation services—can save you from costly corrections later. A good example is ensuring a dishwasher’s drainage slope to prevent leaks, a detail many DIY installers ignore, risking water damage and warranty voids.
Why Do Many Misjudge Repair Costs and Responses?
Another mistake is assuming that all repair companies offer transparent pricing and quick turnaround without hidden fees. In reality, some providers charge hefty diagnostic fees or inflate parts costs, which can surprise homeowners. A savvy consumer asks detailed questions about pricing upfront and seeks providers with clear warranties on their work—like those with warranty-backed services. Additionally, advanced diagnostics, such as testing internal voltage controls or sensor calibration, often require specialized tools and expertise, emphasizing the need for experienced technicians.
Understanding these nuances helps you avoid the trap of oversimplified beliefs, ensuring you make informed decisions that save money and extend your appliance’s lifespan. Have you ever fallen into this trap? Let me know in the comments.
Keeping Your Appliances Running Like New
One of the most reliable ways to ensure your appliances remain functional and dependable over the years is by investing in the right maintenance tools. In my experience, having a dedicated, high-quality multimeter has been indispensable for diagnosing electrical issues—especially with complex control boards that are prone to voltage inconsistencies. I personally use a Fluke 117 multimeter because of its accuracy and durability, which helps me identify faulty wiring or sensor problems before they escalate. Regular testing of power supplies and internal components allows me to catch issues early, saving costly repairs down the line.
How do I maintain appliances over time?
Establishing a routine maintenance schedule is crucial. For example, cleaning filters, inspecting water supply hoses, and testing safety switches can prolong the life of your dishwasher or washing machine. I schedule a thorough check-up every six months and keep a log of any minor repairs made. This proactive approach enables me to spot trends—like increased vibration or unusual noises—that signal upcoming failures. I also rely on specific diagnostic tools, such as ultrasonic leak detectors, to quickly identify hidden leaks or blockages without dismantling the entire unit. As technology advances, expect to see smart diagnostic devices that connect to your smartphone, offering real-time alerts and maintenance tips—this is the future of appliance care.
Choosing the Right Tools for Quick Fixes
For quick repairs or installations, I recommend a few go-to tools that have served me well. A digital torque wrench ensures that bolts and fittings are tightened to manufacturer specifications, preventing leaks or loosening over time. For delicate electronic components, precision screwdrivers with magnetic tips help prevent damage during disassembly. I also keep a portable pump pressure tester handy; for instance, verifying water pressure before starting washing machine repairs can save you hours of guessing. Combining these tools with professional-grade lubricants like silicone spray keeps moving parts functioning smoothly, reducing wear and tear. In the near future, I expect AI-powered diagnostic devices to analyze appliance behavior and suggest precise fixes instantly—an exciting development for DIY enthusiasts and pros alike.
Maintaining Quality During Installations
Proper installation is the foundation for long-term appliance health. I always recommend hiring certified professionals who follow the latest standards—like those highlighted in this guide. For example, ensuring correct leveling and adequate ventilation can prevent operational stress. Using specialized installation tools, such as laser level guides and water pressure gauges, helps verify that everything is set up precisely. Investing in quality mounting brackets and inlet filters from the start minimizes vibrations and prevents debris buildup, respectively. Remember, even a small oversight during installation can lead to increased wear or early failure. So, when you opt for expert help, confirm they use the right tools and adhere to manufacturer instructions for peace of mind.
Looking Ahead: The Future of Appliance Maintenance
The integration of smart technology into appliances will revolutionize maintenance routines. Predictive analytics and remote monitoring will allow homeowners and technicians to troubleshoot issues before they manifest—a game-changer in minimizing downtime. As these trends mature, I expect to see more affordable, user-friendly diagnostic apps that guide even novices through complex repairs. My advice? Start familiarizing yourself with these upcoming tools now; they could save you significant money and stress in the long run. Don’t forget to regularly consult trusted resources—like this comprehensive guide—to stay informed about innovations and best practices. Try implementing a simple maintenance check using your multimeter this week, and experience firsthand how small investments in the right tools can keep your appliances humming smoothly for years.
Lessons Hidden in My Repairs That No One Tells You
- Always double-check water supply connections; I once rushed a repair and overlooked a simple kink in the inlet hose, which caused repeated no-fill errors. Taking a moment to verify water flow saved me hours of frustration.
- Warranties aren’t a one-size-fits-all fix—reading the fine print revealed restrictions that caught me off guard during a costly repair. Knowing what’s covered truly pays off.
- Same-day service isn’t a guarantee of instant fixes—delays happen. Trustworthy providers with transparent processes, like those I recommend, ensure you’re not left in the lurch.
- Proper installation goes beyond plugging in—it’s about precision. Hiring certified professionals for complex setups prevents early issues and maintains your appliance’s longevity.
- Investing in the right diagnostic tools can be a game-changer; I rely on a durable multimeter to catch electrical quirks early, safeguarding my appliances and my peace of mind.
Tools and Resources I Honestly Trust for Appliance Care
- High-Quality Multimeters: My go-to for electrical troubleshooting, especially when diagnosing control boards or wiring issues.
- Expert Guides on Reliable Repair: Resources like the detailed repair guides at this site help me avoid unnecessary calls and DIY safely.
- Professional Installation Services: When I need a complex setup, I choose installers who follow industry standards, ensuring my appliances perform optimally from the start.
- Maintenance Log Apps: Keeping track of routine checks helps me spot issues early and plan proactive repairs, saving money in the long run.
Your Next Step Toward Confident Appliance Care
Empower yourself by embracing proactive maintenance and understanding the nuances behind common issues like no-fill errors. Each small step—whether inspecting water pressure or choosing the right repair service—builds your expertise and prevents costly surprises. Remember, staying informed through trusted resources and the right tools is your best armor against frustration. Ready to take charge of your appliance care journey? Share your experiences below—I’d love to hear how you’ve turned troubleshooting into a confidence boost.