
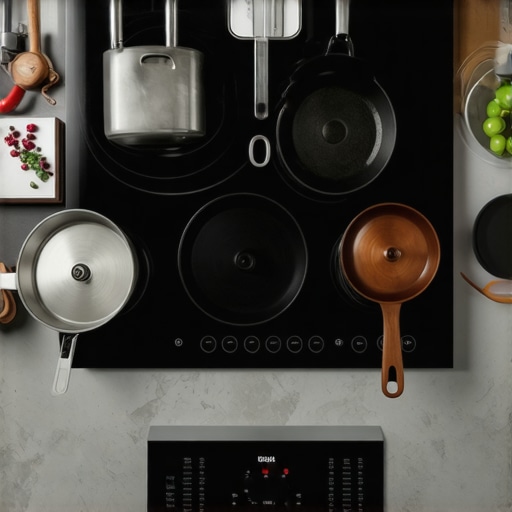
Ever stood in front of your induction cooktop, ready to cook, only to be met with that frustrating zero recognition beep? I remember the first time it happened to me. I was all set for a quick dinner when suddenly, my sleek new cooktop refused to acknowledge my favorite cast iron pan. It was a lightbulb moment—I realized I wasn’t alone in this struggle. If you’ve experienced this, you’re not just imagining things. Induction cooktops are marvels of technology but can be surprisingly finicky about the cookware they recognize.
Getting to the Bottom of Why Your Cooktop Isn’t Detecting Your Pan
Before jumping into expensive replacements or calling in repairs, it’s helpful to understand that this common issue often boils down to simple mistakes or overlooked details. For instance, I once faced this problem and blamed the entire unit until I discovered I was using a pan incompatible with induction cooking. A quick check revealed that not all metals work interchangeably with induction fields. It’s worth noting that, according to an expert guide, using cookware that isn’t ferromagnetic is a leading cause of detection failure.
Is Your Cookware Truly Compatible?
One of the first steps I recommend is testing whether your pan is induction-ready. A simple magnet test—if a magnet sticks to your pan, you’re good to go. If not, no amount of fiddling will make your cooktop recognize it. I learned this the hard way, wasting precious time before realizing I needed a compatible pan. This is a common mistake many make, so don’t feel bad. Once you’re sure your cookware is suitable, the next step is ensuring it’s positioned correctly and free of any dirt or residue that might interfere with the sensor’s readings.
If after verifying your cookware compatibility and cleanliness the issue persists, the problem could be with the cooktop’s sensors or internal components. But before taking that route, I’ll walk you through some practical troubleshooting steps to get you cooking again in no time!
Test Your Cookware Compatibility Intensively
My recent experience involved using a vintage cast iron skillet that somehow didn’t have a magnetic base, despite being cast iron. I placed a magnet on the bottom—if it sticks strongly, your pan is induction-friendly. If not, you’ll need to invest in compatible cookware to avoid frustration. Remember, not all metals are ferromagnetic, so checking every new pan before cooking saves time and energy.
Ensure Proper Placement and Maintenance
Once you’ve confirmed your cookware’s compatibility, position it centrally on the cooktop. I recall placing a pan slightly off-center, which caused recognition failure. Clean the pan’s bottom meticulously—residue or dirt can disrupt sensors. Use a damp cloth to wipe it thoroughly, then dry before testing again. Proper positioning and clean cookware are fundamental, like aligning a key when opening a lock; small adjustments matter.
Inspect the Sensor Area Carefully
Next, examine the sensor zone—usually at the center of the induction coil. Use a flashlight to look for debris or signs of damage. I once found a small crumb lodged near the sensor, which prevented detection. Gently clean this area with a soft cloth, avoiding abrasive materials. Treat it like cleaning the lens of a camera—clarity ensures better performance.
Use a Magnet Test to Confirm Magnetic Properties
Perform a quick magnet test on all cookware you plan to use. If the magnet doesn’t stick, there’s no point trying to force recognition—this pan is incompatible. I learned this the hard way after purchasing an expensive aluminum pan that failed the test. Replacing it with a ferromagnetic one resolved the issue instantly. This simple step saves hours of troubleshooting.
Reset or Power Cycle Your Cooktop
If issues persist, turn off the cooktop and unplug it from the power source. Wait for about 60 seconds—like rebooting a computer—to clear any residual faults. Then, plug it back in and test with your compatible pan. I once had to reset my unit after a power surge, which restored normal functionality. Regular resets can help resolve minor glitches without professional repairs.
Verify Power Supply and Connections
Sometimes, insufficient power or loose connections cause recognition failures. Check that your outlet supplies the correct voltage, especially if you’ve installed an extension cord or surge protector. Tighten any loose wiring or terminals, mimicking troubleshooting a delicate electronic device. Ensuring stable power delivery is crucial for consistent operation.
Consult Professional Repair or Installation Services
If none of these steps work, it might be time to call in experts. Professional technicians have specialized tools to diagnose sensor faults or internal component issues, much like a doctor uses advanced instruments for diagnosis. Consider scheduling same-day service for swift resolution, especially when you’re in the middle of dinner prep. Look for trusted local technicians who offer warranty-backed repairs to guarantee peace of mind.
Remember, proper maintenance and cautious troubleshooting can often resolve recognition issues without costly replacements. Keeping your cookware compatible, clean, correctly positioned, and ensuring a stable power supply are the cornerstones of reliable induction cooking.
Many homeowners assume that appliance repair is straightforward and that all same-day services are created equal, but this oversimplification can lead to costly mistakes. One prevalent myth is that a quick fix always guarantees long-term reliability. In reality, rushing to repair without understanding the root cause may only provide a temporary solution, and some problems require more thorough diagnostics that expert technicians can provide—like those highlighted in the expert guide. Another misconception is that replacing parts with third-party, non-warranty parts is safe; however, this can void your warranty and compromise appliance safety, so always verify parts’ compatibility and quality. People also believe that all warranties are equal, but in truth, warranty coverage varies widely—some only cover specific components or faults, and some exclude certain repair types altogether. A crucial nuance often overlooked is the importance of professional installation; improper setup can lead to frequent breakdowns, as detailed in installation tips. Keep in mind that ‘same-day’ service doesn’t mean instant fix—providers vary in response times, skills, and parts availability. According to recent research, choosing a reputable service with comprehensive warranty support is essential to ensure your appliance remains functional long-term. Lastly, many think that repair services are always costly; however, many providers offer affordable options, especially when factoring in warranty-backed benefits, which can actually save you money over time—more info in affordable repair plans. Recognizing these myths and nuances can prevent you from making expensive mistakes and ensure your appliances serve you reliably for years to come. Have you ever fallen into this trap? Let me know in the comments!
Mastering Maintenance for Long-Term Reliability
Ensuring your appliances stay in top shape over the years requires more than just occasional cleaning. Regular maintenance not only prolongs lifespan but can also prevent unexpected breakdowns. I personally recommend scheduling seasonal checks for critical components like filters, vents, and internal belts. For example, replacing or cleaning your dryer lint trap regularly can significantly reduce fire risks and energy consumption, as discussed in this detailed guide. Establishing a routine maintenance calendar tailored to each appliance guarantees consistent performance and minimizes surprise repairs.
Tools I Trust for Effective Appliance Care
Over years of hands-on experience, I’ve found a handful of tools indispensable for diagnosing and maintaining appliances. A high-quality multimeter is essential for checking electrical continuity and voltage across various parts, helping me identify faulty sensors or power issues swiftly. For appliance-specific diagnostics, I rely on manufacturer-approved test tools, which ensure accuracy without risking warranty violations. A digital infrared thermometer allows quick surface temperature checks, especially useful when verifying heating elements or motors. I also swear by a precision screw driver set—small, magnetic, and multi-headed—to access internal panels without stripping screws. Using these tools regularly enables me to spot small issues before they evolve into costly repairs.
Future of Appliance Care: Smart Maintenance Solutions
Looking ahead, I believe the trend leans toward smart diagnostic systems embedded within appliances, capable of alerting homeowners and technicians to issues remotely. Apps that monitor performance metrics and predict potential failures could revolutionize maintenance routines, saving time and money. Integration with IoT devices may enable real-time troubleshooting, allowing remote resets or part ordering. Embracing these innovations now can set you up for a smoother, more reliable appliance experience in the future. As technology advances, staying updated with the latest tools and software will become essential for both homeowners and technicians.
How do I maintain appliance performance over time?
Regularly inspect, clean, and replace wear parts to keep appliances functioning optimally. Follow the manufacturer’s guidelines for scheduled servicing and consider subscribing to professional maintenance plans that include routine check-ups. Using high-quality, compatible replacement parts—preferably warranty-backed—helps prevent future malfunctions. Remember, a proactive approach reduces downtime and extends your appliance’s lifespan, providing peace of mind and saving money in the long run.
If you’re interested in simplifying your maintenance routine, try investing in a digital multimeter paired with manufacturer diagnostic apps—many brands now offer dedicated tools for troubleshooting, which I find invaluable. For more detailed strategies, you can refer to this expert guide. Proper tool usage combined with scheduled maintenance can dramatically improve your appliance’s reliability, ensuring peace of mind for years to come.
Lessons Learned from the Induction Repair Trenches
- One of my biggest lightbulb moments was realizing that the smallest dirt or residue can block sensor detection, making regular cleaning a crucial step I often overlook in busy weeks.
- Stubborn appliance faults sometimes stem from power issues rather than the device itself. Checking your outlet and connections before diving into parts can save hours and money.
- Trusted diagnostic tools like a multimeter aren’t just for pros—they’re game changers for homeowners willing to learn, especially when it comes to verifying the magnetic properties of cookware.
- Understanding the myth that a reset fixes everything helped me avoid unnecessary service calls. Sometimes, a simple power cycle is all that’s needed to restore full function.
Recommended Tools and Resources for DIY Appliance Care
- Multimeter: Essential for checking electrical continuity and voltage, saving me from unnecessary part replacements.
- Manufacturer Diagnostic Apps: Many appliance brands now offer these, providing step-by-step guidance tailored to your model, which I find invaluable.
- Infrared Thermometer: Quick temperature checks help diagnose heating issues without invasive procedures, maintaining warranties and peace of mind.
- Official Service Guides: Accessing manufacturer manuals or certified repair databases ensures accurate troubleshooting, preventing costly mishaps.
Your Next Step: Embrace the Repair Journey
Repairing your induction cooktop might seem daunting at first, but with the right knowledge, tools, and a bit of patience, you can master the art of troubleshooting. Taking control of your appliance care not only saves money but also empowers you to understand your devices better. Remember, every challenge is an opportunity to learn something new and extend the life of your valuable appliances. Ready to roll up your sleeves and get started? Share your experiences or questions below—let’s troubleshoot together and keep those appliances running smoothly!