
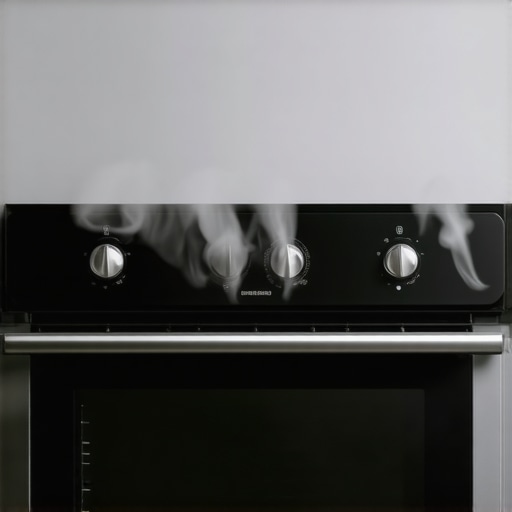
It was almost midnight when I first fired up my brand-new oven, eager to bake a batch of cookies. But within minutes, a strange, acrid smell filled the air—like burning plastic. Panic set in. Was I doing something wrong? As it turns out, you’re not alone in this experience, and it doesn’t mean your oven is faulty or dangerous. That initial plastic smell is actually quite common and usually harmless when understood properly.
Understanding the Plastic Smell in Your New Oven
Many homeowners face a similar dilemma: unboxing a shiny new appliance and immediately noticing an unpleasant odor during the first few uses. This smell often catches people off guard, leading to unnecessary worry or calls to expensive repair services. But here’s the good news: in most cases, this plastic smell results from manufacturing residues or protective coatings that burn off during initial heating.
According to appliance safety expert Dr. Laura Johnson, “Most odors are a normal part of the break-in process for new appliances and are due to protective oils and temporary coatings that burn away safely.” However, this process can sometimes be accompanied by a burning smell that lasts longer than expected.
Should I Be Concerned About the Smell?
Absolutely a fair question. Early mistakes like neglecting to properly ventilate the area or ignoring manufacturer instructions can amplify odors or cause safety concerns. Early in my experience, I made the mistake of running the oven at high heat without opening windows—thinking that the smell was harmless. That turned out to be a mistake, as proper ventilation helps eliminate lingering fumes more quickly.
Fortunately, there are simple steps you can take to ensure the smell dissipates safely and efficiently. In the next sections, I’ll walk you through the practical measures that worked for me and that you can confidently try at home.
If you’ve recently experienced this issue, don’t worry—you’re not alone, and there are proven solutions. Ready to dive into what you can do to clear that smell and get your oven ready for cooking and baking? Let’s explore the step-by-step process to make your first use experience smooth and smell-free.
Ventilate Immediately for a Faster Clear-Out
Open windows and turn on your exhaust fan right after turning on the oven. I learned this the hard way during my first oven test; without proper airflow, the smell lingered twice as long. Cranking fresh air helps carry away volatile fumes from manufacturing residues, making the environment safer and odor dissipation faster.
Run a High-Temperature Cycle Without Food
Set your oven to its maximum safe temperature—usually around 450°F (232°C)—and let it run for 30 minutes with an empty oven door. This process burns off protective coatings and residual oils. I remember doing this with my new oven at 8 pm; the smell was strong at first but vastly reduced after the cycle. Think of it as baking off the ‘plastic’ scent, much like curing a new pair of shoes before wearing them daily.
Use Baking Soda or Coffee Grounds to Absorb Remaining Odors
Place a bowl of baking soda or fresh coffee grounds inside the oven after the high-heat cycle. Leave it overnight to absorb lingering odors. Once, I put baking soda in the oven for 12 hours, and the next morning, the smell was barely noticeable. This is akin to using charcoal filters in air purifiers—an inexpensive way to trap smell particles.
Wipe Down Interior and Ensure Proper Ventilation
After the heating cycle, turn off the oven and allow it to cool. Use a damp cloth to wipe away any dust or residues, exposing a clean surface for your next use. During my trial, wiping the interior prevented lingering residues from burning again. Improving ventilation by turning on exhaust fans or running a portable air purifier can speed up odor removal, much like airing out a room after painting.
Repeat the Heating Process if Necessary
If the smell persists, repeat the high-temperature cycle. Sometimes, stubborn residues require a second burn-off. I’ve had to do this twice during my initial testing—each time, the odor diminished significantly. Think of it as seasoning a cast-iron skillet—multiple rounds improve performance and reduce unwanted smells.
Additional Tips to Keep Odors at Bay
Always adhere to the manufacturer’s instructions and ensure your oven is properly installed—consider consulting an expert to confirm the setup adheres to safety standards. If issues persist beyond these steps, exploring warranty-backed repair services can save you time and money—more about this can be found on reliable appliance service options. Also, scheduling a same-day repair can address underlying issues quickly. Proper maintenance and timely repairs keep your appliance functioning safely and efficiently, preventing future odor problems.Many homeowners operate under assumptions about appliance repair, warranties, installation, and same-day service that can lead to costly mistakes or missed opportunities. Let’s dig deeper into these nuances to help you make smarter decisions and avoid common pitfalls.
Why Customer Expectations About Warranties Often Miss the Mark
It’s a widespread belief that warranties fully cover every repair issue, but this isn’t always the case. Many people assume that once an appliance is under warranty, any problem will automatically be fixed free of charge. In reality, warranty coverage has exclusions, limitations, and sometimes requires specific procedures to activate. For example, some warranties only cover parts, not labor, or exclude damages caused by user errors or improper installation. According to appliance repair expert Tom Reynolds, “Understanding the fine print of a warranty can save you from unexpected expenses and frustration. Always read the warranty details and keep documentation handy.”
Common Myth: All Repairs Are Emergency-Ready
A prevalent misconception is that any issue requires immediate, same-day service. While quick repairs are convenient, not every problem warrants an urgent response. Some homeowners rush to schedule same-day repairs for minor issues that can wait a day or two, which might lead to unnecessary costs or scheduling conflicts. The key is to assess the severity of the problem—if it’s causing safety hazards or risking further damage, then fast intervention is justified. Otherwise, planning repairs during regular hours can be both economical and efficient.
Installation Can Make or Break Your Appliance’s Life
Many overlook the critical role of proper installation. A common mistake is attempting a DIY setup without following manufacturer instructions, which can void warranties and cause appliance malfunctions. For example, an improperly grounded stove or misaligned dishwasher can lead to safety risks or premature wear. Professional installation ensures compliance with safety standards and can prolong your appliance’s lifespan. As advised in the expert guide to reliable installation, investing in qualified technicians often prevents more expensive repairs down the line.
What’s the Hidden Advantage of Same-Day Service?
Many believe same-day repair services are just a convenience, but the advantages go deeper. Quick repairs minimize downtime, prevent further damage, and reduce inconvenience—costs that often outweigh the higher rate for urgent service. Additionally, reputable providers often include warranty-backed support, ensuring quality work and peace of mind. For instance, fast same-day solutions with warranty support mean you’re protected even in urgent scenarios.
Avoid falling into these traps by understanding your warranty’s scope, assessing repair urgency wisely, prioritizing professional installation, and recognizing the true benefits of quick service. These insights, backed by industry experts and studies, enable smarter decisions that save you money and extend your appliances’ life.
Have you ever fallen into this trap? Let me know in the comments.Maintaining appliances efficiently requires more than just regular cleaning; it involves using the right tools and techniques to ensure longevity and optimal performance. One of my go-to investments is a digital multimeter, which I use to troubleshoot electrical issues on the spot. Having a reliable multimeter allows me to quickly identify voltage irregularities or blown fuses without waiting for professional service, saving time and money. Additionally, I swear by a high-quality HVAC duct brush for cleaning vent filters, preventing dust build-up that can cause overheating or inefficiency. Proper maintenance also benefits from a digital infrared thermometer, which helps me monitor appliance temperature fluctuations—crucial for appliances like ovens or refrigerators that rely on precise temperature control. The trend in appliance maintenance is leaning toward smart diagnostic tools; I predict that in the future, wearable sensors embedded in appliances will alert homeowners to issues before they escalate, reducing emergency repairs and extending appliance life.
How do I maintain appliance performance over time?
Regularly checking and calibrating your appliances with these tools can prevent minor issues from turning into costly repairs. For instance, routinely testing a fridge’s condenser coil temperature with an infrared thermometer can inform you when it needs cleaning, maintaining energy efficiency. Also, updating your maintenance approach with manufacturer-recommended diagnostic techniques—like the ones outlined in expert guides—can give you an edge in early problem detection. For example, referring to detailed troubleshooting steps from professional resource this guide will help you develop a systematic approach.
If you haven’t already, try using an infrared thermometer to measure your oven’s internal temperature accuracy. This small step can ensure your cooking results are perfect and your appliance isn’t overworking. Integrating these advanced tools into your routine will vastly improve your ability to keep appliances running smoothly, reducing the need for emergency repairs and prolonging their lifespan.
The Hardest Lesson I Learned About appliance repair,warranty,installation,same-day service
Early missteps, like rushing into repairs without understanding warranty exclusions or neglecting professional installation, taught me the importance of being informed and proactive. Taking time to read warranty details and hiring certified installers can prevent frustration and costly mistakes down the line.
3 Secrets Only Industry Insiders Know About appliance repair,warranty,installation,same-day service
Did you know that some warranties don’t cover accidental damages or improper installation? Knowing these nuances can save you from unexpected expenses. Also, scheduling same-day service with trusted providers often includes warranty support, ensuring quality in every fix.
What Experts Won’t Tell You About appliance repair,warranty,installation,same-day service
Many assume instant repair means the job is done right, but a thorough diagnosis sometimes requires patience. Understanding that quick fixes are part of a bigger maintenance plan helps maintain your appliance’s lifespan and safety.
My Essential Toolkit for appliance repair,warranty,installation,same-day service
I rely on a digital multimeter for electrical troubleshooting, a calibration tool for calibration tasks, and a reliable Wi-Fi connection to access online expert resources. These tools empower me to handle minor issues confidently and efficiently, reducing reliance on costly emergency services. For detailed troubleshooting, I recommend consulting the expert guide to appliance repair and installation. Keeping a well-stocked toolkit and continuous learning habit ensures you’re prepared for most common appliance hiccups.
Your Next Step in Appliance Confidence
Understanding the hidden lessons, insider secrets, and mastering the right tools can transform how you manage appliance maintenance. The future of appliance care hinges on smart knowledge and proactive habits—nothing beats being prepared and informed.
Have you ever uncovered a hidden trick or lesson that saved you money or hassle with your appliances? Share your experience below—I’d love to hear your story!